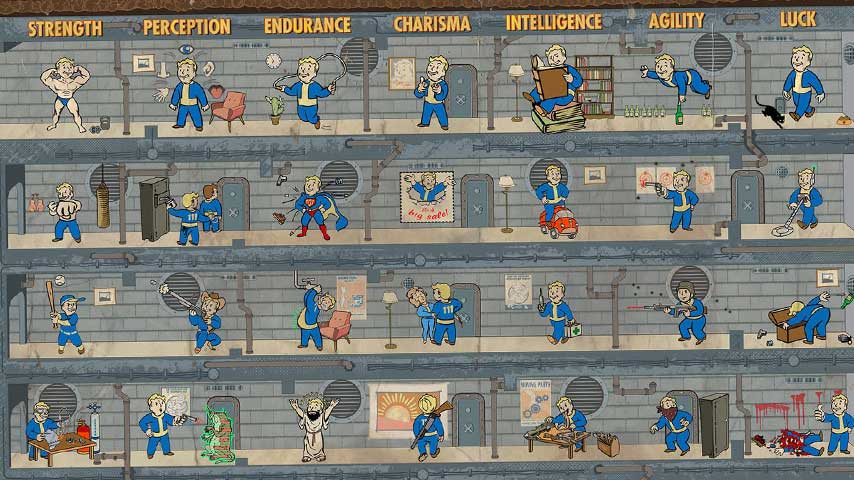
In this guide for Fallout 4, I examine each of the 70 perks in the game’s handy perks chart individually, giving each one a grade and my reasoning behind why it does or doesn’t deserve top marks. In fact, I highly recommend following this public guide with the full official descriptions of the perks and their ranks. Technically, the various SPECIAL stats are also perks themselves, but this guide won’t go into them specifically. (That’s for a different guide altogether.)
Now, Fallout 4 doesn’t have a level cap, so you can earn perk points indefinitely until you run out of ranks in the perk chart. However, that doesn’t mean that perk points should be spent randomly. At this point, there’s no way to take back a perk point, and since I’ve beaten the game at around Level 35, I’ve found that you don’t have that many opportunities to spend perk points before you can effectively finish the game.
While I wish that the game would give you seven more SPECIAL points to distribute at the start, it doesn’t. You will need to distribute your SPECIAL points wisely right at the beginning of the game so that you have access to the best perks in the game that suit your build. Some of these perks are very specific to a particular build, so even if I give the perk a ‘B’, that doesn’t mean you should flat-out ignore them. I’ve indicated perks that are closely tied to certain character builds.
The Best Perks at a Glance
Below is a quick tl;dr glance at the best perks for any build, with Luck-based perks being rather fantastic for every single one of them:
A: Lifegiver, Intimidation, Action Boy/Girl, Critical Banker
A-: Armorer, Locksmith, Penetrator, Local Leader, Medic, Hacker, Gun Fu, Scrounger, Grim Reaper’s Sprint, Four Leaf Clover
B+: Pain Train, Rifleman, Demolition Expert, Gun Nut, Bloody Mess, Mysterious Stranger, Better Criticals, Science!, Commando, Toughness, Wasteland Whisperer, Intimidation
Strength Perks
 Iron Fist – Strength 1
This perk is meant specifically for players who like the idea of pulverizing enemies with knuckles, boxing gloves, and power fists. Players who wish to concentrate on guns or melee weapons will never need to consider Iron Fist at all, but it’s a must for unarmed builds. Just make sure you up your endurance and that you have a way to deal with ranged enemies (go with sniping or grenades). (Edit: If you like Power Armor, though, you may not want to put points into this, as you can’t use any unarmed weapons with Iron Fist.)
Grade: B
Build: Unarmed
 Big Leagues – Strength 2
Similar to Iron Fist, this perk is meant specifically for melee weapon builds. The core difference is that the fourth level in Big Leagues has you use your weapon against all targets in front of you, which is great for crowd control (though enemies in Fallout 4 don’t tend to cluster in groups). Between this or Iron Fist, I recommend picking one of the two at most. You really don’t need to specialize in both unarmed and melee weapons.
Grade: B
Build: Melee
 Armorer – Strength 3
Armor is relevant for all builds. Not only does it impact your access to modifications for standard armor, but it’s also required for some mods for Power Armor. As such, putting at least one point in Armorer is worth its weight in gold. With the right materials, you can become resistant to most everything in wasteland and rarely die outside of explosions.
Grade: A-
Build: Any/Tank

Blacksmith – Strength 4
This should be paired with Big Leagues and is an essential perk for melee weapon builds. Melee weapon mods tend to add damage and various status effects. Not too shabby if you’re a melee expert. You can safely skip this perk, though, if you don’t care for melee weapons at all.
Grade: B
Build: Melee
 Heavy Gunner – Strength 5
Heavy guns tend to do whopping amounts of damage already, so doing even more damage with them isn’t particularly necessary (but hey, why not?). The main reason for taking this perk is if you’re concerned about ammo usage. If you can reach the final fifth rank, you will effectively get double the damage output with big guns and thus use significantly less ammo (which tends to be rare and/or expensive when it comes to using big guns).
Grade: B
Build: Guns/Tank
 Strong Back – Strength 6
This is a perk for convenience, really. Carry weight really isn’t that much of a problem if you watch it carefully and if you journey with one of the many companions available in the game. The final fourth level of the perk is worth mentioning, though, since it lets you fast travel even when overencumbered, so you can store any items in a container and pick them all up later once you’re ready to head back to a market to sell off everything. But with some maintenance, you won’t need to worry about weight management.
Grade: B-
Build: Any/Tank

Steady Aim – Strength 7
If you don’t use VATS much and like being up close and personal with rifles and such, then Steady Aim is worth taking just for the accuracy boost. Any gun with a high fire rate will greatly benefit from this perk, unless you’re a person that likes to aim down the sights before firing any shot. Otherwise, this perk isn’t terribly useful.
Grade: B
Build: Guns (Automatic)
 Basher – Strength 8
Bashing is great for keeping enemies away in close range and for interrupting enemy attacks. At higher ranks, Bashing allows you to cripple opponents more frequently. If you like wielding shotguns or rifles in close corridors, then this is a strong perk for you to take, though I would spend perks on upping gun damage first rather than bashing.
Grade: B
Build: Guns (General)
Root ed – Strength 9
Typically, you won’t be standing still ever in the game. Apart from some super mutants and the like, tougher enemies generally use ranged attacks instead of coming straight at you, so standing still just means you’re an easier target. Rooted just isn’t terribly useful, even if you’re going for a melee or unarmed build. The only benefit is if you have the discipline to stand still before punching, but when your in the midst of combat, standing still just isn’t instinctual.
Grade: C+
Build: Melee/Tank
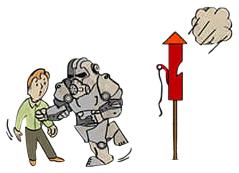 Pain Train – Strength 10
If you can reach this perk and use Power Armor frequently, then this is the perk for you. Sprinting does cost more core energy but being able to tackle enemies with a quick sprint just makes you feel like a wrecking ball of steel. The stagger/knockdown effect is fantastic as well and is perfect for a follow-up coup de grace with whatever weapon you’ve got handy.
Grade: B+
Build: Any/Tank
Perception Perks
Pickpocket – Perception 1
Pickpocketing isn’t terribly important in Fallout 4. You can earn caps and weapons in different ways and most locked doors or terminals can be overcome with some careful searching or good lockpicking/hacking skills. Most NPCs will also give you a key for having high Charisma (carry around those charisma-boosting clothing!), so you don’t really need to pickpocket. The only really fun thing is being able to place a live grenade in someone’s pocket and watching the explosion, but it’s not really that practical.
Grade: B-
Build: Any
 Rifleman – Perception 2
Over the course of the game, you’ll likely use at least several non-automatic rifles so Rifleman tends to be a more well-rounded choice than most other gun-related perks. Pouring points into this boosts damage and removes a portion of your opponent’s armor resistance, so it’s worth the perk point in general. This perk is definitely key for snipers who want to increase the damage they do with sneak attacks. One shot, one kill.
Grade: B+
Build: Guns (Non-Automatic)

Awareness – Perception 3
While not really necessary, especially if you have a guide, having information on an enemy’s overall level and resistances is handy during combat. This is better for novices to the Fallout series than veterans who know what an enemy’s general resistances are. It’s also useful with some of high-tier charisma perks that only work if your level is higher than the enemy you’re attempting to sway.
Grade: B
Build: Any
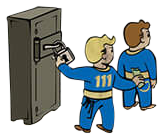
 Locksmith – Perception 4
Being able to pick locks is just worth it. No one enjoys being shut out of grabbing awesome loot, and lockpicking is usually the method of cracking safes and other boxes to claim caps, ammo, and otherwise strong equipment. Bobby pins are quite easy to come by, so I don’t recommend taking the last perk in Locksmith. Going up to the third perk which unlocks Master safes is all you really need.
Grade: A-
Build: Any/Sneak


Refractor – Perception 7
Apart from synths, energy attacks aren’t what most enemies throw at you, so gaining permanent energy resistance isn’t particularly useful compared to the more general Toughness perk. Wearing Power Armor gives you enough energy resistance in case you really need it too. That said, it’s a permanent boost and so it’s hard to argue against.
Grade: B-
Build: Any
 Sniper – Perception 8
Sniping isn’t particularly difficult to require a longer breath for stabilization. All it really takes is waiting for enemies to stop while you’re hidden before taking the shot, so the first rank in this perk is not that great. The second level of Sniper knocks enemies down, but that can actually work against you if knocking them down makes them harder to hit with a follow-up attack. The third level of the perk is the only one worth it, giving +25% accuracy to head shots in VATS, but hitting enemies in the head outside of VATS is not that hard. Even for someone who uses sniper rifles, this perk surprisingly just isn’t that useful.
Grade: C+
Build: Sneak
 Penetrator – Perception 9
This perk is incredible for all gun users. Enemies can use cover effectively so being able to mitigate any cover penalties in your accuracy is fantastic and means that you don’t need to waste time finding an appropriate angle. The second perk ignores the cover penalty altogether, which is a godsend for any person who uses guns.
Grade: A-
Build: Guns

Concentrated Fire – Perception 10
This is nice boon for VATS, giving additional accuracy for continual fire at a particular enemy’s body part. It’s not spectacular given that this is the last perk in the Perception category, and it requires additional uses of VATS for you to get mileage out of the perk. You might as well wait to get a 80-95% chance anyway when firing on an enemy for the first time. The third rank of the perk does give 20% extra damage on a body part, so that’s worth the perk point at least.
Grade: B
Build: Guns
Endurance Perks
 Toughness – Endurance 1
Lead Belly – Endurance 2
This is largely an unnecessary perk. Radaway is fairly plentiful if you search around and ot can be purchased, even if it’s expensive early on. Besides, you can cook various meats to get rid of the radiation and create purified water from dirty water. Don’t waste your time with this perk.
Grade: D
Build: Any
 Lifegiver – Endurance 3
Gaining health points is always good. Who can complain? Better yet, getting the final perk in Lifegiver gives you gradual regeneration powers as if you’re Wolverine. This is one of the best perks to invest in and will save you many Stimpaks in the long run. The additional sixty health points is just a handy bonus for having all three ranks.

Chem Resistant – Endurance 4
Getting addicted to chems isn’t much of a problem in Fallout 4. Yes, it can happen often if you continue to use Buffout, Med-X, Psycho, and a host of other drugs in the game, but eventually, you’ll find vendors selling Addictol or you’ll find the ingredients for Refreshing Beverage, both of which cure chem addictions completely. So really, Chem Resistance is just a matter of convenience than anything else.
Grade: C
Build: Any
 Aquaboy/Aquagirl – Endurance 5
Water doesn’t play too much of a factor apart from locations on the eastern shoreline of the map. That said, swimming indefinitely is quite liberating and being undetected in water (the second rank) can be useful when infiltrating encampments near water. This is more of an entertaining perk than anything else.
Grade: B
Build: Any
 Rad Resistant – Endurance 6
Radiation resistance is the easiest damage to mitigate in the game, either through the use of Rad-X, a few packets of Radaway, or a Hazmat suit. Wearing Power Armor works too. So building radiation resistance isn’t so much of a problem as much as regular physical resistance or even energy resistance.
Grade: C+
Build: Any


Cannibal – Endurance 8
Stimpaks and food are plentiful enough in the game without you needing an additional source of health, though this perk will save you caps in the long run. If you’re attentive, though, you won’t need this perk to stay alive.
Grade: B-
Build: Any
 Ghoulish – Endurance 9
Again, health isn’t difficult to restore and basking in radiation just to heal wounds is rather silly given that the Life Giver perk at its highest rank will regenerate health naturally. Places of radiation are rather rare in the wasteland and restoring health normally isn’t a problem for the most part. The only real boon from this perk is being able to pacify and turn ghouls on occasion.
Grade: C+
Build: Any
 Solar Powered – Endurance 10
I suppose when combined with Night Person, this perk can give you better overall bonuses throughout the day. Extra strength, extra endurance, radiation damage healing, and health regeneration are all great boons for simply walking around during the day (radiation damage most of all). Solar Powered is worth taking for that reason alone, but it’s still limited to being useful only half of the day. (Edit: Solar-Powered is one of the only ways to heal radiation damage without using Radaway. For that, it gets a bump up, but it does require an Endurance of 10 to reach it.)
Grade: B+ (changed from a B)
Build: Any
Charisma Perks
 Cap Collector – Charisma 1

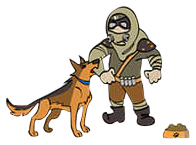
Attack Dog – Charisma 4
This is only necessary with you choose to have Dogmeat as a companion throughout the game, which might be the case if you’re going for an evil build since Dogmeat doesn’t really care whether you’re a horrible person. The ranks in Attack Dog give him status-effect chances like bleeding and crippling, and you’ll have an easier hitting an enemy that he’s holding down in VATS. Otherwise, you can skip this perk entirely if you’re far more interested in having any of the other companions.
Grade: C+
Build: Any
 Animal Friend – Charisma 5
Pacification of any enemy, just by aiming at them, is a great way to thin the herd. At higher ranks in Animal Friend, animals will either attack their enemies or give you the ability to command them. This is particularly great if you can turn a yao guai over to your side and watch it maul everything around you. Animal Friend is rather limited later in the game, though, when you’ll face off against more human enemies… but there’s a perk for that. Wasteland Whisperer at Charisma 9 also knocks the crap out of this perk, so if you’re planning on getting that perk instead, save your points to gain access to it instead of spending it here.
Grade: B
Build: Any


Party Boy – Charisma 7
Alcohol isn’t as useful as the chems available in the game, though you can boost their effects with the second rank of alcohol and be completely resistant to alcohol addiction with the first rank. The third rank gives you better luck while being intoxicated which is a nice boon. Still, you need to put ranks into alcohol before it’s worth taking. Your perk points will be better spent elsewhere.
Grade: C
Build: Any
 Inspirational – Charisma 8
As opposed to the Lone Wanderer perk, this perk provides damage mitigation between you and your companion. The first two ranks of the perk makes it so that you and your companion do not damage each other which is great if either of you specialize in explosives or big guns, though it’s not that useful since you can just pick your companion up with a stimpak. The third perk gives your companion more carrying weight so that you can have longer exploration runs, which is a fine addition. but not particularly amazing.
Grade: B-
Build: Any
 Wasteland Whisperer – Charisma 9
This completely destroys the Animal Friend perk by giving you the ability to pacify any creature in the Wasteland and win them over to your side. The usefulness of this cannot be understated. The crowd control is fantastic and having a deathclaw at your beck and call is extraordinary. And hey, once you’ve killed everything, you can just go ahead and shoot your “friend” for extra experience points if you want. If you have access to this perk, it’s worth taking now and forever. (Edit: However, if you’re a shoot-first kind of person or tend to shoot enemies from long range, then this perk isn’t very useful since you won’t even be up close enough to use it.)
Grade: B+ (changed from A)
Build: Any

Intimidation – Charisma 10
This perk compliments Wasteland Whisperer by giving you the ability to pacify humans as well. Working together in tandem, you can charm your way out of a battle sometimes without firing a single shot (okay, maybe a few). This perk is just as powerful as Wasteland Whisperer and is worth its weight in gold. (Edit: Again, if you’re a shoot-first kind of person or tend to shoot enemies from long range, then this perk isn’t very useful since you won’t even be up close enough to your enemies to use it.)
Grade: B+ (changed from A)
Build: Any
Intelligence Perks
 V.A.N.S. – Intelligence 1


Hacker – Intelligence 4
Hacking hasn’t changed much at all from the last two Fallout games, so it’s not particularly difficult if you pay attention to the letters in the password and if you can find all of the special strings enclosed in brackets. Putting more points in Hacker gives you access to more difficult terminals and gives you the ability to add a protectron to your side as a distraction, open safe locks (some that can’t be lockpicked), and disengage mag-locks on doors. You won’t need the last perk in Hacker if you’re good at hacking in general but getting the first three ranks in Hacker will give you many more strategies in combat and a good amount of additional loot.
Grade: A-
Build: Any/Sneak
 Scrapper – Intelligence 5
You can typically find all the ingredients you need in the wasteland just by picking up items strewn across the wasteland. You’ll likely want to save junk weapons and armor for selling to traders since they net the most caps, so this perk is extremely limited in its utility. However, if you habitually pick up all sorts of guns regardless of their value-to-weight ratio, then being able to break down guns to find rarer components (crystal, nuclear material, etc.) will be very useful for you.
Grade: B
Build: Any
 Science! – Intelligence 6
This perk is actually a requirement for many settlement-related items for defense and for certain power armor mods. You don’t necessarily need it, but having access to high-tech mods does help in the long run and gives you the ability to craft some of the best power armor builds in the game from scratch. It also unlocks the sniper rifle scope that can tag enemies, which is almost broken as a mechanic.
Grade: B+
Build: Any/Tank

Chemist – Intelligence 7
Combined with Chem Resistant at Endurance 4, this perk is actually quite strong since it extends the duration of chems longer and longer for each rank. That said, chems are one of the easiest items to craft and you don’t necessarily need chems to survive the wasteland. If you’re the type to save chems for a particularly tough boss fight, then this perks is limited in its use since these fights don’t last that long. But against legendary enemies, chems are certainly useful, so it’s up to you whether chems are part of your strategy or not.
Grade: B
Build: Any
 Robotics Expert – Intelligence 8
This is similar to the Charisma perks that can win over animals, creatures, and humans over to your side. Robotics Expert works on robots instead, and unlike the Charisma perks, winning a robot to your side isn’t percentage-based. It’s not completely practical since robots are on the rarer side in terms of enemies, but in specific situations (like a sentry bot), this is a very useful perk indeed.
Grade: B
Build: Any
![]()
Nuclear Physicist – Intelligence 9
This perk gives bonus damage to radiation weapons and extends the duration of power cores which is fantastic for anyone with a Power Armor build. Over the course of the game, though, it’s not difficult to purchase power cores from vendors and the health of each Power Armor part becomes more a factor than the duration of your power core. The last perk gives you the ability to use fusion cores as a powerful grenade, which gives the item more utility.
Grade: B
Build: Any/Tank
 Nerd Rage! – Intelligence 10
This perk is more of a fail-safe than anything else, giving you extra damage resistance and more damage output when your health dips below 20%. Time slows down as well so that you can heal yourself, which is probably want you’ll want to do instead of keeping Nerd Rage on. However, if you find yourself at less than 20% health a lot, you probably want to have better tactics in combat anyway unless you purposely like living on the edge. If you like to keep your health high, then Nerd Rage just doesn’t go into effect much of the time.
Grade: B-
Build: Any/Tank
Agility Perks
 Gunslinger – Agility 1
Pistols are only really useful at the beginning of the game. If you can find a suppressed pistol, it’s great for stealth attacks, but other than that, there’s little long-term investment with Gunslinger when there so many better gun options later down the road. (EDIT: That said, some pistols in the game like Kellogg’s Pistol or The Deliverer are extremely deadly since they don’t need to a lot of AP per shot in VATS. This perk makes them even deadlier.)
Grade: B (changed from C+)
Guild: Guns (Non-Automatic)
 Commando – Agility 2
This perk is specific toward players who favor spraying a large amount of bullets at enemies from short- to mid-range. This strategy tends to consume a lot of ammo very quickly so it’s worth putting ranks into Commando if that’s the case for both damage and hip-fire accuracy. The later ranks also add a chance at staggering opponents and given the rate of fire your guns will deal, this is a fantastic boost for all automatic guns.
Grade: B+
Build: Guns (Automatic)


Mister Sandman – Agility 4
Being able to kill a sleeping person isn’t that useful here (in part since you can perform a sneak critical on them), but it’s the additional damage done with silenced weapons with sneak attacks that’s the major boon here. Anyone into sneaking around with a suppressed sniper rifle should place points into this perk (along with Ninja). Otherwise, don’t bother putting points into this at all.
Grade: B
Build: Sneak
 Action Boy/Girl – Agility 5
No complaints here. Having the AP bar fill faster is stupendous for all builds. Take this perk now if you have access to it. You won’t regret it. The payback is immediate and powerful, giving you more opportunities to use VATS which pairs well with numerous other perks and just combat in general.
Grade: A
Build: Any
 Moving Target – Agility 6
Sprinting doesn’t happen too often, though if you have an unarmed or melee build or like running around with a shotgun, then Moving Target is a fine perk to take. Having some bonus damage and energy resistance is never bad here when you’re the most vulnerable. This pairs well with sneak builds as well if you’ve been detected and need a quick way to disengage in combat.
Grade: B
Build: Any
 Ninja – Agility 7
While sneak attacks with melee weapons is extremely difficult in the game unless you have the perks to support it, ranged sneak attacks are incredible and can one-shot enemies with high frequency with the right suppressed sniper rifle in hand. Ninja only makes the sneak attack multiplier even higher. This perk is necessary for all sneak builds and for no one else.
Grade: B
Build: Sneak
 Quick Hands – Agility 8
Reloading is not really a problem in Fallout 4 unless you’re into heavy weapons. Even so, the time savings are minimal for most guns and it’s not difficult to find some form of cover while reloading. So it’s just not really useful to dump a point into this.
Grade: C
Build: Guns (General)
 Blitz – Agility 9
This is a tough one. Blitz is perfect for melee and unarmed builds, and gives every melee attack the same impact as a Superman punch to the face. By closing the distance for melee attacks in VATS But the problem is that this perk is buried at Agility 9 and most melee and unarmed builds will want to spend points in Strength and Endurance instead. It’s still a great perk, though, if you can manage to gain access to it. (EDIT: If you’re a melee or unarmed build, then this perk is necessary to get sneak damage on a consistent basis.)
Grade: B+ (changed from B)
Build: Melee/Unarmed
 Gun Fu – Agility 10
The name alone should make you spend a point in this. If you wield guns that don’t require a lot of AP points per round in VATS, then this perk will make you feel like a god with extra damage and more critical hits the more targets that you use. It will influence you into spending your entire AP bar at once, but if you grab Action Boy/Girl too, you won’t need to wait that long to take advantage of Gun Fu once again.
Grade: A-
Build: Any
Luck Perks
 Fortune Finder – Luck 1
Finding more caps is never bad since they have no weight and putting ranks into this gives you a higher likelihood of caps in containers. The final rank has the chance of turning enemies into a shower of caps too which is hilariously entertaining. On utility, though, Scrounger is a bit more useful since ammo has a lot more uses.
Grade: B
Build: Any
 Scrounger – Luck 2
Ammunition is important for all gun builds, so taking this perk is incredibly useful. Since you can’t craft ammo, finding more ammo off enemies and from containers is fantastic. Better yet, even if you aren’t a gun build, all ammo converts into caps at a vendor. With this perk active, you can find a large amount of ammo and since ammo drops a higher rate, that’s a lot of extra caps at your disposal.
Grade: A-
Build: Any, Guns (General)
 Bloody Mess – Luck 3
Well, why not? More damage is more damage, and is worth the skill point for any build. Enemies will explode in a bloody mess which is neat effect, though it might be difficult to find a piece of the enemy on the ground to collect the loot. If you can’t decide on what to place a perk point in, extra damage is never a bad idea.
Grade: B+
Build: Any
 Mysterious Stranger – Luck 4
With a few ranks in this perk, Mysterious Stranger will save your ammo and will sometimes save your ass whenever you use VATS. The more times you use VATS, the more times that the Stranger has a chance to come along and kill an enemy for free. The third rank will give you a chance to fill the critical meter whenever he arrives which is a nice bonus as well.
Grade: B+
Build: Any
 Idiot Savant – Luck 5
EDIT: After a few more tests with Idiot Savant, it’s not as useless as it seems to be. Even with several points of Intelligence, you have a fairly good chance to have Idiot Savant activate, earning you bonus experience. The best part is getting multiples of experience from completing a quest; in fact, you can reload you save over and over again until Idiot Savant activates. If you’re going for a build that earns XP very quickly, then Idiot Savant will be central to it.
Grade: B (changed from C-)
Build: Any
 Better Criticals – Luck 6
This is all-around perk that provides extra bonus damage anytime you land a sneak attack critical or use the execute critical bar while in VATS. Paired with Critical Banker at Luck 7, this perk becomes a source of true reckoning, especially against legendary foes and bosses.
Grade: B+
Build: Sneak

Critical Banker – Luck 7
One of the most practical perks around for any build, this perk allows you to save critical attacks in VATS for storage against the tougher enemies in the game. Each additional rank here gives you an extra critical attack that you can save, and the final rank gives you the chance to add an additional critical to the bank for free. With this perk around, the power of many other perks in the Luck like Grim Reaper’s Sprint and Four Leaf Clover are exponentially strengthened.
Grade: A
Build: Any
 Grim Reaper’s Sprint – Luck 8
Another incredibly all-around perk, this gives you the chance to refill your action points after killing an enemy in VATS. Paired with Gun Fu, you will have an incredible time just sinking bullet after bullet into enemies, and with Critical Banker and/or Four Leaf Clover, you might as well be living in the Matrix because you’ll be landing critical after critical after critical.
Grade: A-
Build: Any
 Four Leaf Clover – Luck 9
Every time you hit an enemy in VATS, Four Leaf Clover gives you the chance of getting a free Critical Meter. That’s an incredible perk that pairs extremely well with both Critical Banker and Grim Reaper’s Sprint. In fact, the synergy between the last few perks in Luck is incredible and makes Luck one of the most powerful stats in the game.
Grade: A-
Build: Any
 Ricochet – Luck 10
Karma is a bitch. With Ricochet, an enemy’s ranged attacks can reverse and kill the enemy instead. The only trouble with this is that it only really works if you have low health, so its function is rather limited. It’s better to place a perk point in another Luck perk instead.
Grade: B
Build: Any
Fallout 4 Coverage Footer
-
Secret UFO Crash Site Easter Egg

Grab your alien blaster. -
A Guide to Base Building
Make the empire of your dreams. -
PC Ultra Graphics with SweetFX
This is how good the PC version can look. -
The Entire Fallout 4 Map

Fallout 4 Full Map. -
Get Perky: A Ratings Guide for Every Perk
Read up on where to spend your Perk Points. -
Fallout 4 Review

Should you buy Fallout 4? -
There\'s a Secret Dev Test Area You Can Visit Where Every Item is Available

Visit the secret dev test area. -
10 Tips Before You Start
Prepare for your post-apocalyptic adventure. -
Bobblehead Locations

Grab all of the bobblehead collectibles for permanent bonuses -
Bloodborne vs The Witcher 3 vs Fallout 4

What was the best RPG of 2015? -
Bugs Galore

These aren't just ordinary bugs. -
Friend With Benefits: A Guide to All 12 Companions

Win over all 12 companions in the game. -
The 10 Most Useful Mods

Want it? Mod it!