This Dark Souls 3 walkthrough will be brief and to the point, offering you quick tips for dealing with the intricacies of each area. Boss tips will also be provided to help you overcome the major milestones of the game.
Note that this guide is written in chronological order of my full playthrough, so if you find yourself not knowing where to go next simply check which area is listed after the area you are stuck on for a hint on direction.
SPOILER ALERT: Since this is a walkthrough, there are area and boss name related spoilers contained below. Proceed with caution!
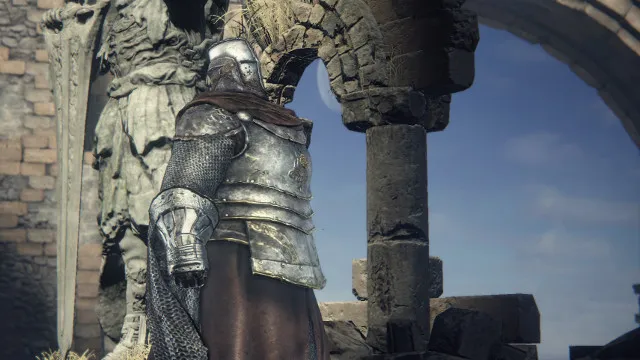
Cemetary of Ash
- This area serves as a tutorial. You should spend time getting used to movement, dodging, and attack patterns against the area's simple foes.
- Don't forget to grab an Ashen Estus Flask at the fountain.
- Boss: Ludex Gundyr
- Gundyr's phase one attacks have very clear animations that should be dodged and followed up with counter-attacks.
- In phase two Gundyr becomes very dangerous at range. Get close to him and hit him hard while side-stepping to avoid his mutated arm.
- A few easy-to-defeat enemies guard the path from Cemetary of Ash to Firelink Shrine, including a katana-wielding human outside and to the left of Firelink Shrine.
Firelink Shrine
- This is a safe hub where you can level up, visit the blacksmith, acquire and equip new magic, and more.
- Additional NPCs will become available as you meet them on your travels. This includes NPCs for each of the three schools of magic.
- Note that there is a merchant here called the Shrine Handmaid where you can buy general goods and sell items. She will stock more items as you collect and bring her special key items. This vendor carries two keys, one of which is the Grave Key (1500 souls) which is used to access the optional sewer area. The other is the Tower Key (20,000 souls) which allows you to access the Bell Tower above Firelink Shrine.
High Wall of Lothric
- This area contains a wide range of enemies, including fast-moving dogs, axe-wielding ghouls, and crossbow-wielding ghouls. Pace yourself slowly through each section to avoid mistakes.
- Once you arrive at the massive greataxe-wielding enemy, run past him to the left of where you came from and go right up the flight of stairs to find a shortcut back to the first bonfire.

- This area's Lothric Knights are some of the toughest enemies in the game. They are best defeated by well-timed rolls and back stabs. If you play as a heavily-armored character, you may want to consider farming them for their powerful Lothric Knight Set.
- Boss: Vordt of the Boreal Valley
- Stay close to Vordt and roll through his legs when he attacks before counter-attacking, similar to Gundyr.
- In phase two you should back off and carefully dodge his three-stroke charge before counter-attacking.
- He is exposed from his left and behind when breathing frost.
- You will need to collect a Small Lothric Banner from the cathedral on the opposite end of the Vordt boss battle, where the Lothric Knights are located, to proceed.
Undead Settlement
- This area's regular enemies look intimidating, but are easy to take down if you block or roll through their attacks. Be sure to move out of the way when the saw-wielding enemies charge you to avoid combo damage.
- When you encounter your first fat sorcerer, be aggressive but always keep stamina available for rolls from their melee spin attack.
- In the section where spears are raining down on you, try to position your enemies to be hit by the spears before running through to the next area.
- Optional Boss: Curse-Rotted Greatwood
- Attack the egg sacks on his left arm, left leg, and stomach while avoiding damage to proceed to phase two.
- In phase two target the egg sacks on his back first, then focus on the egg sacks on his stomach while rolling through the hand's attacks.
- This boss is optional, but drops a key item that allows you to trade in boss souls for unique items back at Firelink Shrine.
- When you arrive at the elevator, note that it is a double-leveled elevator. So, to go up, you need to step on the first switch and then jump off the elevator and wait for the top platform to come down. At the top of the tower you can speak to and befriend the giant that throws spears down at you and enemies.
- Speaking of the elevator, you can hop off of it halfway between the middle and top levels to access a secret area that has a mini boss and several powerful items.
- When you encounter the Outrider Knight (frost enemy) in the basement, be patient and feel free to use the stairs to gain an advantage. This enemy is very difficult, but drops an extremely potent straight sword that you may consider using for the rest of the game.
Road of Sacrifices
- This area introduces one of the game's most frightening and dangerous foes, the Evangelist. When facing these enemies always be prepared to roll away from a quick multi-hit combo. These enemies aren't difficult to hit, but are known for punishing players who commit to offense without quick reflexes.
- Skip the water area at first and enter the broken down castle to the left. Note that there is a bonfire located out in front of this castle.
- Boss: Crystal Sage
- Charge the boss in the beginning and attack a few times to make him disappear. Throughout the battle Crystal Sage will disappear after being attacked. When this happens, you should run to the middle and be ready to charge him wherever he spawns.
- In phase two you will want to quickly hit two of the four sages that spawn, only one of which will be the real Crystal Sage (he won't die after one attack unlike the others). Use the pillars around the battle area to protect yourself from the magic attacks of the two others and try to single them out. Rinse and repeat.
- Once you've defeated the boss, you can proceed through a short area after until you reach a bonfire. You should stop here as the area ahead is very difficult at this level. So, teleport back to Road of Sacrifices and head through the water area to encounter two human enemies. Try to single out each of these two enemies and carefully counter-attack to whittle them down. After they are defeated, head down the ladder in the area they were guarding to proceed to the next area.
Farron Keep
- Note that you may experience some framerate issues in this area. It is known as the Blighttown (a notorious Dark Souls area) of Dark Souls 3, although patch 1.03 did address most of the technical issues.
- Your goal in this area is to find three small flames and extinguish them, which will open a large gate into the next area. Each of these flames are found at the bottom of chimneys in elevated positions on land, each separated by poisonous swamp water.
- Don't worry about being poisoned by the water as there's really no realistic way to avoid it. Simply be careful about preserving health so that you can heal through the poison damage, and head back to your last bonfire to restock on Estus Flask charges as needed.
- Once you've extinguished all three flames, proceed through the gate to face a few more regular enemies before you face the area's boss.
- Boss: Abyss Watchers
- This is considered the toughest boss during the first half of the game, so don't lose hope if you die many times. If you find yourself very frustrated, consider using an Ember and see if you can summon help.
- During phase one be patient and roll away from attacks. When the additional enemies spawn, avoid them and try to lure the boss and enemies together to make them attack one another. When this happens, hit the boss as much as you can to get some free hits in.
- In phase two adds will stop spawning, and the boss will continue using many of the same attacks, except with additional fire effects. Spend time learning the timing of these attacks so that you can punish them. It's all about timing and conservation of Stamina.
Cathedral of the Deep
- Teleport back to the bonfire you acquired after Crystal Sage.
- Before you enter this area, be sure to buy a torch from the vendor in Firelink Shrine.This area contains a mixture of familiar, easy to defeat enemies, and some extremely annoying foes that infest you with leeches that apply a bleed effect to you after only one hit. When leeches are on you, simply pull out your torch to cure the infestation. Alternatively, you can cure the bleed effect with Bloodred Moss Clumps.
- Your first goal should be to run across the rooftops and survive long enough to get inside the cathedral. It's a very long route with tons of enemies, and you'll only find a bonfire after you head into the cathedral and clear a room with two magic-based enemies. You may want to consider skipping a few enemies if you find yourself frustrated.
- Once inside the Cathedral, you will only face a few enemies before reaching the area's boss. Note that you don't have to kill the two giant trolls in the main area.
- Boss: Deacons of the Deep
- This entire battle is all about focusing on the single undead empowered by the red orb at a time while dodging the attacks of the others.
- In phase two be sure to pressure the oracles, as if you wait around for too long they will begin a ritual that summons a devastating magic attack. This ritual can be interrupted by killing an oracle or two, though.
- Focus on the main enemy in the middle of the pack to finish the battle.
Catacombs of Carthus
- The skeletons in this area are a nuisance since they quickly respawn after death. Because of this, you'll want to simply run through areas where skeletons are present.
- This is the first area with several traps. Be on the lookout for triggers, especially pressure plates.
- Note that there is a drop down to the right of where you entered which will allow you to skip the entire section on the other side of the bridge. Be weary of a rolling boulder on the stairs at the bottom, though.
- Once in the basement you will encounter a large number of skeletons that will chase you through the halls. If you want to collect treasure, do so carefully.
- When you encounter a wooden bridge, don't walk across it. Instead, go around it by dropping down to the platform. This bridge can be attacked from the other side to make it drop, revealing a ladder down to an optional boss in an area called Smouldering Lake. This optional boss is very difficult, so you may want to skip him for now. Proceed further into the upper area to encounter the boss of the catacombs.
- Boss: High Lord Wolnir
- Attack his golden bracelets to damage him. It is preferable that you destroy one bracelet on each arm and leave one bracelet on his left arm as the final weak point.
- When he raises his head upward, run away to avoid the dark damage that will pour out of his mouth.
- Roll through his swings and sword attacks while avoiding skeletons.
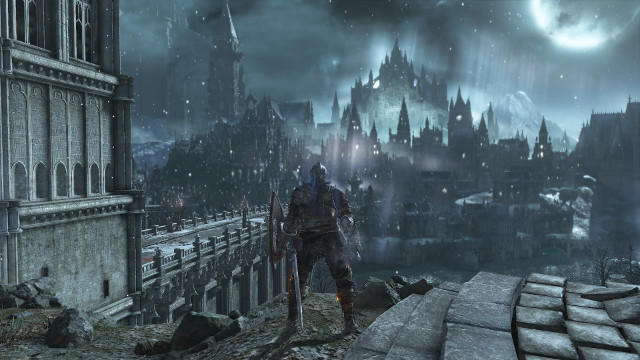
Irithyll of the Boreal Valley
- This is one of the most beautiful areas in the game, but also one of the most difficult. Don't forget to take a few screenshots along your way.
- Try to only pull one dancer at a time, as they are extremely dangerous. If you typically rely on your shield, you'll want to put it down for these enemies as they attack too ferociously for the shield to be effective.
- The first bonfire isn't too far in, but you'll need to kill a few of the game's most challenging regular enemies to get there. Take your time and consider using consumables to make your life easier.
- From the chapel bonfire, continue downward into a dark dungeon where invisible enemies are present. A shield may come in handy here.
- You will soon find yourself in the water. This path will soon split, one path of which is at the end of the water and leads to Irithyll Dungeon, and another found inside a cave inhabited by spiders. Which way you go is up to you, but it is recommended that you head into the spider cave first to face a boss.
- Boss: Pontiff Sulyvahn
- It is preferable that you use light armor for this fight, as mobility is very important.
- This battle is a race for damage. Pontiff is very strong and will wear you out quickly, so focus on offense and learn his patterns to the best of your ability.
- In phase two Pontiff will spawn a clone that makes the battle much more difficult. Although it seems counterproductive, the best strategy here is to be aggressive and get in the face of the boss.
- Head back into the water area and head down to the end where a bonfire awaits in front of the next area.
Irithyll Dungeon
- This area has one of the game's most iconic and punishing enemies, the Jailer. The Jailer reduces your max health quickly when you're in line of sight. While after a few seconds this max health reduction will dissipate, you won't recover your HP.
- In the room with three Jailers, it is recommended that you quickly kill the one closest to you and then head up the stairs before taking care of the other two separately, preferably by pulling one up the stairs.
- In the section with a giant troll, attack his hand and then quickly drop down to the lower platform and roll out of his line of sight. His attacks will destroy your health bar, so you'll want to be very careful about killing the lizard near him if you choose to do so.
- Note that there are some special items and an NPC in this area. One is the Profaned Coal dropped by one of the large, four-legged creatures in the basement. There's also a Dragon Torso Stone in an outdoor area, which is later used to visit an optional area that is regarded as the most difficult area in the game. Karla is also found here, who will teach you advanced magics after you obtain a Jailer's Key Ring in Profaned Capital.
Profaned Capital
- You will eventually find yourself in an open area with two massive bridges. There's a bonfire at the top of the tower. You can proceed down a ladder to visit the area's boss, or head into the side section to clear an optional area back in Irithyll Dungeon. In this optional area you can obtain the Jailer's Key Ring that Karla in Irithyll Dungeon requires.
- This area is very short and serves mostly as a host for one of the game's major boss encounters.
- Boss: Yhorm the Giant
- Pick up the Storm Ruler at the other side of the room and quickly equip it. You will not do much damage to Yhorm unless you equip this weapon, and hold L1/LB long enough to charge it with wind power.
- This battle includes easily read attacks that should be countered by fully charged Storm Ruler swipes.
Anor Londo
- Anor Londo is a a returning area from the original Dark Souls. While some of its layout is familiar, it's changed in dramatic ways since you last saw it. It houses a couple of tough enemies, but is short in length.
- In the same area you fought Ornstein and Smough in Dark Souls, you will find a boss battle.
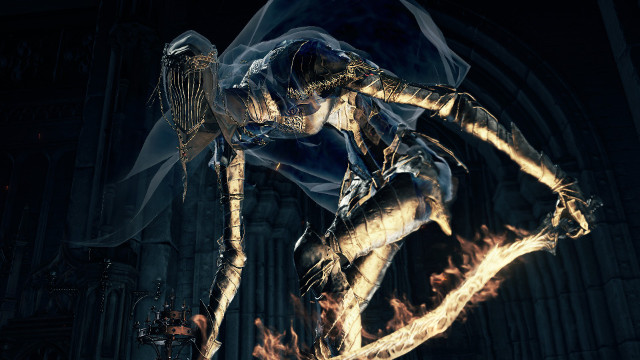
- Boss: Aldrich, Devourer of Gods
- Aldrich is one of the game's toughest bosses. He uses both dark and fire magic, both of which you may want to consider bringing resistance for.
- Quickly charge Aldrich every time he disappears. He will always reappear on the opposite corner of the room.
- Use the pillars to avoid soul masses. When he charges his bow, try to lead his aim to an open area and side roll away before getting behind him.
- In phase two he will throw down a wall of fire whenever he appears. Be sure to go around it and avoid the damage as you roll away from his attacks.
- Some of this battle is luck-oriented, as Aldrich's arrow attack, wall of fire, and soul masses often combo in a way that is virtually unavoidable, and health bar destroying.
High Wall of Lothric #2
- You will find yourself teleported back to the cathedral in High Wall of Lothric and given a key item after a short cutscene. Use this item on the statue in front of you to initiate a boss fight.
- Boss: Dancer of the Boreal Valley
- This battle is all about memorizing attack patterns and dodging accordingly while choosing your moment to attack. The Dancer leaves lots of room for you to sit back and use your Estus Flask, allowing you to choose when you want to engage in battle and recover as needed.
- In phase two you may want to use the pillars to your advantage. Dancer will use several very long range multi-swipes that deal devastating damage, and by heading to the opposite end of the room you can wait for her to finish this series of attacks, and punish her afterward.
- Upon defeat of Dancer, use the key item on the statue again to proceed.
Lothric Castle
- Upon entering this area you can go left into an optional area or progress by going forward. It is recommended that you skip the optional area for now.
- The Knights in this area are enhanced by the clerics nearby. Always prioritize the clerics to ensure that the knights are easier to handle.
- Note that you will be hit by some white magic in this area that prevents you from using your Estus Flask for around 15 seconds.
- When you arrive at the two dragons, drop down off the side of the bridge to go around the area that they guard. You can kill them from behind once you wrap around the castle, providing a shortcut.
- After heading through several castle areas, you will encounter the area's main boss.
- Boss: Dragonslayer Armour
- Dragonslayer hits very hard, but has predictable attack patterns. You should play in a position to counter his large swipes with counter-pokes from behind him.
- Play defensively throughout the fight, and prioritize keeping your stamina up and avoiding damage.
Grand Archives
- This area's main enemies are easy to deal with, but there are usually many of them and other enemies present that can be overwhelming. Because of this, you may want to try pulling one or two enemies out of a room at a time to dispose of them before moving forward into each area.
- Be careful to avoid open books on the ground and bookshelves, as ghost hands will spring outward dealing damage and cursing you. Dunking your head into candle wax will allow you to avoid the effects of these hands.
- The large enemies on the rooftop aren't too difficult to handle, but be careful not to roll off the roof.
- You will eventually encounter three human enemies. It is recommended that you try pulling back and fighting them one at a time. The Sorceress is by far the easiest of the three to take down, so you may want to rush her first.
- You will eventually head into the grand cathedral to face arguably the hardest boss in the game.
- Boss: Lothric, Younger Prince
- Spend some time memorizing the attack patterns of the elder prince. He will be present for both phase one and phase two.
- When he charges up the holy fire beam, stand still and side roll at the last moment to avoid the damage.
- Phase two makes the battle much more difficult. Your goal is to deal damage to Lothric, which can only be done by taking the elder prince down to 0 health. Doing this is achieved similar to phase one, but you have to worry about a barrage of magical attacks from the younger prince not too dissimilar to Aldrich in Anor Londo.
- You may want to use stamina recovery items when the elder prince is at lower health in phase two, as you'll only have a few seconds to deal damage to the younger prince before he resurrects the elder prince from death.
Kiln of the First Flame
- This area is entirely dedicated to the final boss battle.
- Boss: Soul of Cinder
- Cinder is able to take four different forms, each with very different styles of play. This multi-dimensional offense is what makes this boss so notoriously difficult. You'll need to learn how to avoid magical damage in addition to melee combos.
- You'll occasionally find that Cinder falls to his knees after being attacked. During these three or so seconds, deal as much damage as possible to him.
- In phase two Cinder will become much more aggressive. You'll need to avoid his stab attack, which is followed up with a multi-hit combo that can one shot many players.
- Due to his aggressiveness in phase two, you may want to play defensively and make him come to you.
- Congratulations, you have completed the game! You will now have the option to proceed to new game plus. Alternatively, you can keep playing in your current game and take down some of the optional bosses that you may have skipped.
Check Out More Dark Souls 3 Coverage At GameRevolution: