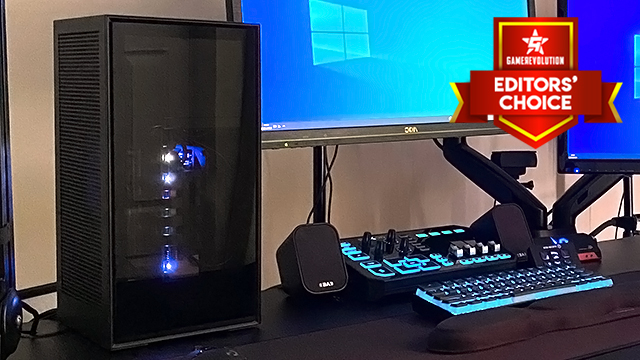
NZXT is no stranger to making fantastic PC cases. When it comes to combining great performance with fantastic looks, all for a fair price, NZXT is top-tier. The H510 remains my overall favorite case for ATX builds, but we’re not looking at ATX today, as we’re about to shrink things down with our NZXT H1 review. This is a small form factor case with included components that make it ridiculously easy to build in. Read on for the full details.
NZXT H1 Review | What’s hidden within
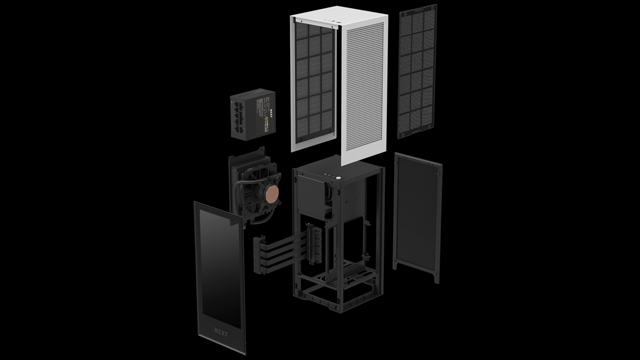
The NZXT H1 isn’t your typical case as it comes with a couple of components that you would normally have to buy separately. These are a small form factor 650w Gold power supply and an NZXT 120mm AIO CPU cooler. These are already fitted inside the case with all cables routed to the correct locations.
ALSO: AVerMedia Live Gamer BOLT Review (GC555) | The power of thunder
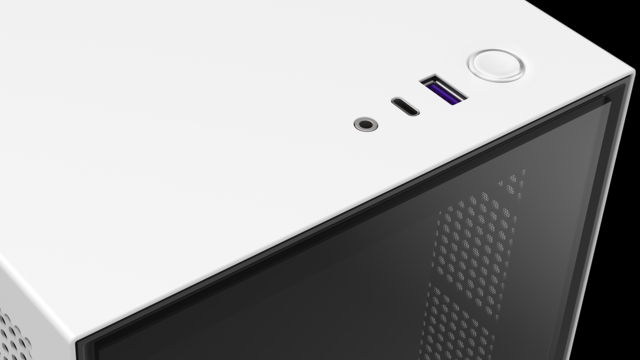
External IO includes a headphone/mic combo jack (with provided splitter), a single USB 3.2 Gen 1 Type-A port, and a USB 3.2 Gen 2 Type-C port. The latter currently requires an Intel motherboard with the relevant header, so AMD builds will have this port disabled. The power button is worth a mention for its satisfying click and white LED.
As you won’t need to provide a power supply or cooler, the only other components you require are the CPU, M-ITX motherboard, RAM, storage, and a graphics card (maximum 2.5 slot).
There is a lot of flexibility here, as this ITX case boasts enough room for very powerful components, without taking up a massive footprint. The vertical height allows for a lengthy GPU and an impressive water cooling solution.
NZXT H1 Review | Easiest build ever
Above you can see a build tutorial created by NZXT. As I mentioned earlier, the power supply and water cooler are already fitted and their cables are routed and ready to be plugged in. This meant that it took me 25 minutes to put my new PC together, and that was with me being careful with my unusual choice of motherboard.
My NZXT H1 PC Build
- Case: NZXT H1
- CPU Cooler (Included): NZXT 140mm AIO Liquid Cooler
- PSU (Included): 650W SFX-L 80Plus Gold Fully Modular PSU
- MOBO: ASRock X570 Phantom Gaming ITX/TB3
- CPU: AMD Ryzen 7 3700X
- RAM: HyperX Fury 32GB (2x 16GB) 3733MHz DDR4
- SSDs: Crucial CT1000P1SSD8 1TB, Samsung 850 Evo 1TB
- GPU: Palit GeForce RTX 2070 Dual
First, I removed the toolless case panels, giving me full access to all areas. Then I removed two screws that lock the water cooler down. Once the cooler has swung out of the way, I could then insert my motherboard.
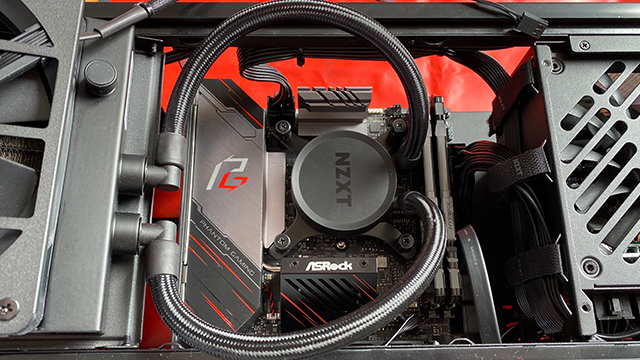
I had already put my CPU, RAM, and SSDs in place, so then it was just a case of moving the motherboard onto the pre-inserted standoffs. The four included screws (the only screws you need!) lock the motherboard down.
The next step is to simply plug everything in. Cables are all in the right spots and have enough slack to reach the common locations. The water cooler pump and fan also have enough give to reach any awkward areas, so then it’s just a case of inserting the PCI-e extension, which is pre-bent and ready to be plugged in. Honestly, it felt like cheating at this point!
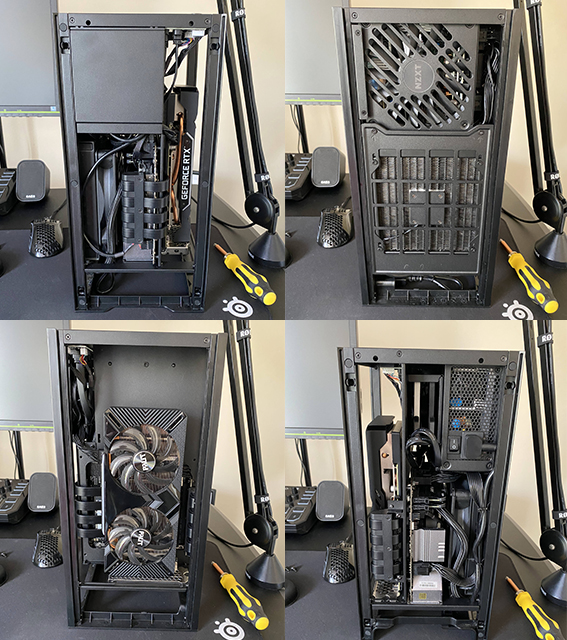
The penultimate step is to swing the water cooler back into place, being especially careful to avoid bending and kinking the cables. This is a pretty tight fit, as expected, but I held my breath and it fitted perfectly, with a decent bit of headroom for my RAM height.
Last, but certainly not least, is the graphics card. The GPU has its own little area which the PCI-e extension leads to. In addition to allowing the graphics card to be mounted vertically to take up less space, this area also helps with thermals by keeping the CPU and GPU further apart. With the graphics card slotted in and given juice, it was time to flick the power switch and put the panels back on for that first boot.
NZXT H1 Review | Cooling off

I’m happy to say that the new build immediately booted and was ready for testing. Again, it felt like I had entered a cheat code to get to this point, with the tougher parts of the build process already done for me. 25 minutes from start to finish, with me double-checking things and taking photos, is just crazy. I never thought the easiest build I’d ever do would be inside of an ITX case, but here I am.
Let’s move on to noise and thermals. Initially, I kept my CPU and GPU performance stock with a custom fan curve that started the fans spinning at their lowest speed before ramping up at 50°C, reaching the maximum 100% at 75°C.
The supplied NZXT fan is much quieter than my (admittedly cheap) Palit graphics card, but your mileage may vary depending on the GPU you use.
Thermally, the stock 3700X was no problem for the NZXT AIO, with peak temperatures of 69 degrees while stress-testing in the unrealistic Prime95 software. The 2070, on the other hand, was getting a little toasty, rising to 78°C with the fans at 100%.
The cooling solution that Palit has used on this cheap card no doubt deserves some of the blame here, but it’s also worth mentioning the additional testing I did after removing the NZXT H1 tempered glass front panel. Removing this glass resulted in a drop of 2°C on the CPU and 10°C on the GPU at full load. As many have said, it would be nice to see a more open panel option. The glass is nice, but it’s not exactly showcasing the graphics card or anything impressive.
Temperatures after one hour of CPU and GPU stress-testing*
- Stock: CPU 69°C, GPU 78°C.
- Stock with tempered glass removed: CPU 67°C, GPU 68°C.
- Stock CPU and undervolted GPU: CPU 69°C, GPU 69°C.
- Stock CPU and undervolted GPU with tempered glass removed: CPU 67°C, GPU 59°C.
* Ambient temperature of 25°C. CPU and GPU fans locked to 100%.
After more testing, I ultimately decided on keeping the 3700X stock with the “Silent” fan profile selected in the BIOS. For the 2070, I undervolted to drastically reduce temperatures while keeping the same level of performance. This setup makes for minimum fan noise while still keeping the heat in check with no throttling.
NZXT H1 Review | Small PC, big winner
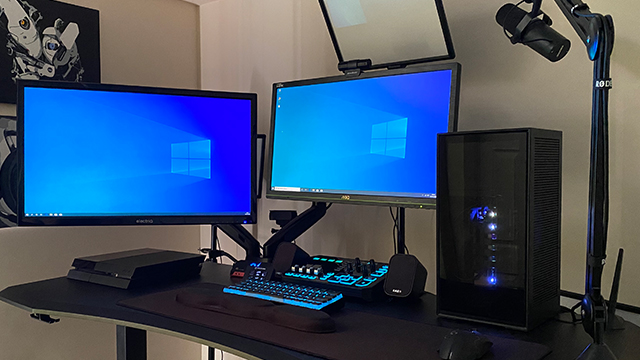
I’ve loved my time with the NZXT H1 and I’m happy to say that I’m now using it for my main PC. Being able to move my powerful components into a chassis about 40% of the size means I can now fit it on my desk during the working week, before moving it into the lounge to be used as a 2K/4K gaming machine. That might be the advantage of a mini-ITX case in general, but the H1 also helps make the build process easier and keeps internals decently cool when in use.
NZXT has always made some of the best cases around, in terms of both great performance and incredible style, but the H1 is on another level when it comes to providing an easy build experience, and it’s great to see the company pushing mini-ITX builds further into the mainstream.
The one major downside for many will be the price of $349.99. While I wouldn’t blame you for initially balking at that cost, it’s actually pretty reasonable when you consider the supplied and fitted power supply and CPU cooler. Factoring in the included components, as well as the high prices of competing small form factor cases, I think the launch price of $349.99 isn’t too bad. I’m clearly not alone in that thinking, as the H1 has been flying off shelves since launch!
I’m very happy to award the H1 with our Editors’ Choice award and I’m super excited to see what’s next for what is hopefully a series of small form factor cases. NZXT has come up with something seriously special here!
H1 review unit was provided by NZXT.
When you click on a link from an online retailer on GameRevolution, we might earn a percentage of the value of your purchase. Learn more here.


