God Of War II
LIVE HARD - DIE GREAT - BURN IT DOWN!!!! - Full FAQ/Walkthrough
Authored by VampireHorde
MMMMMMMMMMMMMMMMMMMMMMMMMMMMMMMM MMMMMMMMMMMMMMMMMMMMMMMMMMMMMMMMM
MMMMMMMMMMMMMMMMMMMMMMMMMMMMMMM MMMMMMMMMMMMMMMMMMMMMMMMMMMMMMMM
MMMMMMMMMMMMMMMMMMMMMMMM MMMMMMMMMMMMMMMMMMMMMMMMM
MMMMMMMMMMMMMMMMMMMMMM MMMMMMMMMMMMMMMMMMMMMM
MMMMMMMMMMMMMMMMMMMMMM MMMMMMMMMMMMMMMMMMMMMM
MMMMMMMMMMMMMMM M M MMMMMMMMMMMMMMM
MMMMMMMMM M M MMMMMMMMMMMM
MMMMMMM MMMM MMMM MMMMMMMMMM
MMMMM MM MM MMMMMMM
MMMM MM MM MMMMM
MMMM M M MMMM
MMMM M M MMMM
MMMM M M MMMM
MMMM M M MMMM
MMMM M M MMMM
MMMM M M MMMM
MMMM M M MMMM
MMMM MM MM MMMM
MMMMM MMM MMM MMMMM
MMMMMMM MM MM MMMMMMM
MMMMMMMMMM MMM MMMMMMMMMM
MMMMMMMMMMM MMM MMMMMMMMMMMM
MM MMMMMMMMMMMMMM MMM MMMMMMMMMMMMMM MMM
MMM MMMMMMMMMMMM MMM MMMMMMMMMMMM MMM
MMM MMM MMM
MMM MMM MMMM
MMMM MMM MMMMM
MMMMMMMMMMMMMMMMMMMMMMM MMMMMMMMMMMMMMMMMMMMMMM
MMMMMMMMMMMMMMMMMMMMMMM MMMMMMMMMMMMMMMMMMMMMMM
MMMMMMMMMMMMMMMMMMMMMMMMM MMMMMMMMMMMMMMMMMMMMMMMMM
MMMMMMMMMMMMMMMMMMMMMMMMMMMMMMMM MMMMMMMMMMMMMMMMMMMMMMMMMMMMMMMM
MMMMMMMMMMMMMMMMMMMMMMMMMMMMMMMM MMMMMMMMMMMMMMMMMMMMMMMMMMMMMMMM
=======================================================================
=======================================================================
_____ ___________ ____ ___ __ _____________________ _ __
/ _/ |/ /_ __/ _ / __ / _ / / / / ___/_ __/ _/ __ / |/ /
_/ // / / / / , _/ /_/ / // / /_/ / /__ / / _/ // /_/ / /
/___/_/|_/ /_/ /_/|_|____/____/____/___/ /_/ /___/____/_/|_/
=======================================================================
=======================================================================
What it do nephews? Welcome back to the violent world of ancient
Greece. But whatever! Scroll down and read the walkthrough already!
ENOUGH TALK, FIGHT!!!
-----------------------------------------------------------------------
-----------------------------------------------------------------------
+++ DOMINATION - GAMEPLAY ASPECTS +++
--CONTROLS (KRATOS)
X BUTTON: JUMP/DOUBLE JUMP/SWIM/GLIDE
SQUARE BUTTON: LIGHT ATTACK/DIVE
CIRCLE BUTTON: GRAB
TRIANGLE BUTTON: HARD ATTACK
L1 BUTTON: BLOCK/DEFLECT WITH FLEECE
L2 BUTTON: ACTIVATE MAGIC
R1 BUTTON: ACTION BUTTON
R2 BUTTON: SUB-WEAPON
--CONTROLS: (PEGASUS)
X BUTTON: PEGASUS DASH (drains magic power)
SQUARE BUTTON: LIGHT ATTACK
TRIANGLE BUTTON: HARD ATTACK
CIRCLE BUTTON: GRAB
L1 BUTTON: DASH LEFT
R1 BUTTON: DASH RIGHT
ON TO THE WALKTHROUGH!
-----------------------------------------------------------------------
-----------------------------------------------------------------------
____ __ __ __
_ ______ _/ / /__/ /_/ /_ _________ __ ______ _/ /_
| | /| / / __ `/ / //_/ __/ __ / ___/ __ / / / / __ `/ __
| |/ |/ / /_/ / / ,< / /_/ / / / / / /_/ / /_/ / /_/ / / / /
|__/|__/__,_/_/_/|_|__/_/ /_/_/ ____/__,_/__, /_/ /_/
/____/
-----------------------------------------------------------------------
-----------------------------------------------------------------------
+++ PRIMAL CONCRETE SLEDGE - FULL WALKTHROUGH +++
Looks like Kratos isn't happy being a god. Sigh, here we go again!
+++ AREA: RHODES +++
The level begins inside a chamber room with multiple enemies. Begin
slashing away using hard combos. All the enemies here are too simple so
slash away until a short cutaway occurs.
With the room cleared, go up to the door and press the R1 Button and
then rapidly tap the Circle Button to open the door. Head outside and
continue the onslaught of fast combos.
Once the walkway near the door is clear, head for the other end but
WATCH OUT! The Colossus will smash his fist through the walls leaving
an open gap. Jump past the large hand and into the gap. Open up the
Green Chest and then climb up the ladder to the next area.
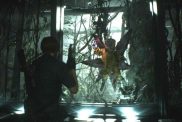
+++BOSS BATTLE: THE COLOSSUS - PART 1
Jump down to the lower area and start slashing at the enemies. The
Colossus is prone to using slam and swiping attacks with its right arm.
Use evasive rolls when the Colossus starts to rear its arms (that means
it's gonna pound the floor).
Attack the boss's arms with hard combos until it falls back in pain.
Repeat the tactic two more times and the Colossus will become stunned.
From there, a cutaway will show the catapult machine.
Jump up to the catapult machine and toss a rock at the boss (press the
R1 Button at the base). When the boss is out, press the R1 Button to
mount onto the catapult and then rapidly tap the Circle Button to fling
yourself sky-high onto the Colossus.
From there, a series of buttons will show onscreen. Press the button
that is shown onscreen to deal massive damage to the boss. If
successful, Kratos will remove the boss's right eye and then get thrown
halfway across the city to another area. If you pressed the wrong
button, the boss will grab Kratos and slam him back to the ground. If
that happens, I suggest memorizing the button layout!
+++TITAN MODE NOTE: The Colossus has a brand new attack where he slams
both fists into the center of the arena.
-----------------------------------------------------------------------
-----------------------------------------------------------------------
+++ AREA: RHODES BATHHOUSE +++
+++I SAID "WHAT WHAT" IN THE BUTT: TEN DOLLARS TWO HOURS
Emerge out of the water and climb out to the ledge. Break down the wall
on the right side to see two lovely wenches. You know what to do! You
don't need me to tell you how to get the job done. Once you're done, I
suggest "doing it" a couple of more times to hear some funny lines from
the ladies.
When you're done loving the ladies, jump back into the water and swim
through the large pipe (wait, what?). Use a Dash Charge on the gate and
then swim up to an open area. Swim towards the ledge on the right side
and then jump up and climb the ladder.
Access the lever across from the ladder and press and hold the R1
Button to activate your first grip holder. Jump up to the grip holder
and press and hold R1 to swing. Swing and jump to the next ledge and
then continue forward. Jump up to the higher ledge and open the door
and head outside.
+++TITAN MODE NOTE: Next to the lever is a Save Point! Use it!
Destroy the small number of soldiers and continue upwards to the
ladder. Climb it up and head forward but WATCH OUT! The Colossus will
smash its foot through the wall in an attempt to squish you down.
Rapidly tap the Circle Button to throw it back. Continue towards the
Blue Chest (open it if you want) and then climb up the wall to the
rooftops. Its boss battle time again!
+++BOSS BATTLE: THE COLOSSUS - PART 2
Jump down the balcony to face off against the Colossus again. The
strategy is still the same: evade and counter. The boss has some
unblockable and unavoidable attacks (like its goddamn forearm attack)
but all you have to do is stay evasive and continue to pound hard
combos on its arms.
You'll notice that on the right side of the balcony, there is a grip
holder. You can jump and swing to the opposite balcony and continue
your assault from there. You can alternate from balcony to balcony to
avoid its pound attacks and then attack it while it turns around.
When enough damage is dealt (when it reels in pain three times), the
Colossus will keel over on the other balcony and a Circle Button will
appear above its arm. Quickly make your way to the arm and then press
the button to begin the kill sequence. You then have to press the
buttons that appear onscreen to finish the first half of this battle.
When successful, Kratos will land back onto the balcony. You then have
to damage the boss until it keels over again. Repeat the kill sequence
and then the boss will grab Kratos and try to squish him. Rapidly press
both the L1 and R1 button to set Kratos free.
-----------------------------------------------------------------------
-----------------------------------------------------------------------
+++ AREA: RHODES PALACE +++
Open the Blue chest and jump up to the upper area and open the door. Go
around the corner and you'll see some archers on the other side of the
gate. Ignore the archers and turn right and then turn right again into
another hall.
SAVE GAME!
Eliminate the enemies that appear here. First, roll towards the archers
on the other end of the hall and kill them first and then get rid of
the other soldiers until the room has been cleared. Now its time for
your first puzzle!
+++DOUBLE STEP PUZZLE SOLUTION:
You'll notice two buttons (one on the other side of the gate). When
Kratos steps on the button in front of him, the gate will open and then
close if he steps off. Look to the left side of the wall where the
button is located to find a statue pedestal.
Grab the pedestal and then drag it to the button to open the gate. Do a
light charge kick to kick the pedestal to the adjacent button. Roll
under the gate and then drag the pedestal on the button to open the
adjacent door.
+++SECRET: THE URN OF GAIA
Before opening the next door, drag the pedestal into the hallway on the
right side. Kick the pedestal towards the end of the hall and then
break apart the statue above the pedestal.
You will notice three chests above. Jump up towards the chests using
the pedestal and open the middle chest to obtain the URN OF GAIA Bonus
Item. Open the other two chests as well!
Bring the pedestal back to the switch button and open the gate. Make
your way into the hall to encounter the last batch of soldiers. Before
you eliminate them, roll towards the archers at the end of the hall and
get rid of them. Now finish off the soldiers and then head for the
elevator (open the Red Chest if you want). Activate the lever to ascend
to the top. When the elevator stops, the Colossus will peek through the
open window. Perform a hard combo on its eye to trigger a cutscene.
-----------------------------------------------------------------------
-----------------------------------------------------------------------
+++ AREA: EASTERN RAMPARTS +++
Time to get the Blade Of Olympus! Climb up the wall to the top.
Soldiers and archers will try to stop you but why? First, ignore the
soldiers and roll towards the archers. Eliminate those archers and then
wipe out the soldiers to clear the top balcony area.
Open the double doors and head inside. Crack the green chest open and
grab the goodies and then smash the windows open and head out.
It might seem like a good idea to cross the wooden bars but with so
many archers and soldiers below, it's not worth the trouble. Jump down
to the bottom area and eliminate the archers on the upper perch. When
the archers are gone, rid the soldiers and then climb back up to the
wooden bars. As you cross the bars, there are TWO hard-to-see chests on
the right side of the bars. Simply double jump towards them and then
open the chests for the goodies. Continue crossing the bars towards the
Save Point.
SAVE GAME!
Now ascend ladder and enter the next room. Slide down the chain to the
lower room and destroy the soldiers. Enter the door to the next area.
+++BOSS BATTLE: THE COLOSSUS - PART 3
WAVE 1: As you head towards the Blade, the boss will continue pounding
the floor. To stop him from doing that, run towards the large piece of
metal (the boss's missing left hand) and press the R1 Button to fling
it at the boss. Now head for the Sword and press the R1 Button.
WAVE 2: For this wave, you need to physically damage the boss. Run up
towards its body and pound the hard combos on it. Use triple evasion
when it uses its double-swipe and slam attack. Continue attacking it
until it keels back. Now head for the Sword and press the R1 Button.
WAVE 3: Same as above. Continue the barrage of attacks until it keels
back and then head to the Sword to finally obtain it!
Now that you have the sword, you've basically drained all of your
powers back to nothing. Run up to the boss's forearm and inflict hard
combos with the sword until it falls over. Use simple evasion to avoid
being electrocuted. Once the boss is really damaged, press the Circle
Button when it starts floating on its head to enter the boss's
"internal" organs.
+++BOSS BATTLE: THE COLOSSUS - PART 4
Get ready because this is the longest part of this battle!
Once inside the boss's body, make your way up the scaffoldings and
eliminate the soldiers inside. BE CAREFUL! There is falling debris and
watch for those blue-colored rods. Head for the center platform and
smash the chains binding it. Press the R1 Button when prompted to drain
all of the blue energy.
Now continue up the scaffoldings until you reach what looks like a dead
end. Use the wooden wall to scale to the top. As you continue, the
floor will collapse. Double jump up towards the zipline above and then
scale towards the other end of the area. Jump down (press the R1
Button) and eliminate the soldiers. Use the wooden bars and cross to
the center platform. Smash the chains and then press the R1 Button to
drain more power.
Cross the wooden bars again and head towards the other scaffolding.
Head up and scale the wall to the top. Eliminate more soldiers and then
head for the center platform. Shimmy on the center platform to the left
and then climb down (press the R1 Button) and continue shimmying to the
left and then climb up. BUT BEFORE YOU DO ANYTHING ELSE....!!!!
+++POWER-UP: GORGON'S EYE
There is a secret area near the blue-colored bars. As soon as you climb
up the scaffolding (where you shimmied), make a left turn to the side
to see a wall to scale. Climb it up and you'll see a chest. Open it to
grab the Gorgon's Eye!
Now jump down and smash the center platform and press the R1 Button to
drain the power. Now climb the rope to the top and jump towards the
scaffolding. WHEW!
+++BOSS BATTLE: THE COLOSSUS - PART 5
Now make your way to the ladder at the other end and climb it to the
top. There is a lever just near where you ascended. Above the lever is
a zipline. PUZZLE TIME!
+++THE PENDULUM PUZZLE SOLUTION:
Head towards the lever and activate it to lower the pendulum. Now jump
down and whack it a few times to get it swinging. Now head back up to
the lever and press it again to raise the pendulum.
When the pendulum rises, it will swing back and forth (slowly) and
block the blue energy that is flowing towards each of the boss's eyes.
Double jump to the zipline above and patiently wait for the pendulum to
swing towards the left eye. When the energy is blocked, quickly zip
past the eye towards the middle. When the pendulum swings to the right
eye, quickly zip to the end of the line and jump down! WOOHOO!
Now make your way to the center platform and destroy the chains and
SUCK that last piece of blue energy to FINALLY finish this battle. Now
exit the area through the boss's mouth.
WELCOME TO GOD OF WAR 2
-----------------------------------------------------------------------
-----------------------------------------------------------------------
+++ AREA: PALACE OF RHODES +++
Approach the Blade Of Olympus to trigger the first epic showdown with
the almighty god of Olympus, Zeus.
--BOSS BATTLE: ZEUS
Unfortunately, you are SCREWED! Press the Circle Button when prompted
to trigger the next cutscene.
-----------------------------------------------------------------------
-----------------------------------------------------------------------
+++ AREA: HADES +++
After the cutscene, climb up the wall and attack the protruding arms to
release green energy and restore health. Jump to the right and then
continue climbing to the top towards the light.
SAVE GAME!
You will see a bunch of dead soldiers in the area. One of them is still
alive, though. Approach him and talk to him to trigger a cutscene and
the arrival of the Pegasus. Once the soldier leaves, mount onto the
Pegasus. IT'S TIME TO RIDE!
-----------------------------------------------------------------------
-----------------------------------------------------------------------
+++ FLIGHT OF THE PEGASUS - PART 1 +++
Attack the flying beasts (griffons) that surround the Pegasus and
continually attack them until the Circle Button appears. Do NOT use
hard attacks on them or they will fly off and shoot energy balls at
you. Just use continuous light attacks (Square Button) to avoid the
hassle. Once prompted, press the button shown onscreen to perform a
cool fatality. There are four beasts that need to be killed, so do it!
After the griffons have been killed, another enemy (a large raven) will
start doing dive bombs at Pegasus. The fastest way to kill this *****
is to use the Pegasus Dash. When the raven performs the dive bomb,
press the X Button and any of the attack buttons AT THE SAME TIME to
trigger a kill sequence. Press the button shown onscreen and then
rapidly MASH the Circle Button to kill that goddamn raven.
And now for the last part! Dodge the enemies' purple energy balls until
you enter the next area.
-----------------------------------------------------------------------
-----------------------------------------------------------------------
+++ AREA: LAIR OF THE TITAN +++
--MISSION OBJECTIVE: FREE THE PEGASUS
Once you've "landed", attack the harpies that appear and then descend
the stairs to the bottom. DO NOT ATTACK THE FINGERS JUST YET!!!
Continue towards the bottom of the area and climb down.
+++POWER-UP: GORGON'S EYE
Descend the wall to the bottom to find a Gorgon's Eye and a blood
chest. Open them both and then climb back up. Attack the middle finger
(*snicker*) and roll to the other side.
Now it's time for some wall-climbing! Head to the other end and descend
down the wall. IGNORE the enemies that appear here! They will only
distract you! Press the R1 Button to quickly descend and the X Button
to ascend faster.
Continue downwards and then towards the right side. Scale the ceiling
and then descend the next wall. Scale the next ceiling and then down to
the bottom floor. Destroy any enemies that followed you!
SAVE GAME!
Head down the path to encounter the Minotaur and some harpies. Use jump
attacks to damage them both and then press the Circle Button when
prompted to finish off the Minotaur. Continue down the path towards a
cage on a zipline. Smash the cage and zip down the zipline to the other
side (open the Blood chest if you want). Exit the area to a snowy
Cliffside.
-----------------------------------------------------------------------
-----------------------------------------------------------------------
+++ AREA: THE SNOWY CLIFFS +++
In this area, you will encounter three archers perched above wooden
scaffoldings and three minotaurs. Attack the scaffoldings to bring down
the archers and then use a Grab attack to kill them off.
+++TITAN MODE NOTE: There will be 6-7 additional minotaurs that will
appear during this battle so be prepared!
Deal with each minotaur the usual way and then ascend the cliff. Shimmy
to the left and then climb up to the top. Open the chests if you want
and then zip down the zipline. Approach the large bird to trigger the
cutscene.
After the cutscene, attack the chains on the old man (Prometheus) to
bring him down. Now descend the chain down to the bottom. Go around the
fiery blaze and you will be shown another Cliffside (with a Save Point
at the bottom). Descend the walls to the bottom (while avoiding the
enemies) and then destroy the ones that are waiting for you near the
Save Point.
SAVE GAME!!
Go around the path and eliminate more enemies. At the end of the path
is another Gorgon's Eye, so go and get it! DO NOT CROSS THE BRIDGE YET!
You don't have the weapon needed to cross that bridge! Instead, scale
the nearby wall to the top and enter the helmet-covered entrance.
-----------------------------------------------------------------------
-----------------------------------------------------------------------
+++ AREA: TYPHON'S CAVERNOUS PRISON +++
Enter the cavern and open the two chests for goodies. At the end of the
cavern is a grip holder. Press the R1 Button to do a large jump to the
other side. Notice that caged-up chest? Here's how to get it:
+++POWER-UP: PHOENIX FEATHER
To open up the cage, go to the right and you will see another zipline
that takes you back to the area where you started. When you take the
zipline down, keep pressing the R1 Button BEFORE you land on the ground
to do a large jump towards the cage. This will open up the cage and get
you a Phoenix Feather.
Continue down the cavern until you reach a small circular area. BATTLE
TIME! A gorgon will appear and you gotta kill that *****! Use light
attacks and evasion rolls. Simple rolls will keep you from being
frozen. When the Circle Button appears above her head, grab her and
ROTATE the analog stick in the direction it points to AND HOLD IT
THERE! The next direction will tell you to ROTATE the analog stick 360
degrees in a specific direction. Do it and you will behead that whore!
Two more gorgons appear together with some harpies. Use the same
strategy with the first gorgon and behead both those skanks. Once it's
clear, smash the pillar blocking the way and descend towards the Save
Point at the bottom.
SAVE GAME!
--MISSION OBJECTIVE: OBTAIN TYPHON'S BANE
As you approach Typhon, he begins blowing gusts of wind towards you.
When he stops, approach each ledge and wait until he starts and stops
blowing gusts of wind to move to the next ledge.
To get rid of the harpies, use jump-and-grab attacks (when behind safe
ledges). As you approach the top ledge, smash the large pillar and
knock it down to make a bridge towards Typhon. Wait for him to stop
blowing gusts and then approach the top pillar across from him and
press the R1 Button to jump towards him and obtain a new weapon!
+++NEW WEAPON ACQUIRED: TYPHON'S BANE
Once you've acquired the weapon, start using it on Typhon (hold the L2
Button to aim and the Square Button to fire). Fire enough arrows at him
to blind him. Now make your way towards the bridge back to the ledge.
Archers and soldiers will appear in the area, so use the Typhon's Bane
to rid the archers and then take care of the soldiers. Head to the
right to see more grip holders and three far-off archers. Use the Bane
and fire lots of arrows until the archers are gone.
+++SECRET CHESTS:
There is a fire pit and some soldiers further down where Typhon is
located. You need to toss the soldiers into the fire pit by grabbing
them and then pressing the Square Button. After tossing 4-5 of them,
the ice wall melts to reveal four hidden chests with goodies!
Now jump and swing your way back to where you started the level.
Destroy the rubble and go back to the Save Point.
SAVE GAME
--MISSION OBJECTIVE: FREE PROMETHEUS
++POWER-UP: GORGON'S EYE
Before going back to the area with the old man, go back down to the
area with the broken bridge. Shoot an arrow at the shining light to
reveal a grip holder. Jump and swing towards the other side to find a
blood chest and a Gorgon's Eye!
Now head back to the area where the old man is hanging for his life.
Use the Typhon's Bane a couple of times to bring him down. This will
trigger a cutscene and give Kratos' a new power.
+++NEW POWER OBTAINED: RAGE OF THE TITANS
More soldiers and some minotaurs will appear on the other end. Destroy
them with the Rage powers or use hard combos to eliminate them. Now
climb up the newly opened path up the cliff. At the top, you will see
wooden scaffolding. To bring it down, shoot an arrow at it and then
climb it up to the top. Go up the next set of steps to a broken bridge
area with a zipline but DO NOT TAKE IT YET!
++SECRET AREA #1: Right next to the broken bridge, there is a large
chain that goes down. Jump towards the chain and slide down to a secret
cavern with two blood chests and a Gorgon's Eye! YEAH!
++SECRET AREA #2: On the wall of the cliff next to the zipline is a
wall that you can scale. Climb it to the top and then to the left to
find three chests (one with a Phoenix Feather)!
Cross the zipline and eliminate the soldiers that are crossing. At the
other end of the zipline, jump down to the door entrance. Activate Rage
(L3 + R3) and use a combo to break down the door. Now it's time to free
Pegasus! Go back to the area where Pegasus is being squished (the Hand
Cavern) and activate Rage Of The Titans. Attack each of the Titan's
fingers to get him to release Pegasus. WHEW! Now hop on and fly outta
the cavern.
-----------------------------------------------------------------------
-----------------------------------------------------------------------
+++ FLIGHT OF THE PEGASUS - PART 2 +++
Just like the first encounter, you will be swarmed by numerous griffons
and harpies. Use continuous Light Attacks on the harpies and the
griffons and perform the fatality on the griffons when prompted.
+++TITAN MODE NOTE: Instead of solo griffons, you will encounter 3-4
griffons with soldiers riding alongside them.
After you kill three griffons, you will encounter the Dark Raven.
Again, use continuous Light Attacks on it while circling around the
raven to avoid being hit. After much damage, the raven flies off and
starts shooting energy orbs.
Dodge about 5-6 orb attacks and then the kill sequence begins. Press
the buttons that appear onscreen to kill the raven handler and then the
raven itself. As Kratos falls from the sky, press the button that
appears onscreen before he falls! PRESS THE BUTTON!!!!!! AAAHHHH!!!!
-----------------------------------------------------------------------
-----------------------------------------------------------------------
+++ AREA: TEMPLE OF LAHKESIS +++
Jump and grapple your way to the top of the temple. Make a right turn
and you will find the Save Point.
SAVE GAME!
Before you ascend the ladder, go to the other side of the balcony to
find two chests with some goodies and a Phoenix Feather. Now climb up
the ladder to the top. Grapple higher to the upper balcony and jump up.
A new soldier enemy will appear. Eliminate all the soldiers in the area
(or don't) and then ascend the next ladder to the top. As you approach
the center area, you'll see numerous hell hounds. Uh-oh! How do you
kill so many hounds? Simple, you grab them! That's right, approach
every hound and keep pressing the Circle Button and Kratos will grab
and kick each hound (and then he'll snap their necks after more grabs).
**NOTE: Every time you grab a hound, Kratos takes NO damage for those
few seconds when he is grabbing and kicking the hound. Believe me,
using grab attacks on the hounds is MUCH easier than using combos.
+++THE DOUBLE GATE PUZZLE SOLUTION
See that lever? If you activate the lever, you will descend to a lower
level. There is a step-button and a door lever across from you that you
need to pull. Unfortunately, you can't step on the button AND pull the
lever, so you need some "help". Go back to the center court above.
Attack the hanging corpses to retrieve some extra blood. One of the
hanging corpses is still in human form so cut it down and have Kratos
haul it with him back to the lever. Activate the lever to descend back
to the lower area. Haul the dead body with you and place it on the
step-button. Now pull the lever all the way back and then enter the
metal gate before it shuts itself. Simple.
Enter the next area. Now head for the large bridge and kick it down to
trigger a cutscene. After the cutscene, it's mini-boss battle time! You
can't go any further from there, so go back.
+++POWER-UP: PHOENIX FEATHER
The bridge has two ledges: one on the right and one on the left. The
ledge on the right takes you to the next area. But at the end of the
left ledge, there is a special chest that has a Phoenix Feather just
for you! Grab it and then take the ledge on the right side.
-----------------------------------------------------------------------
-----------------------------------------------------------------------
+++ AREA: GARDEN OF LAHKESIS +++
+++MINI-BOSS: CERBERUS + HOUNDS
Go back near the entrance of the bridge and go around the ledge to the
other side. Careful because the ledge collapses! Jump through the open
path and jump down to encounter Cerberus.
The strategy is the same with the previous hounds. Grab and kick each
hound towards Cerberus (be sure to kill the hounds for health!). After
5-6 kicks to Cerberus, perform some combos on it to trigger the kill
sequence. Press the Circle button and then rapidly mash it to
decapitate the first head. Repeat the strategy two more times to kill
the three-headed *****.
Now make your way to the lower area of the courtyard to see some
statues. Destroy the third statue to bring down a pedestal. Drag and
kick the pedestal under the ledge that Cerberus emerged from and then
jump up to the top to find a Save Point on the left side.
SAVE GAME!
This may seem like a dead end but its not. Squeeze between the pillars
right next to the Save Point. Now scale down the wall to the bottom
area. Go around the ledge to find two chests with goodies.
Ascend the ladder located between the chests and grapple the ceiling.
Make your way down the ceiling while eliminating soldiers. Head all the
way to the other side of the ceiling and then climb up to the top.
-----------------------------------------------------------------------
-----------------------------------------------------------------------
+++ AREA: UPPER GARDEN - PATHWAY TO THE STEEDS +++
Once you climb up, more hounds will appear. There are also some
annoying archers on the other ledge, too. Use the Typhon Bane on the
archers and grab and kick all the hounds until the area is cleared.
Jump towards the adjacent balcony and more soldiers and archers will
appear. Eliminate them all to clear the area and then approach the
lever and activate it to descend.
In the next area, you will encounter the Siren. She has two attacks: a
double swipe attack and her shriek attack. If you stay far, you can
avoid SOME of her shrieks. For this battle, use HARD combos and lots of
evasion for the best results. Do 1-2 hard combos and then roll away.
When the Circle Button appears above her head, press it to kill her
(and crack the door). Kill three Sirens to blast the door open but DO
NOT exit just yet!
++POWER-UP: GORGON'S EYE:
See that massive chain on the wall? Climb up the ledge next to it and
then jump onto the chain and run up to the top. Scale the ceiling and
scale to the other end to find a couple of chest with goodies including
a Gorgon's Eye!
Exit the area to find the Save Point.
SAVE GAME!
Now jump down onto the large chain and make your way towards the Steeds
Of Time.
-----------------------------------------------------------------------
-----------------------------------------------------------------------
+++ AREA: THE STEEDS OF TIME - ENTRANCE +++
Climb up to the top. Go around the gate entrance to find a lever on the
other side. Activate it to bring down a zipline. Head for the zipline
and zip down the next balcony for first boss fight since the Colossus!
+++BOSS BATTLE: THESEUS
WAVE 1: This fight isn't as hard as it looks. The main strategy here is
to use DEFENSE and lots of quick combos. Attack Theseus and then roll
back. When you are attacking and see that he is about to strike, press
the BLOCK BUTTON to counter. Blocking is the key! Always BLOCK!
Use evasive rolls and well-timed blocks to defend from the boss.
Sometimes the boss will grab you and you are prompted to rotate the
Analog stick. When successful, Kratos will grab the boss and slam him
down. Keep up the defensive tactics and the boss will soon keel over.
WAVE 2: Theseus will perch himself above the doorway and start shooting
thunderbolts and summoning ice spikes. Use evasive rolls to keep from
being hit. To kill the boss, shoot arrows at him with the Typhon Bane.
Keep firing at him non-stop until your Magic is depleted.
At that point, Theseus will summon minotaurs. Destroy the minotaurs to
replenish health and Magic and continue to shoot arrows at Theseus
until he falls over.
WAVE 3: When prompted, press the Circle Button to perform a fatality.
Once Kratos grabs the Key Item, mash the Circle Button for a bloody
finish to Theseus. Eeeeew!!!
+++KEY ITEM OBTAINED: THE HORSEKEEPER'S KEY
Enter the room and open the two chests for goodies. Read the book on
the mantle if you want and then exit the area on the left or right
side. Make your way to the top of the steed and jump to the upper tower
and zip back to the area where you started the level. Be sure to grab
the chests from both sides before taking the zipline because you won't
be coming back to this area!
-----------------------------------------------------------------------
-----------------------------------------------------------------------
+++ AREA: HORSEKEEPER'S DOOR +++
Place the Horsekeeper's Key on the front door and enter inside.
Approach the mantle and press the R1 Button to obtain a new power.
+++NEW POWER ACQUIRED: RAGE OF CRONOS
Use your new power on the soldiers that appear. Clear out the area to
open the gates. Exit from the left side and go up the ladder to the top
to find the Save Point.
SAVE GAME!
On the other side of this area is a chest with a Phoenix Feather, so
don't hesitate to grab it. Now make your way down the pathway to the
reins of the steeds.
-----------------------------------------------------------------------
-----------------------------------------------------------------------
+++ AREA: REINS OF THE STEEDS +++
PUZZLE TIME!
+++THE COLORED LEVER PUZZLE SOLUTION:
Here's how it works, there are four different colored levers. Each one
you pull slowly rotates back into position. When you pull a lever, a
certain energy source will open in the upper area and you must insert
the Horsekeeper's Key to keep it open.
Rotate the GREEN lever. Quickly make a left turn and scale the wall to
the top. Approach the pole that is flowing with green energy and place
the HK Key on it (BE QUICK!). Notice the little harpie with the grip
holder?
**NOTE: After activating the green energy pole, jump all the way down
to the bottom to find a chest with a Gorgon's Eye.
Now head back to the lever area and rotate the RED lever. Quickly turn
right and scale the wall to the top and place the HK Key on the red
energy pole. Notice that other harpie with the grip holder? Go back
down and rotate the BLUE lever. Run back up to the right side and climb
up to the top. Use the grip holder and swing to the other area and
quickly ascend the stairway to the blue energy pole. Place the HK Key
on it. Now jump back to the last lever.
Yup, you guessed it. Do the same thing with the YELLOW lever on the
left side. Once all four levers and poles are open, head back to the
lever area and press the R1 Button to unlock the reins.
Now approach the center and press the R1 Button. Time to wrangle up
them horses, YEEEHAWW!!! Rotate the analog stick in the direction
indicated onscreen to wake up those valiant steeds, HEIGH HO SILVER!!!
After the cutscene, work your way BACK to the Garden of Lahkesis.
Destroy all the soldiers and minotaurs to unlock the gates and then
cross the gigantic chain back to the temple.
-----------------------------------------------------------------------
-----------------------------------------------------------------------
+++ AREA: TEMPLE OF LAHKESIS +++
As you head back to the temple, scale the wall and destroy the rubble
blocking your way. Head up to the top and go around the ledges to find
a Save Point.
SAVE GAME!
Enter the next area.
-----------------------------------------------------------------------
-----------------------------------------------------------------------
+++ AREA: THE DIVINE POOLS +++
Enter the Divine Pools to encounter some new harpie enemies. When you
kill them, they explode so be careful! Once the area is clear, approach
the back wall of the waterfall and destroy the wall to gather lots of
blood and find a blood chest.
Go up the waterfall and make a right turn. You'll find one more blood
chest. Now head left to a balcony and go around it. See that wall?
Scale it all the way to the left to find a hidden ledge with three
chests (one that has a Gorgon's Eye!).
Go back to the wall and scale to the bottom ledge. Make a right turn
and continue scaling down and then left. Break open the wall to find a
hidden chest with a Phoenix Feather inside. Now go back up to the upper
ledge and eliminate the exploding harpies and then kick the double
doors open. Enter inside for a new puzzle!
+++AMULET OF THE FATES PUZZLE SOLUTION:
In this massive room, there is large statue with a green Amulet on its
head and a step-button across the doorway you just entered. Jump down
to the bottom area. There is a lever on the upper left of the area that
will only partially open the metal gate if you activate it. There is
also a step-button on the lower area of the floor. If you step on it,
the pillars will rise and then fall when you step off. (There's also a
hidden chest with a Gorgon's Eye next to the button!)
See that large centerpiece in the middle of the room? Walk up to the
front of it and drag it BACKWARDS to reveal a hole. Swim into that hole
and break open the wall blocking the way. Emerge on the other end and
approach the statue to obtain the Amulet of the Fates Key Item!
Now swim back to the other side. Stand on the button to raise the
pillars but DO NOT STEP OFF! Activate the Amulet (L1 + R1) to freeze
time and then make your way to the pillars and jump back to the top
area before the timer runs out. Now step on the button across from the
statue and then activate the Amulet. Run towards the statue's hands and
jump on them to trigger a cutscene.
After the cutscene, smack the statue's head off and then jump down.
Turn left of the statue to find a Phoenix Feather and a blood chest on
the other end. Exit to the area outside to encounter the shadow wraith
enemy and some harpies.
-----------------------------------------------------------------------
-----------------------------------------------------------------------
+++ AREA: OUTER GARDENS +++
There's no need to use the Amulet for this battle. Use simple BLOCKING
techniques and lots of hard combos on the shadow wraiths. Grab them
when they've been weakened to kill them. Four wraiths appear, so get to
it! Once the area is clear, destroy that noisy goddamn talking statue
head to open the next area.
Cross the bridge to the next series of balconies. There are chests on
the left and right side (one with a Phoenix Feather inside!), so grab
it while their hot! Take the ladder down to the bottom area.
-----------------------------------------------------------------------
-----------------------------------------------------------------------
+++ AREA: DESTINY'S ATRIUM +++
As you approach the center of the atrium, a couple of wild hogs and a
Cyclops will appear. Grab the hogs to kill them. For the Cyclops, use
evasive rolls and hard combos (use the Square, Square, Triangle combo
for more damage). All it takes is some fast evasive reflexes to stay
outta trouble.
When the first Cyclops falls, two more appear. Rid them both using Rage
Powers and whatever magic you wanna use. Once they've both fallen, it's
time to solve the puzzle of the laser eye!
**NOTE: After defeating the Cyclops, a new path with a fireball-spewing
wall will open. Ignore it for now because you don't have the
appropriate tools to crack it.
+++LASER EYE PUZZLE SOLUTION:
At the atrium, you will notice that there are four sets of ladders: two
where you descended and two near the large statue head. Ascend the
ladders near the statue head to the upper balcony.
On either side of the balcony are ledges with hard-to-see statues. Go
to the right side and look for the statue and a lever to activate.
Activate the lever to lower the upper ledge. Grab the statue and drag
it on top of the ledge. Activate the ledge again to raise it up. Now
double jump up to where the statue is located and use a fully charged
kick to fling the statue halfway across the balcony.
Now head for the statue and drag it into place in front of the left eye
to block the flow of energy. For the other eye, look for the statue on
the opposite ledge and just drag it in front of the other eye to
trigger a cutscene! WHEW! Now jump down and approach the SAVE POINT.
SAVE GAME!
Exit the area towards the forest area.
-----------------------------------------------------------------------
-----------------------------------------------------------------------
+++ AREA: BOG OF THE FORGOTTEN +++
Enter the area and head all the way down to trigger a cutscene. Press
the buttons indicated onscreen while being dragged to keep from getting
killed. Once you make it to the end of the path, its boss battle time!
+++BOSS BATTLE: THE BARBARIAN KING
This is a pretty lengthy battle that requires lots of patience and
quick evasion. Think you can handle it, Spartan?
WAVE 1: The BK will circle around the arena and shooting arrows at you.
Block his arrows and pound hard combos towards the horse. That's pretty
much the strategy for this wave. Once the Circle Button appears, press
it to dismount the BK and slaughter his horse.
WAVE 2: Here's the long part of the battle. The BK is pretty powerful
and it'll take LOTS of hard combos to whittle his health down. The BK
has four attacks: ground pound, a double swipe, hellspawn summons, and
the legions of undead souls.
Attack him after he pounds the hammer. Get in as much hard combos and
then evade before he counters. Remember to BLOCK! Keep up this strategy
for this portion of the battle until he starts summoning the hellspawn
soldiers. Eliminate the soldiers for health and magic and continue
pounding combos on the BK. Now would be a REALLY good time to activate
Rage of the Titans.
+++TITAN MODE NOTE: I didn't encounter this in Normal Mode, but in
Titan Mode, the BK has a new move where he grows to three times his
size. When that happens, use continuous aerial combos and he'll start
shrinking back to normal.
After much, MUCH damage is inflicted, the Circle Button will finally
appear above the BK's head. Press it to begin the brutal kill sequence.
Once Kratos grabs the hammer, press the buttons shown onscreen to
finish off this boss! Okay, so it wasn't as bloody as the Theseus
battle, but whatever!
-----------------------------------------------------------------------
-----------------------------------------------------------------------
+++ AREA: ARENA OF THE FORGOTTEN +++
With the Barbarian Hammer in your possession, put it to use and start
smacking the crap out of the enemies that appear. The Barbarian hammer
is SUPER hard to get used to because of its slow speed but with some
practice, you'll get used to it (for all of you Ninja Gaiden BLACK
fans, the hammer is similar to using the Unlabored Flawlessness).
Now look above the trees to see a grip holder. Jump and swing out of
the arena to the next area. Head down the green path (kill those hogs
in the way to a new area).
-----------------------------------------------------------------------
-----------------------------------------------------------------------
+++ AREA: TEMPLE OF EURYALE +++
The Save Point is located on the right side of the temple entrance.
SAVE GAME!
Ignore the path on the left side of the temple because you don't have a
specific Key Item yet. Instead, continue past the Save Point to the
other end. Head down the path to trigger a short cutscene. Approach the
dead soldier to obtain a Key Item.
+++KEY ITEM OBTAINED: EURYALE'S KEY
Once you grab the key, some hogs clad in armor (huh, what?) will
appear. Eliminate them (or don't) and head back to the temple entrance.
A couple of skeleton warriors will rise at the temple entrance.
These enemies are quite strong and require a little more power to
defeat. Equip the Barbarian Hammer and pound the crap out of them. Now
head for the door on the left side of the temple entrance and use the
key. Enter inside to see a chest with some green goodies.
Just across from the green chest is a well-hidden chest with a Gorgon's
Eye in it, so grab it! Enter the next area to encounter a new enemy.
-----------------------------------------------------------------------
-----------------------------------------------------------------------
+++ AREA: RUINS OF THE FORGOTTEN +++
A mega-Cyclops will appear and try to stomp on you. Just like with the
previous battles with the Cyclops, use hard combos and quick evasion.
The Cyclops has a pretty strong club so avoid getting whacked by it.
After much damage, press the Circle button when prompted to trigger the
kill sequence. Press the buttons that appear onscreen to remove the
Cyclops' eye. Once the first one is killed, more soldiers and one more
Cyclops will appear. Take care of them using Rage powers and then grab
the eye from the Cyclops.
**NOTE: Collect 20 Cyclops Eyes to unlock a special item!
Head for the doorway on the teeter-totter and pull the coffin-looking
thing out of the way. Open the gate and head inside. As you circle
around the hallways, go all the way to the end (eliminate the enemies)
to find two chests with goodies. Head back to the middle of the hall
and enter the cave area.
Jump down to encounter harpies and shadow wraiths. Destroy them with
ease using the hammer and Typhon's Bane. Once the area is clear,
destroy the large rock pillar in the center of the room to reveal a
grip holder above.
Now jump and swing your way past two areas to the next area. In the
next area, you will see a ladder on the right side. Climb it up and
then take the zipline to the other end (eliminate the enemies) to find
two chests (one with a Gorgon's Eye!). Jump down and continue past the
red waters to an area with some deadly archers.
The archers here tend to use explosive arrows and throw bombs at you.
Use the Bane to drop two of them down but watch out! They will crawl
towards you and self-destruct! Approach the pillar and press the R1
Button and the mash the L1 and R1 Buttons to destroy the pillar. With
the area clear, continue onwards to the next area.
+++THE TRI-GATE PUZZLE SOLUTION:
There is a step-button in the center of the room, a partially-opened
gate with a step-button on the left side, and a closed gate on the
right. Look for the lever on the upper right side of the room and
activate it to lower the gate on the right side. There is a dead body
lying on the ground but don't grab it yet!
Break open the wall next to the body to reveal a small waterway
(eliminate the soldier). Go to the left gate (jump over the spikes) and
break open the wall behind the gate to reveal another waterway. Now go
back and grab the body on the right side and toss it into nearby the
waterway. Head BACK to the waterway on the opposite side and wait for
the body to appear. Quickly grab the body and place it on the step
button to partially open the main gate. But before you exit the room...
+++SECRET CHESTS:
See those chests on the upper right ledge? How do you get them? Stand
in the center of the room and use the Typhon Bane to shoot down a hard-
to-see grip holder above the chests. Grapple your way to the top and
grab the goodies!
Now go to the center of the room and step on the button to open the
main gate. Quickly had for the Save Point before the gate closes!
SAVE GAME!
Continue down the path to a new area.
-----------------------------------------------------------------------
-----------------------------------------------------------------------
+++ AREA: RIVER OF THE FORGOTTEN +++
After the cutscene, jump down to the giant floating waterwheel and
start rotating the lever. As you turn the lever in a circular motion,
enemies will jump at you to distract you.
Your best bet to rotating the wheel without it going back too far is to
use the Rage of Cronos magic attack. This will temporarily stop the
enemies in their tracks and allow you to continue rotating the lever.
Make it past both waterwheels and then head for the next area.
+++MINI-BOSS BATTLE: PETRIFIED MINOTAUR
This boss is sort of like the second boss from the first God Of War
game. Only this one is easier to defeat! The enemy has two attacks: a
ground pound and a circular attack. Use quick evasion and hard combos
on it to whittle its health down. When the Circle Button appears, press
it to trigger the kill sequence. Press the buttons onscreen to defeat
it. Piece o' cake!
Run up to the tree bark and bring it down. Go up the wooden bark and
scale the wall and then jump down. Take the zipline to the other end
while destroying the soldiers that appear. Jump down at the next ledge
and head for the door next to the spinning waterwheel. Open the door to
reveal an Amulet statue.
Activate the Amulet to slow down the waterwheel. Run past the frozen
waterwheel to the opposite side and jump down to a conveyor belt.
Destroy the soldiers and time your movements as you descend the
conveyor belt that has gorgon stares. Destroy the wooden wall at the
end of the belt and then jump and swing to the other end of the area.
Destroy the statue in the middle to reveal a coffin-like item blocking
the way. Push the coffin FORWARD and out. Jump down to end up in the
area where you started the level. Push and kick the coffin next to the
doorway entrance with the other coffin to reveal a gap under the
building. Approach the gap and have Kratos toss the large building into
the water below to reveal a new path.
-----------------------------------------------------------------------
-----------------------------------------------------------------------
+++ AREA: THE PETRIFIED PATH +++
Jump down to the newly opened path to the other side. Scale the wall
and destroy the tree blocking the way. Make your way to the other side
and jump down. Go down the pathway (ignore the doorway with the
rotating wheel) and make a left to see some petrified minotaurs. See
that soldier on the ground? Approach him and talk to him.
After the cutscene, a medusa will appear. Kill her the old-fashioned
way and then grab the soldier's body. Haul it with you to the other end
of the path with the conveyor belt and then drop it down.
++NOTE: At the end of this pathway are two chests (one with a Phoenix
Feather!).
When the rotating wheel collapses, smash it down and enter the next
area. Raise the gate to encounter another Cerberus-type enemy. I don't
really consider this a boss battle so I won't label it as one. The
hound likes to use fireball attacks. Just use lots of evasion and hard
combos to whittle its health. Remember to block its attacks! This enemy
has a lot of HP so be patient and keep damaging it until the Circle
Button appears. Press it to end the battle and obtain a new Key Item.
+++KEY ITEM OBTAINED: GOLDEN FLEECE
Now pull the nearby lever to activate a fireball-spewing wall. Stand in
the area where the fireball is landing and block the fireball at the
right time to deflect it back at the wall. Exit the arena and eliminate
the gorgons that appear but DO NOT EXIT THE AREA YET!
+++POWER-UP: GORGON'S EYE
Just before you exit the area, destroy the rotating wheel to reveal a
secret chest with a Gorgon's Eye!
+++SECRET: URN OF THE GORGONS
As soon as you receive the Fleece, go BACK to the area with the large
waterwheel (that you had to freeze with the Amulet). Remember that
conveyor belt that had all those gorgon stares? If you use the Golden
Fleece on each one, you will be prompted to quickly press a specific
button. When successful, Kratos will deflect the gorgon stare and
destroy the wall. One of the destroyed walls contains the Urn Of The
Gorgons! SWEET!
Now that you've gotten all the goodies, make your way back to the
Temple of Euryale entrance.
SAVE GAME!
-----------------------------------------------------------------------
-----------------------------------------------------------------------
+++ AREA: TEMPLE OF EURYALE +++
Head to the front door and use the Golden Fleece to deflect the
medusa's gaze and destroy the door. Enter inside and open the next
door. Destroy the petrified soldiers and the un-petrified ones that
appear and then take the ladder going down.
In this large hall, two minotaurs and numerous soldiers will appear.
Try to kill the minotaurs first by using Rage and then deal with the
soldiers last. When the area is cleared, exit to the next area to
trigger a cutscene. Approach the lever and start rotating it to descend
to the lower level. When you reach the bottom, rid the harpies.
++POWER-UP: GORGON'S EYE & PHOENIX FEATHER
See that logo in the middle of the wall? Destroy it to reveal a hidden
chest with a Phoenix Feather. Also, there is a hidden chest with a
Gorgon's Eye underneath the elevator you just used. Lift the elevator
halfway so that you can still exit through to the lower floor and you
will see the open door underneath.
On the second elevator (with the missing handle), use the ledges on the
wall to climb up to the top. Once you exit the area, you will encounter
a mega-soldier. Use blocks with the Fleece and counter him using the
Barbarian hammer for some insane poundage! Finish him off with a
fatality and then approach the Save Point.
SAVE GAME!
-----------------------------------------------------------------------
-----------------------------------------------------------------------
+++ AREA: LOWLANDS VISTA +++
Go back to the area where the cowardly soldier ran off to and climb up
to the top. The next part involves Kratos scaling the ceiling with a
lot of killer sawblades rotating all over the place. Climb up the wall
and start scaling past each sawblade SLOWLY! Time your moves so that
you can reach the other end.
Jump down and rotate the lever to pull back a large spiked battering
ram on the right side. Quickly make your way inside and go to the other
end to find a lever. Activate it and quickly head for the door on the
other end and open it before the battering ram squishes you. Now jump
down the bottom area and destroy the petrified soldier reading the book
on the pedestal. Read the book to trigger the next boss battle!
+++BOSS BATTLE: EURYALE
Euryale is basically a big fat version of Medusa. A lot of her attacks
revolve around her tail and her stone gaze.
WAVE 1: Euryale is pretty quick and quite powerful. Use double jumps to
evade her tails swipes and quick evasion from her shrieks and gaze.
Your best bet at damaging her is to use air attacks. Keep attacking her
from above to whittle her health down and remember to BLOCK! If you
have Rage in the Rage meter, don't hesitate to use it! When she starts
using the stone gaze, deflect it using the Fleece! At certain times,
rapidly tap the Circle button to repel the gaze back at her.
WAVE 2: Euryale will slide up one of the pillars and begin firing
fireballs at you. This is the best time to start using air attacks on
her. You can deflect the fireballs with the Fleece if you are quick
enough with the timing. When she uses her scream, be ready to deflect!
Approach her and use air attacks at her until she keels over. From
there, the Circle Button will appear, so press it and rotate the Analog
stick in the direction indicated onscreen to drag her down.
She will then slither up to the next pillar. Repeat the tactic again to
finally bring her down to the ground.
WAVE 3: Now that she's weakened, use hard air combos on her. Activate
Rage and start pounding the hurt until the kill sequence is triggered.
Press the buttons onscreen to kill her and obtain a new item.
+++NEW WEAPON ACQUIRED: HEAD OF EURYALE
Use the weapon on the enemies that appear. Kill them all using
Euryale's head to open the next area with the Save Point.
SAVE GAME!
-----------------------------------------------------------------------
-----------------------------------------------------------------------
+++ AREA: WATERWAYS +++
+++TURNSTILES AND WATERWAYS PUZZLE SOLUTION:
This may look like a complicated puzzle, but it ain't! It just happens
to be VERY long! Turn the first turnstile (white color) all the way
around until the large pillar stops. Jump to the lever across from the
turnstile and activate it.
Quickly activate the Amulet and swim down to the newly opened gate
under the water to the other side. Once the gate closes, stay under
water and activate the lever next to where the gate shut just in case.
Now swim up to the top and turn the turnstile (yellow color) until the
large pillar stops. Swim down and activate the other lever in the
water. As the double gates open, swim inside and use a lightly charged
dash to make it to the other end of the gate before it shuts.
Swim up to the top and turn the turnstile (red color) until the large
pillar stops.
**NOTE: Behind this turnstile is a large cracked wall with a hidden
chest that has a Gorgon's Eye!
Swim back down and find the wooden door in the water on the right. Use
a charged dash move to destroy the door. Swim up and turn the turnstile
(green color) until the large pillar stops. Now approach the last lever
across the turnstile and activate it to open a doorway above. Enter the
nearby doorway and turn right to an open arena. Approach the lever and
turn it to trigger an enemy battle.
Destroy the enemies using hard combos until the area is cleared. Now
here comes the hard part. Turn the turnstile until the large pillar
stops. Once you let go, the pillar will slowly start going back down
after a few seconds. Activate the Amulet and quickly exit to the ladder
and head up to the top and step on the button. By this time, the Amulet
runs out, so activate it again and then start jumping and swinging from
pillar to pillar. The third pillar is the one that is slowly going down
so BE QUICK when swinging around each pillar! Swing past all five
pillars to complete this puzzle! WOOHOO!
-----------------------------------------------------------------------
-----------------------------------------------------------------------
+++ AREA: THE CRUSHING FLOOR +++
Make your way inside the doorway into a small room with a lever.
Activate the lever to make the floor start rising. As the floor rises,
hounds will start jumping down from above. You can't spend your time
fighting all of them so use the Cronos Rage attack.
When the floor reaches the ceiling, have Kratos push the floor back
down. The exit to this area is locked and the only way to open it is to
"push" the floor back down at least 5-6 times before you can exit. Once
you exit the room, go around the hall to encounter some harpies and
some wooden bars to cross.
Use the Typhon Bane on the harpies and then slowly cross the bars. On
the last bar, jump onto the wall above and then shimmy all the way to
the other end and jump down.
+++SECRET AREA:
Notice that at the end of the large chasm across the wooden bars, there
is a rope hanging down. Jump towards that rope and climb it to the top
to find two well-hidden chests in a secret area!
Exit the area and you'll encounter another large petrified minotaur
mini-boss. The tactic is still the same, so get to it! Once the
minotaur is gone, jump and swing to the Save Point!
SAVE GAME!
-----------------------------------------------------------------------
-----------------------------------------------------------------------
+++ AREA: CATACOMBS OF THE FALLEN +++
Go through the catacombs and destroy the skeleton soldiers blocking the
way. Approach the spiral staircase and go all the way to the top.
Activate the lever to bring down more stairs. Exit the area back to...
-----------------------------------------------------------------------
-----------------------------------------------------------------------
+++ AREA: DESTINY'S ATRIUM +++
+++OPTIONAL CHESTS: When you exit the stairway, go BACK into the Bog Of
The Forgotten. Just before you encountered the Barbarian King, there
were two chests at the end of the bog. Go back and open them for some
major goodies! And I mean MAJOR GOODIES!
Remember that fireball-spewing wall from earlier in the game? Now you
can get through it. Stand in the path of the fireball and use the
Fleece to shatter the wall open. Shimmy on the right side of the cavern
and then make your way down and outside. Eliminate the archers and the
mega-soldier. Use the Bane for the archers!
Jump and swing to the next ledge but DO NOT swing to the next grip
holder yet! Land onto the next ledge, and then scale the wall to the
top to find two chests (one with a Gorgon's Eye!). Now continue
swinging and jumping to the other side. Eliminate the soldiers and then
climb up the ladder to the next area.
-----------------------------------------------------------------------
-----------------------------------------------------------------------
+++ AREA: COURTYARD OF ATROPOS +++
Kill all the shadow wraiths in this area. Once the area is cleared,
head for the Save Point.
SAVE GAME!
You can't solve the puzzle in this area for now, so make your way to
the doorway across the Save Point. Open the door to a large hall.
-----------------------------------------------------------------------
-----------------------------------------------------------------------
+++ AREA: HALLWAY OF ATROPOS +++
Make a right turn to the adjacent hall to encounter some enemies. These
enemies (priests) summon minotaurs to fight for them, so be smart and
kill them first! Block their green ball attacks and simply pound the
combos onto those priests until they've all fallen. Oh, and don't
forget to kill those minotaurs!
+++THE DOUBLE STATUE PUZZLE SOLUTION:
In the room are two statues and a turnstile that raises a large
platform. When you rotate the turnstile, the platform rises but will
quickly go down once you release the lever. Here's how to solve this
really tedious puzzle...
Grab one statue and place it on top of the pedestal. Grab the other
statue and place it on the RIGHT side of the pedestal but not on it.
Now rotate the turnstile all the way to the top. As soon as you release
the lever; quickly grab the statue that was next to the pedestal and
drag it (or kick it) UNDERNEATH the platform as it falls halfway. Now
climb on top of the statue and jump to the top.
Open the chests and then ascend the ladder to the area above. There is
a far off chest but if you try to approach it, enemies will appear. If
you want it, get it. But if not, take the stairway on the right side
and go down to the hall below. Inside you will encounter a new enemy
(satyrs) with some strong skills. For this battle, use the Fleece
counterattack on them to get the upper hand.
Defeat both the satyrs to open up the doorway. Approach the large block
and pull it BACKWARDS. Jump on top of it to find a hidden chest with a
Gorgon's Eye. Jump back down and then kick the block FORWARD. Jump down
back to...
-----------------------------------------------------------------------
-----------------------------------------------------------------------
+++ AREA: COURTYARD OF ATROPOS +++
Drag the large block to the nearby pillar that has a broken ladder.
Place the block underneath and then jump up to the ladder. Climb up to
the balcony above. Rid the harpies above first!
Explore the upper balcony to find some chests and a chest with a
Phoenix Feather. There is also a statue that is missing a shield
Hmmm...I wonder why. Make your way to the door located on the left side
of the large statue's head and enter. In the middle of the room will be
a couple of soldiers and a berserker enemy.
Eliminate the soldiers the usual way but use the hammer against the
large berserker guy. Block and counter his attacks and then pound him
into dirt. When the Circle Button appears above its head, press it to
perform a really bloody fatality. Eliminate the second berserker to
clear the area. Exit the room to find a Save Point.
SAVE GAME!
-----------------------------------------------------------------------
-----------------------------------------------------------------------
+++ AREA: EDGE OF CREATION +++
Go around the ledge and then swing and jump your way to the other side
of the area. Eliminate the soldiers that appear here.
+++THE MOVING VINES PUZZLE SOLUTION
This puzzle is not so difficult to figure out. First, step on the large
circular stone to make the large vines come out of their holes.
Activate the Amulet and cross the vines to the center platform. Quickly
make a left turn to the vines on the left side before the timer runs
out. Destroy the enemies on the platform to clear it.
Step on the stone to make the vines come out. This time, head to the
center platform and then turn left to the next ledge. Destroy the
enemies that appear and then step on the stone to reveal the last set
of vines. Activate the Amulet and then head for the center platform and
then turn left to the main doorway.
**NOTE: There is a hidden chest on the center platform (with the two
trees). Jump down between the trees and you will land a tiny ledge with
a chest that contains a Gorgon's Eye. If you take this item, you will
have to do the puzzle all over again by stepping on the stone and going
back to the starting point.
Now enter and open the door to fight someone you may have heard of
before from a certain movie...
+++BOSS BATTLE: PERSEUS
That's right! The main character from the movie "Clash Of The Titans"!
This battle is quite a trip and requires some patience and quick
evasion on your part to defeat Perseus.
WAVE 1: Although Perseus is invisible you can still see his footsteps
as he runs on the water and you can also see his shadow if you stay
under the shade. Block all his attacks and then use hard combo counters
to whittle his health down. Continue the tactic until the Circle Button
appears above his head. Press it to grab Perseus and destroy his
helmet. (It may take a few tries to grab him but keep going!)
WAVE 2: Armed with sword and shield, stick with the same plan and
inflict hard combos on Perseus while staying defensive. When he starts
his slingshot attack, block it and then roll forward and attack.
Continue to pound the combos while blocking his attacks. When he uses
his sunlight attack, quickly wiggle the analog stick to recover and
then attack him before he can strike. When the Circle Button appears,
press it to grab Perseus and destroy his sword.
WAVE 3: This last part of the battle can take a very long time because
you need to do one thing to end it: push Perseus to the wall at the
back of the arena. Perseus will continually run from end to end of the
arena while attacking you. Keep hitting him with combos and then try to
get him near the wall to tire him out. When the Circle Button appears,
press it and follow the instructions on the screen to finish him off.
+++KEY ITEM OBTAINED: PERSEUS SHIELD
Open the chests near the chain for some goodies and then slide back
down to...
-----------------------------------------------------------------------
-----------------------------------------------------------------------
+++ AREA: COURTYARD OF ATROPOS +++
+++COURTYARD OF ATROPOS PUZZLE SOLUTION:
Now it's time to solve this mystery! With the Perseus Shield in your
hand, go to the upper balcony and place it on the statue on the lower
right area (destroy its perch first).
Grab the statue and drag it out. Kick it to the lower courtyard and
then jump down. Drag the statue to the square perch on the wooden
bridge and place it. Now rotate the turnstile in the middle of the
courtyard to raise the bridge to block one of the laser eyes. Now what
do you do? After a few seconds, the bridge lowers back down. AAAAHHH!!!
NOW WHAT??!!!!??? Simple! As soon as you raise the bridge, climb back
to the top balcony using the nearby ladder and use the Fleece on the
other eye! HAH, GOTCHA!
Head back to the Save Point and save your game.
SAVE GAME
Now head on up the stairs to a new area.
-----------------------------------------------------------------------
-----------------------------------------------------------------------
+++ AREA: LOWLANDS ENTRANCE +++
As you go up the path, you will see a path on the right with two
archers and a grip holder and the other path is a trap floor that locks
a door to the chests across from you when you step on it.
Ignore the chests and kill the archers with the Bane. Jump and swing to
the other side (or swim on the water). Go around the corner and jump
into the water and emerge on the other side. Keep going around the
corner and exit. You will see a Save Point across the broken bridge but
don't go to it yet! Look for the wall on the right side and scale it to
the top. Approach the lever and activate it to open the gate below.
Jump down and enter the small area to find the Dark Raven that was
killed earlier in the game. Grab the weapon sticking out of its body to
acquire a brand new weapon!
+++NEW WEAPON ACQUIRED: SPEAR OF DESTINY
Use the spear on the enemies at appear to clear out the area. Now it's
puzzle time!
+++SECRET: URN OF OLYMPUS
Remember that chest you saw that had the trap floor and spiked doorway
at the other side of this area? Here's how to get it: grab the statue
with the green emerald on it (the one to use for the Amulet) and drag
it onto the turnstile. Turn the turnstile clockwise until the statue is
facing south. Now drag the statue to the lower area. Activate the
Amulet and head back to the area with the trap floor before the timer
runs out. If successful, you will enter the room and find three chests
with a Gorgon's Eye, Phoenix Feather, and the Urn Of Olympus!
Head back to the area where you saw the Save Point (near the broken
bridge). Bring the statue BACK to where to you found it and place it on
the turnstile. Rotate the turnstile until the statue is facing EAST and
then place it back where you got it. Now go to the teeter-totter bridge
and jump on it to level the bridge. Activate the Amulet and then cross
the bridge to the Save Point.
SAVE GAME!
-----------------------------------------------------------------------
-----------------------------------------------------------------------
+++ AREA: CROSSING THE LOWLANDS +++
Now comes the fun part! If you've seen the commercials for this game,
then you'll know what I'm talking about. It's the pillar jumping mini-
game! Yeah! Here's how it goes:
Swing and jump past the first two grip holders and then grip the
pillar. Kratos will then jump to the adjacent pillar and start swinging
in a circle. Land on the platform across the pillar and let it fall. As
it reaches near the bottom, double jump to the grip holder and hold on.
The pillars across from you will begin to fall. Wait for the nearby
pillar to drop down and then swing and jump past it to the second
falling pillar. Wait as the pillar drops lower to jump towards the
lower grip holder. Jump and swing towards it and Kratos will begin
hopping from pillar to pillar.
On the fourth jump, wait for the pillar that you are on to slowly fall
down near the last grip holder. Double jump to it to swing to safety!
WHEW! That was crazy awesome! Now enter inside the cave.
This next part involves two difficult battles inside the cave. Go up
the path and you will encounter sirens and some large minotaur enemies.
Use the Fleece to defend from all the enemies and try out the Spear of
Destiny if you wanna spice up the battle. Be sure to perform fatalities
on them to restore health and Magic! Once the area is cleared, enter
the next area for ANOTHER battle!
The next area has some large satyr and berserker enemies. Stay
defensive and use the hard combos with the hammer or spear. Perform
fatalities on the enemies to clear the area. Now exit this cave and
head outside to find the Save Point.
SAVE GAME!
-----------------------------------------------------------------------
-----------------------------------------------------------------------
+++ AREA: THE GREAT CHASM +++
Go down the bridge to encounter a scrawny fellow by the name of Icarus.
+++BOSS (?) BATTLE: ICARUS
I don't know if this encounter with Icarus qualifies as a boss battle
but I'll let it slip. Simply follow the directions shown onscreen as
you fall down the chasm. When Kratos is above Icarus, start punching
him (press the Square Button continuously). Continue pressing the
analog stick in the direction indicated until you are prompted to
rapidly tap the Circle Button. Once that's done, Kratos will receive a
new power.
+++NEW POWER ACQUIRED: ICARUS WINGS
-----------------------------------------------------------------------
-----------------------------------------------------------------------
+++ AREA: THE FACE OF ATLAS +++
After landing on the ground, make your way around Atlas (go left) and
all the way to the back to find the Save Point and some chests.
SAVE GAME!
Now it's time to put those wings to use! Go to the wall where you
landed (near Atlas' nose) and scale to the top and then jump down to
the ledge below. Go around the corner to see large gaps. If you try to
jump, you will land on the ground below.
When you jump a gap, press the X Button and then press and hold it a
second time to glide to the next ledge. Jump and glide to the next
ledge and climb up. See those hanging platforms with the chains? Glide
from platform to platform (eliminate the harpies) until you see a
platform in the red river below.
Glide to the bottom platform and then glide into an icky cave entrance.
Satyrs and harpies will appear, so eliminate them with the spear! Once
the area is cleared, go to the end of the path to a doorway that is
being protected by tentacles. Attack the tentacles to repel them and
then grab the large "bone" and pull it BACKWARDS.
Drag the bone to the left of the door and then jump to the hidden ledge
on the top left side to find a chest with a Phoenix Feather and more
goodies. Now jump down and drag the bone from the backside into the
doorway. Make sure to drag it from the other side! Jump on top of the
bone to the upper ledge and then head down to the next area.
+++MINI-BOSS BATTLE: PETRIFIED MINOTAUR
The petrified minotaur is back and stronger than before. Use the same
tactics from your previous battles with him and stay evasive! Defense
will not work for this battle, only evasion!
After much damage is dealt, the large platform will sink. Jump and
glide to the wall and scale it. The boss will start tossing rocks at
you, so either jump out of the way or hit them. Once the platform rises
again, continue the hard combo assault until it finally dies.
Once the minotaur dies, it leaves a tiny rock behind. Drag the rock to
the nearby doorway and then jump on top of it. Jump and glide to the
doorway above and climb up. Glide to the bottom and you will see two
chests. One of them has a Phoenix Feather, so go get it! Exit the room
and find the Save Point on the left side.
SAVE GAME!
-----------------------------------------------------------------------
-----------------------------------------------------------------------
+++ AREA: INSIDE THE MIGHTY TITAN +++
After you save your game, look next to the Save Point. Do you see those
tentacles? Attack them to release a floating boulder. Now catch up to
the boulder and jump on top of it. Destroy the obstructions in the way
and let it float to the edge of the river. There is a grip holder at
the edge, so jump and swing to it. Swing and glide to the next area.
Destroy that obstruction in the way. There is a high ledge that you
cannot glide to, so what now? When you destroyed the obstruction,
notice there is hot steam coming out of it. Stand on top of the steam
and double jump and unflap your wings to soar higher! Glide to the top
ledge and enter! Easy.
AS you enter the next area, you'll notice that there are numerous
harpie hives in the cavern. Go up to each one and destroy them to rid
all the harpies in this area. There are six hives to destroy so get to
it! Once all the hives are gone, kill the remaining harpies to clear
the area of enemies.
One of the destroyed hives revealed a wall to scale. Jump up to the
wall and scale to the other end and jump down. Open the two chests if
you want and then jump and glide to the adjacent wall. Scale it to the
other side and destroy the stalactite blocking the way. Jump down and
out towards the open exit. DO NOT TRY TO JUMP OUT! Look to the left of
the wall to see that it is scaleable. Scale the wall to the left and go
around the ceiling while destroying stalactites and enemies in the way.
+++SECRET: URN OF PROMETHEUS
There is a secret upper pathway on the right-hand side of the ceiling
that leads to an upper room with some chests with goodies including the
Urn Of Prometheus!
When you reach the end, climb up and out at the top. Take the platform
going down and then jump to the adjacent wall. Descend the wall and
approach the remaining stalactites. Now that a new path has been
revealed, approach the Save Point and save your game!
SAVE GAME!
Now jump and glide to the new pathway (be sure to grab some extra steam
and glide higher) to exit the area. Jump and glide to the next platform
with the turnstile. When you land, a couple of harpies and satyrs will
emerge. Kill them all with Rage of the Titans and the spear. When the
platform is clear, rotate the turnstile all the way until the platform
stops moving. Now jump and glide through the next three platforms and
then take the zipline to the Save Point.
SAVE GAME!
-----------------------------------------------------------------------
-----------------------------------------------------------------------
+++ AREA: ASCENSION OF ATLAS +++
Ascend the nearby wall and jump to the next wall. Kill the enemies that
approach you and then continue upwards. Destroy the rubble blocking the
way and go all the way to the top. At the top, you will see a grip
holder. Jump towards it and swing and jump your way past two more grip
holders until you reach a wall.
Ascend that wall and jump to the next ledge. Go around the ledge to see
two large stone blocks and what seems like a really high ledge.
+++DOUBLE STONE PUZZLE SOLUTION:
This one was quite easy to figure out. Grab one stone block and drag it
up the short slope. On top of the slope, drop it down to the ground
below. Now grab the other stone block and drag it up the slope. Drop
the stone block on TOP of the other block.
Now drag the two-tiered stone block and drag it to the high ledge. Jump
to the top ledge and grab the top stone and drag it towards the wall.
Now you can reach the higher ledge. Notice that when you reach the
higher ledge, there is a wall that you can scale across the ledge. Jump
to the ledge and scale the wall to the left to find a hidden chest with
a Gorgon's Eye.
Go around the ledge and scale the wall going up. There are falling
rocks that fall in a left and right pattern. When a rock falls on the
left side, jump to the right. And when a rock falls from the right
side, jump to the left. Understand the pattern? Make your way up and
around two walls to the other end and then ascend to the top. Destroy
the large chain to trigger a series of cutscenes.
When prompted, rapidly tap the L1 + R1 buttons to avoid getting
squished by Atlas. After another cutscene, Kratos receives a new power!
+++NEW POWER ACQUIRED: ATLAS QUAKE
Test out your new power against the enemies that appear. Destroy all
the enemies to trigger the next cutscene. Once the cutscene ends, jump
and glide to the Save Point.
SAVE GAME!
**USELESS NOTE: In case you're wondering why the voice of Atlas sounds
familiar, that's because he's voiced by Michael Clarke Duncan.
-----------------------------------------------------------------------
-----------------------------------------------------------------------
+++ AREA: THE PALACE OF THE FATES +++
Jump and glide past the platforms. Climb up the platform and then jump
and glide to the adjacent ledge. From that ledge, jump and glide to the
highest platform. Open the chest for some health and then glide on down
to the Palace gates.
Notice that the gate is barred and cannot be opened. Under the walkway
on the right side is a hard-to-see lever. Activate it and prepare for a
really intense battle. Four large Cyclops, armored hogs, and bomb-
throwing archers will join in on the battle royale.
Use Rage of the Titans as much as possible and pound on the enemies
using the hammer and various combos with the other weapons. If
possible, try to use a fatality on the Cyclops so that you can grab
their eye. Once the arena is cleared, it's time to open the doorway.
Next to where you activated the lever is a large piece of wood jutting
out next to the chest. Grab the piece of wood and rotate the doorway.
Keep rotating the doorway until the open gate appears. Now enter inside
to a massive spike trap. Activate the lever in the middle of the room
to start the revolving doorway puzzle.
+++REVOLVING DOORWAY PUZZLE SOLUTION:
This puzzle is quite painful and very annoying but what the hell can I
do about it? Watch the spikes on the floor. When you see them
protruding through the holes, it means you must move out of the way in
a few seconds or else you will get spliced. The open doorway revolves
around the room. It stops at every door for a few seconds and then
moves clockwise to the next doorway.
The doorway on the upper right side has a large stone. Wait for the
open doorway to reach this door. Once the doorway is open, grab the
stone and drag it out to solve the puzzle. A new path opens up but do
not exit just yet!
Enter each room that has a chest and grab the goodies. Look for the
room on the left with a dead body. Grab the crank key item on the body
and then exit through the newly opened path. Make a left turn at the
green chest to see a large courtyard.
-----------------------------------------------------------------------
-----------------------------------------------------------------------
+++ AREA: THE PALACE COURTYARD +++
You cannot open the doors in this area or use the horn yet. Instead,
take the ladder on the other side and climb it up to find a turnstile
with no lever. Attach the lever you found from the dead body and then
rotate it all the way until it stops. As you rotate the lever, the
flames on the left side of the TV screen will die down.
When the turnstile stops, activate the Amulet and then jump and glide
over to the ledge past the flames. Next to the flames is a tiny little
crevice that has a hidden chest with a Phoenix Feather. Grab it and
then jump over to the next balcony. Enter to find the Save Point.
SAVE GAME!
Head to the other side of the save point and jump to the next area.
-----------------------------------------------------------------------
-----------------------------------------------------------------------
+++ AREA: THE EAST AUDITORIUM +++
In the next area is a lever at the end of the hall. Also notice that
there is a steam vent on the ground. Activate the lever to open the top
portion of the metal gate. Quickly run over to the steam vent and
unflap your wings so that you soar higher and can fly over the gate
before it closes. It may take a couple of tries but you can do it!
Go down the hall and destroy the satyrs and hounds that appear. Use the
Atlas Quake for faster results. When it's cleared, open the large door
and enter the next area.
-----------------------------------------------------------------------
-----------------------------------------------------------------------
+++ AREA: AUDITORIUM OF LAHKESIS +++
Do you see that large wooden construction thingie in the room? Destroy
it and a large stone will fall to the floor. Grab the stone and drag it
outside all the way across to the other side of the auditorium.
Also, do you notice the pedestal outside with the book? Kratos cannot
read it and must use a translator. On the other end of the auditorium
is a man praying on his knees (that's your translator). If you lift him
up, the button he was kneeling on closes the gate behind you. That's
why you brought the stone with you. Pick up the man and drop him down
somewhere. Drag the stone in his place and then bring the man to the
book, but wait!
--MISSION OBJECTIVE: PROTECT THE TRANSLATOR
Satyrs and hounds will swarm at you. You must kill them all while
trying to lift the man to the pedestal on the other side. Use the Atlas
Quake to stun the enemies and then quickly pick up the man and carry
him to the pedestal. If you're sly and quick, you can carry him past
the enemies while they try to surround you!
Once you reach the pedestal, more enemies appear. Now you must
definitely kill them all! Rid all the hounds and satyrs while trying to
protect the man. When the area is clear, approach the pedestal and
press the R1 button to make the man read the book. When prompted,
rapidly tap the Circle Button on various parts of the scene.
After the cutscene with Lahkesis, approach the Ram doorway and grab the
item on the door.
+++KEY ITEM OBTAINED: THE RAM KEY
With the item in hand, open the doorway and go thru the hallway. Open
the other door and go back to the Save Point.
SAVE GAME
Go back to the courtyard and use the Ram Key on one of the doors. Enter
inside and go through the hall to trigger an enemy battle. There are
two spiked walls that are closing in slowly from both sides. To get
them to stop, you MUST kill all the enemies that appear. The best way
to rid them all quickly is to use the Atlas Quake and lots of hard
combos. Also use the hammer and pound the enemies down to shorten the
herd. Once the enemies are all dead, the spikes retract. WHEW!
Now go through the doorway and head up the stairs.
-----------------------------------------------------------------------
-----------------------------------------------------------------------
+++ AREA: GARDEN OF THE GODS +++
Enter the garden to see some familiar looking statues. There is a hard-
to-see chest in the corner of the garden that has a Phoenix Feather and
some blood. When you're done browsing, destroy the wall and enter.
It seems tempting to try and glide your way past each open gate but why
do you wanna do that? Simply approach the wall and let Kratos shimmy
all the way to the Save Point. Was it really that hard?
+++SECRET CHESTS:
As you shimmy on the ledge, you'll notice that there are two red chests
behind the metal bar windows. To access them, shimmy towards the third
metal bar window and jump down to a secret lower ledge. Climb the
ladder up and get the goodies!
SAVE GAME!
--MISSION OBJECTIVE: SACRIFICE THREE SIRENS
Go down the large chain and jump down. For this section, you must kill
three sirens using the flames activated by the levers. When you
activate the lever on the right, the flames come from the left side and
if you activate the lever on the left side, the flames come from the
right side. Understand how it works?
Attack and damage the siren until she is weakened (the Circle Button
appears above her head). You must weaken her near the walls! When she
is dazed, approach the lever on the opposite side and activate it to
burn her alive. Kill two more sirens this way to open up the door. It
will take a few tries to get it right, but keep going! You made it this
far, didn't ya?
When the large doorway opens, head inside and open the green chest.
Jump into the bloody water and swim to the other side. Avoid the spikes
and then emerge out of the water. As soon as you jump out, head TOWARDS
the TV screen to find two well-hidden blood chests. Now enter the next
room for a new puzzle!
+++THE FROZEN EAGLE PUZZLE SOLUTION:
This puzzle is also quite tedious but fun to figure out. In the room
are three levers on the right side, some frozen walls, and a frozen
eagle statue in the center of the room.
First thing to do is to jump down to the eagle statue. Behind the
statue is a lever that makes the eagle statue breathe fire every time
you pull it. Activate the lever to melt the ice wall across from it and
reveal a large globe-like mirror.
Do not grab the mirror yet! Jump to the top and look for the wall that
you can scale. Scale the wall to the top and then scale the ceiling.
There a couple of icicle stalactites on the ceiling that you can
attack. The only stalactite that you need to destroy is the one that is
directly above the entrance doorway that you came from. Once the icicle
stalactite is destroyed, it will reveal a light source beam from above.
Jump down and grab the mirror and drag it under the light beam. Notice
how the light beam is shining towards the symbol on the left side when
you place the mirror there? You need to somehow reflect that light!
Make your way towards the three levers. Each lever rotates the symbols
in a circular direction. When you grab the lever, the camera angle will
show you the symbol in the middle. Rotate all three levers until you
can match the symbol of a big fat half moon. When done correctly, the
light will reflect and melt all the ice off the eagle statue. GOOD JOB!
Now jump to the statue and grab the turnstile. When you turn the lever,
you can position the statue towards each ice wall and melt the ice off
(by activating the lever behind the statue). The only ice wall that you
really need to melt is the exit door. If you want to melt the rest of
the ice walls, that's up to you. You'll find lots of chests (one of
them has a Phoenix Feather) and some un-frozen minotaurs. When you're
done melting all the ice, exit the room to the next area.
-----------------------------------------------------------------------
-----------------------------------------------------------------------
+++ AREA: HARPIE NEST +++
Go around the corner and jump down to a room with a turnstile and three
large harpie nests. Destroy the nearby harpie nest and then scale the
wall to the top. Scale the ceiling and destroy the other two nests
while killing the harpies. Once the area is clear, jump down and turn
the turnstile until the grip holder from above stops.
Quickly double jump towards it and hang on as it slowly ascends to the
upper area. When you reach the top, jump off and head for the next
area. Open the two chests while you're at it!
+++MINI-BOSS BATTLE: HELLHOUND CERBERUS + MINI-HOUNDS + BERZERKERS
Oh god, ANOTHER Cerberus fight? Goddamn it. Unlike the other Cerberus
fight, you cannot grab the small hounds and kick them at Cerberus.
Instead, you'll need to be defensive and use hard combos on it. Four
Cerberus hounds will appear. Kill them off and then kill the two
berserkers using the spear. Perform fatalities on everyone to clear the
area and open a new path.
Enter the hall and take the hard-to-see ladder going to the Save Point.
SAVE GAME!
Before you exit the area, jump to the opposite ledge (the one across
the Save Point) to find three well-hidden chests with goodies. There
are also two chests on the bottom floor. Grab the goodies and then just
jump from ledge to ledge to climb back up. Now open the next doorway
across the Save Point and jump down.
-----------------------------------------------------------------------
-----------------------------------------------------------------------
+++ AREA: AUDITORIUM OF ATROPOS +++
+++THE TIME CONTINUUM PUZZLE SOLUTION:
See that statue with the Amulet medallion? Grab the statue and drag it
with you to the end of the hall. Place the statue to the left or right
of the gate and then pull the lever to open the gate.
Drag the statue under the gate so that it doesn't close. Walk towards
that watery-looking blob on the left and enter through it to be
transported back to a few seconds ago before the translator guy jumped
off the ledge. When you run through the watery blob thingie,
immediately activate the Amulet and then run towards the translator and
grab him (R1 Button!) before he jumps off. If you miss, just keep doing
it again until you get it right!
Drag the translator to the book and handle him the same way you did
with the other translator. After the cutscene, approach the door on the
right and grab the key item.
+++KEY ITEM ACQUIRED: THE WARRIOR'S SKULL
Enter the door to encounter another puzzle!
+++THE STEAM VENT PUZZLE SOLUTION:
Here's how it works: rotate the turnstile all the way until it stops.
This will release some steam from the vent underneath. Double jump to
unflap your wings and float higher. Glide to the upper ledge and
QUICKLY activate the next lever to unleash more steam. Quickly unflap
your wings while the large amount of steam rises and let Kratos float
all the way to the ledge on the upper left side (you won't be able to
float high enough to reach the ceiling, so float to the upper left).
This will take a few tries to get it right, so get to it!
Now jump to the ceiling and scale all the way to the other side and
then jump down. Enter the next room with the turnstile and rotate the
lever to descend to the bottom. Jump and glide out back to...
-----------------------------------------------------------------------
-----------------------------------------------------------------------
+++ AREA: THE PALACE COURTYARD +++
As soon as you land on the courtyard, two Cyclops enemies will appear.
Hopefully, you've perfected your Cyclops-killing skills by now.
Eliminate both the Cyclops with fatalities and then two more Cyclops
will show up. Dispose of them with Rage of the Titans and then perform
the fatalities on them to clear the area.
Now head for the doorway with the Cerberus symbol on it and place the
key item to unlock the door. Open the door and enter to find some
chests and a Save Point.
SAVE GAME!
This next part is quite intense and requires you to be on your toes!
Approach the large chain in the center of the room and press R1 to grab
hold and then rapidly tap the Circle Button to make Kratos manually
drag the platform down like an elevator.
As you descend, a spiked ceiling will start coming down slowly and
skeleton warriors will begin attacking you. Use the Atlas Quake and the
hammer to pound them down. Kill the skeleton guys and continue dragging
the elevator. You will have to keep doing this until you reach the
bottom of the floor, so abuse the Atlas Quake as much as possible!
Once you reach the bottom, approach the door and quickly open it and
then roll outside to safety! Before taking the stairway up, there are
two well-hidden chests just near the door you exited from. One of them
has a Phoenix Feather, so grab it.
-----------------------------------------------------------------------
-----------------------------------------------------------------------
+++ AREA: ENTRANCE TO THE UNDERGROUND +++
Enter the next area and you will see a long zipline with some enemies
that are already crawling on it. Use the Bane on them and then jump to
the zipline and work your way to the center platform and jump down
before the archers shoot you down.
Jump towards the archers and shimmy to the right and then climb up.
Destroy all the archers and gorgons that appear. Once the area is
cleared, jump back down and look for a wall to scale on the left side
of the center platform. Quickly scale to the top and scale the ceiling
to the other side quickly! Eliminate the soldiers that appear to clear
this area. Go down the hall to a new area.
-----------------------------------------------------------------------
-----------------------------------------------------------------------
+++ AREA: THE PHOENIX HALL +++
Approach the pedestal and read the book. This will reveal a lever on
the other side. DO NOT activate the lever yet! There is a Save Point on
the upper right side, so jump and glide towards the Save Point first!
SAVE GAME!
Now jump and glide to the ledge on the other side to encounter some
skeletal warriors and a satyr. Defeat them with the Atlas Quake and
some hard combos to clear the area. Enter the next room to find a ton
of spikes and a lever.
+++THE HEAVY SPIKES PUZZLE SOLUTION:
This room has a TON of sharp spikes! Activate the lever to lower the
spikes and then approach the dead soldier to find the Hail Of Boreas
key item. Run back to the lever before the spikes protrude. When the
spikes have protruded, activate the lever again and then approach the
wall next to the dead soldier and bust it open to find two chests, an
Amulet statue, and two satyr enemies.
Do not open the chests yet! Head back to the lever before the spikes
protrude and fight the satyrs near the lever. When the area is clear,
activate the lever and approach the turnstile. Rotate it 360 degrees
and then activate the Amulet. Quickly escape this room through the door
on the other side!
As you enter the next area, look up near the wall with the flowing lava
to see a ledge that you can jump and shimmy on. Jump up to it and then
jump to the opposite ledge. Jump down to the other side to find three
well-hidden blood chests! Enter the next area for another puzzle!
+++THE WALL OF FIRE PUZZLE SOLUTION:
When you enter the room, a large wall of fire will come straight at you
every few seconds nonstop. To avoid getting burnt, go back to the
entrance doorway and grab the statue on the left side. Drag it with you
from the front to stay safe from the flames.
As you drag it to the front of the room, a bunch of fireproof satyrs
and harpies will emerge to try and stop you. Use the Atlas Quake or
Rage of Cronos to stop them and continue dragging the large statue to
the front. There are two large side doors in the room: one on the left
and one on the right. Each one of them has two chests with goodies (one
with a Phoenix Feather) inside. If you want to grab them, that's
completely up to you.
Continue dodging the enemies while dragging the statue to the front.
Place it in front of the lever and then pull the lever to lower the
floor blocking the way. Drag and place the statue on the left button
and then stand on the right button to lower a grip holder. Quickly jump
and swing to the top ledge! Grab the Ashes of the Phoenix and the
platform will lower you back to the Phoenix Chamber. Drag the large urn
to the center of the walkway and then go back to the Save Point area.
Kill all the minotaurs and skeletal enemies that appear to clear the
area. Now approach the lever and activate it to trigger the
resurrection of the Phoenix. After the cutscene, jump and glide to the
top stairway and ascend to the top. Ignore the soldiers and then
activate the lever to ascend back to the Palace Courtyard.
-----------------------------------------------------------------------
-----------------------------------------------------------------------
+++ AREA: PALACE COURTYARD +++
After you ascend to the courtyard, place the Hail Of Boreas key item on
the wall behind the lever you just used. This will open a new doorway.
Enter inside and make a left turn. Open the chests in the area and then
climb the chain to the top floor and you will see a Save Point.
SAVE GAME!
Now head for the large horn and press the R1 Button to release the
Phoenix. Jump down to the courtyard and jump onto the large pedestal on
the left side and then jump and glide to the door. Open it to reveal a
new puzzle.
+++THE CHAINS AND PILLAR PUZZLE SOLUTION:
Activate the lever to raise a large wall. Scale that wall to the top
and then scale the ceiling. Go to the second chain and cut it down to
reveal a pillar. Jump down and activate the lever again to lower the
wall and make some enemies appear. Kill the exploding soldiers and then
grab the pillar.
Place the pillar halfway through the wall. When you activate the lever
again, the pillar will stop the wall halfway as it rises up. Jump up to
the top of the rising wall and then drag the pillar away to make the
wall rise up all the way. Now place the pillar near the metal door and
jump on top of it. Destroy the large chain above the door to lower it.
Now head for the nearby turnstile and rotate it all the way. Once
that's done, go down the hall and rotate the next turnstile until a
doorway open up. Enter the all to face off against an old ally.
+++MINI-BOSS BATTLE: THE UNKNOWN SOLDIER
The soldier is pretty aggressive and relies mostly on hard sword
slashes. Your best bet is to block using the Fleece and then counter
with some hard combos of your own. This is pretty much a battle of
strength and whoever has the hardest combos wins. When the Circle
Button appears above his head, press it to end the battle and to
trigger a heartbreaking cutscene. This then triggers a new boss battle.
+++BOSS BATTLE: THE KRAKEN
Wait, isn't the Kraken a pirate myth? What the hell is it doing in a
game about Greek mythology? Or am I watching too much Pirates Of The
Caribbean? Whatever.
At the beginning of the battle, Kratos is pretty immobile and slow. Let
the Kraken grab Kratos to trigger a cutscene. After the cutscene, you
will receive a new power upgrade for Rage Of The Titans. When prompted,
activate Rage to begin the battle.
WAVE 1: You must damage the Kraken's tentacle that is holding the
pillar on the LEFT side. Your main strategy here is quick evasion. The
Kraken loves to slap its tentacles around and loves to puke a bunch of
acid so stay evasive! Damage its tentacle on the left side to make it
reveal a step button. Grab the dead soldier's body and place it on the
button to open a steam vent in the center of the arena.
With the steam vent open, unflap your wings and glide towards the
Kraken's head and start unleashing a barrage of hard attacks on the
head to damage it. When Kratos falls back to the ground, he can still
use the vent two more times before it closes back up. Repeat the
strategy while staying evasive and the Kraken will soon get stunned.
Once it's been stunned, it will slam its large crab-leg tentacle onto
the middle of the arena. Approach the leg and climb it to the top and
start slashing at the leg joint. Keep slashing at it and the Circle
Button will appear. Quickly press it to slice off the tentacle in
bloody fashion.
WAVE 2: For this wave, the strategy is still the same. Damage the
tentacles on the left pillar, place the dead body on the button, fly
from the steam vent, damage the boss's head, repeat. Once it's been
stunned after many combos to the head, it will slam its OTHER crab-leg
tentacle across the arena. Double jump upwards toward the leg to
grapple onto it and then scale your way to the leg joint and start
slashing away at it. When the Circle Button appears, press it to slice
off the tentacle.
WAVE 3: With both crab-leg tentacles gone, its time for some real
damage! The boss will start slamming his tentacles on each side. When
it starts slamming its tentacles from the right pillar, run to the left
pillar and damage the tentacle there. When it starts slamming its
tentacles from the left pillar, run to the pillar on the right and
damage the tentacles there. Understand the pattern? After much damage
to a specific tentacle (left or right), it will begin to slip off. When
both tentacles are damaged, the Kraken will try to hold onto the
balcony for dear life.
Quickly approach the lever at the top of the arena and activate it to
end this battle. If you didn't activate the lever in time, repeat the
strategy until you get it right!
After the battle, go down the bridge and over the Kraken's carcass.
Press the Circle Button to wrangle up the Phoenix! YEEEEHAAWWW!!!!
Press the buttons and rotate the analog stick in the direction
indicated onscreen to fly off to the next area!
-----------------------------------------------------------------------
-----------------------------------------------------------------------
+++ AREA: TEMPLE OF THE FATES +++
Swim your way towards the Save Point.
SAVE GAME!
After saving your game, jump towards the large statue face. Press the
R1 Button on the ledge to grapple to a higher ledge. Press the Circle
button to drop down and then destroy the pillar to release the green
energy flowing through the room and bring it back to normal.
+++DING DONG DITCH PUZZLE SOLUTION:
Notice that there are two huge bells in the room. There is one on the
left that you can ring by smacking a large bell ringer and then there
is a bell on the right side that you can manually ring.
Also, underneath the pedestal is a turnstile and a lever under the
water that can be activated. Here's how it works: after getting rid of
the "green" energy in the room, rotate the turnstile counter-clockwise
until you see the object in the water positioned at a five o'clock
position. Now dive under the water and activate the lever and the
pedestal will rise and fit into it.
Now, you have to ring both of the bells at the same time. Jump and
grapple back to the top of the pedestal and press the R1 Button to get
the bell ringer to slam the bell. Quickly activate the Amulet and then
glide to the other bell and press the R1 Button and the L1 + R1 Buttons
to manually ring the other bell. If done correctly, the statue face
will become partially cracked. Now jump down to the turnstile and
rotate the pedestal so that the bell ringer is in FRONT of the statue
face. GO back to the top and activate the bell ringer to smash the
statue face to reveal a new path. Enter the next area to a circular
room. Open the chest on the left and then open the door.
-----------------------------------------------------------------------
-----------------------------------------------------------------------
+++ AREA: THRONE OF LAHKESIS +++
You're almost done, dude!
+++BOSS BATTLE: LAHKESIS
WAVE 1: The boss hovers around the arena and has four attacks: a triple
swipe melee attack, multiple fireballs, a boomerang attack, and a
ground pound. Simply block her melee attacks and block the fireballs
with the Fleece. The timing is quite difficult with the Fleece, so try
some quick evasive rolls or double jumps if you can't deflect her
fireballs. When she hovers above the ground, she will pound on it, so
either roll away or use the grapple holders on the ceiling.
Inflict your hardest combos on her while being defensive. Whittle her
health down and the first part of the battle will be quite easy.
WAVE 2: The boss will start to hover higher and begins electrifying the
floor. This part of the battle involves aerial combat, so grapple above
and attack the boss while holding on.
Jump from grapple to grapple while attacking her to avoid getting
damaged. As the boss loses more of her health her attacks become faster
and more intense. Keep the same strategy going until the Circle button
appears above her head. Grapple and jump towards her and press the
button to end the battle.
+++BOSS BATTLE: ATROPOS
This battle is not quite so difficult once you figure it out. The boss
will fling slow fireballs at you which can be evaded with the Fleece or
quick evasion. Fire the Typhon Bane at her until your Magic meter
depletes. When she starts to hove close by, attack her with hard
combos. Kill the soldiers to restore magic and health and keep firing
the Bane until she goes to the other end of the arena.
At the other end of the arena, she will begin regenerating her health
so run up to her and inflict hard combos on her. Repeat the strategy 2-
3 times and then the Circle Button will appear above her head. Press
the button and then follow the buttons indicated onscreen to end the
battle in bloody fashion.
+++BOSS BATTLE: LAHKESIS & ATROPOS
WAVE 1: Get ready for a very long and intense battle! Damage Lahkesis
the same way you did in the previous battle until Atropos appears. The
main point of the battle is to shatter both of the mirrors on the left
and right side. Use the grapples to avoid the constant barrage of
fireballs from Atropos and continue the assault on Lahkesis.
Once Lahkesis has been stunned, she will keel over and start glowing
green. Activate the Amulet and quickly approach Atropos and start
slashing your hardest combos at her. After much damage, Atropos will
slide back into the mirror. When that happens, smash the mirror!
Repeat the strategy for the opposite mirror. Keep attacking Lahkesis
until she keels over (be sure to grapple above for safety reasons) and
then damage Atropos by using the Amulet. When Atropos slides back into
the mirror; smash it down to finish off this wave.
WAVE 2: Once Lahkesis is by herself, she will hover in front of the
last mirror. She begins performing more attacks to protect herself.
Evade the fireballs and continue pounding the hard combos until the
Circle button appears above her head. Press the buttons indicated for a
spectacular and bloody finish to both of the sisters!
**LAHKESIS NOTE: To end this battle, Lahkesis MUST be in front of the
mirror to trigger the kill sequence! If you are fighting her everywhere
else in the arena except the front mirror, the button won't show up!
With both bosses dead like a mutherf*cker, approach the Save Point.
SAVE GAME!
Enter the next area to a circular room. Uh-oh! You're stuck! WHAT DO I
DO??? There is a wall in the center of the room that you can scale.
Climb it to the top and scale the ceiling. To reach the blood chests on
both sides of the room, scale all the way to the back of the room and
jump down to the ledge below. Jump and glide to each ledge to grab the
goodies. Enter the hall and destroy the wall on the right.
-----------------------------------------------------------------------
-----------------------------------------------------------------------
+++ AREA: THE INNER SANCTUM +++
It's time for bloody battle royale against every single enemy that
you've encountered (well, not everyone but most of them). Hopefully,
you've upgraded all of your weapons and magic to the max!
As you descend towards Clotho, you will encounter numerous waves of
enemy after enemy. The first couple of waves will be soldiers and
satyrs, then satyrs and minotaurs, then a bunch of gorgons, and then
minotaurs and berserkers. Kill all the enemies that appear as you make
your way down the spiral. Stay evasive and be sure to BLOCK! Keep
descending the spiral until you reach the door at the bottom. For the
last wave of enemies, it'll be 3-4 cyclops and a bunch of soldiers.
Kill them all to unlock the door and reveal a new Save Point.
SAVE GAME!
To enter the large door, attack the hands that are holding the lock.
Press the R1 Button to unlatch each lock and then enter through.
-----------------------------------------------------------------------
-----------------------------------------------------------------------
+++ AREA: THE LOOM CHAMBER +++
As you approach the walkway, you will see Clotho's skinny arms moving
to attack you. On the left side of the area is a turnstile. Attack her
arm to stun it and then rotate the lever all the way until the gate
above opens. Now approach the nearby stairs and glide to the cage. Open
the chest inside and then scale the wall above to the other side.
Approach the other metal gate and destroy the statues in front of it.
Now jump down and stun her arm and then rotate the turnstile all the
way to open up the gate and reveal a chain to climb. Approach the
nearby stairs and glide to the gate. Open the chest inside and climb up
the chain to the next area. Now comes a pretty straightforward puzzle.
+++THE LEVERS AND SPEARS PUZZLE SOLUTION:
As soon as you emerge from the next room, you will notice that Clotho
has three arms. You need to pin down each arm to get to the next area
(similar to the Hydra battle from the first game).
Notice that there is a step-button device and a lever nearby surrounded
by spikes. DO NOT TOUCH THIS DEVICE YET! Instead, approach the lever
that is surrounded by spikes to open up a trap door on the floor next
to her arm. (There is a hidden chest in there if you want it.) Damage
the arm so that it gets stunned and is resting in the trap door. Go
back to the lever and activate it to close the trap door and pin her
first arm.
For the second arm, damage it to stun it and then climb the nearby
chain to the top and then jump to the ledge with the lever. Activate
the lever to drop a large spear on her arm to pin it down. It will take
a few tries, so get it done!
For the third arm, you will need that step-button device. Head for the
device and then grab the lever and drag it all the way around to
towards her third arm. Damage her arm to stun it and keep dragging the
device all the way down until it locks into the nearby spear. Damage
her arm again, and then drag the spear under her arm. Jump up and
attack the spear to pin her third arm. Now climb the chain up and jump
to the last ledge and activate the lever.
+++BOSS BATTLE: CLOTHO
This battle is actually quite easy. You can block her ground pounds
with the Fleece and you can simply double jump her arm swipe, that's
pretty much your defensive strategy. You really don't need to use the
Amulet statues in this battle. Notice that there are two levers in the
arena: one on the lower left and one on the lower right. If you pull
each one, it will bring up a dead body and place it in front of Clotho.
She will then pound it and unleash massive green health. Also, take
notice that on the right side near the Amulet statue is a turnstile
handle that you can grab and push around the arena.
Here's the strategy: damage Clotho's arms to stun her. When one arm is
stunned, damage the other one to fully stun her. Now go to the right
side where the Amulet statue is and grab the turnstile handle next to
the door. As you try to drag it, there will be dead bodies above
blocking the turnstile's path. Use an Atlas Quake under the bodies to
rid of them. If Clotho recovers, stun her again and then access the
turnstile and push it down until the lower right lever (that you used
to bring up the dead body) is in the center of the arena.
When Clotho recovers, damage her arms again and then activate the lever
in the center of the arena to bring up a large sharp pendulum. When the
pendulum is in front of her, grab the handle on it and rotate it so the
blade faces her body. Now move to the side of the blade and press the
button to trigger a bloody kill sequence. Press the buttons shown
onscreen to kill this boss!
With the boss out for the count, go to the back room and activate the
lever to descend to the upper area. Swim though the corners (grab the
chest goodies on the ledge) and then access the Save Point.
SAVE GAME
Now pull the lever in front of the mirror to reveal some thread strands
in front of the boss. Go back to the arena where you fought the boss to
start weaving your fate.
--MISSION OBJECTIVE: WEAVE THE STRANDS
There are a bunch of strands in the room. If you pull the wrong one,
the mirror will crack. The strand you need to pull is the one located
to the right side of the middle lever (that you used to bring up the
pendulum). Keep pressing the Circle Button until an hourglass timer
appears. From there, you have 30 seconds to get to the mirror.
Activate the Amulet and make your way back to the mirror. Jump through
the mirror to return to a familiar place.
-----------------------------------------------------------------------
-----------------------------------------------------------------------
+++ AREA: THE SUMMIT OF SACRIFICE +++
+++BOSS BATTLE: ZEUS
Now is the time to fight back! Give Zeus nothing and take from him
everything! Be sure to max out the Athena Blades and the Atlas Quake!
WAVE 1: This battle is almost similar to the Colossus battle. Zeus will
throw lightning bolts and slam his fist into the ground. You need to
damage Zeus's hand considerably. With all the Sirens in the way to
distract you, use the Atlas Quake to stun them and then grab them to
kill them when prompted. When the sirens are killed they unleash a
small aftershock that stuns Zeus and releases health and Magic. Keep
killing the Sirens if you need to restore health and Magic.
Evade Zeus's lightning bolts and then roll away when he pounds the
ground. With his fist on the pavement, damage the hand. When the hand
has been damaged enough, the Circle Button will appear above it. Press
the button to finish this wave.
WAVE 2: Zeus is now back to normal size. Zeus is quite agile (similar
to Dante's Trickster style from DMC3) and has some powerful lightning
attacks. Use the Fleece and counter at Zeus with lots of hard combos.
Stay defensive while being evasive and continue to pound the combos.
Activate Rage if you need to. Once Zeus grabs hold of you, he will take
the Blade Of Olympus away from you. From there, keep up the same
strategy of defense and continue using hard combos and the Atlas Quake
to whittle his health down.
After much damage has been dealt, Zeus will stand in the middle of the
arena dazed. Grab him to inflict some major damage. With Zeus stunned,
run up to the pillar next to him and grab it to smash it on him.
WAVE 3: Continue to damage Zeus with hard combos and the Atlas Quake.
After much damage is dealt, Zeus will grab the Blade Of Olympus again
from you and he will start glowing gold. Activate Rage of the Titans
and pound the combos on him nonstop until he goes to the center of the
arena (DO NOT DEACTIVATE RAGE!). Press the Circle button and beat him
to throw him back. Now approach the pillar on the left side and press
the R1 Button to smash Zeus with it.
WAVE 4: Now comes the END! Kratos will pull a Trojan horse on Zeus!
Press the buttons indicated onscreen to end it all! You must be quick
with the last button (the Circle Button) or Zeus will grab the sword
and kill you. If that happens, you will have to start this wave over
again. Get it right and finish off that butt-knuckled pinko of a god!
Copy and paste this link to watch a High-Def video of how to finish the
last part of the Zeus battle (recorded by yours truly):
http://www.gametrailers.com/umwatcher.php?id=50332
-----------------------------------------------------------------------
-----------------------------------------------------------------------
+++ AREA: THE LOOM CHAMBER +++
After the cutscene, go back to the arena where Clotho is located. Weave
the strand of time until the timer starts. Use the Amulet and work your
way back to the mirror before time runs out to finish the game!
THE END BEGINS...
MON CONGRATS! You beat the game!
-----------------------------------------------------------------------
-----------------------------------------------------------------------
+++ THE UNLOCKABLES +++
--BONUS PLAY
Once you've finished the main game, you then have an option for Bonus
Play. To activate Bonus Play, start a brand new game and the game will
ask if you want to start a new game using all of your items from a
previous game. Please note that you CANNOT use Bonus Play on God Mode
or Titan Mode until you've finished those modes!
--CHALLENGE OF THE TITANS
Finish the game to unlock this mode. There are 7 challenges in this
mode that test out your abilities. Defeat each challenge to gain a
ranking of Mortal, Spartan, God, or Titan.
--ARENA OF THE FATES
Receive a Titan ranking for all seven Challenge Of The Titans to unlock
this bonus. With this bonus, you can create your own Royal Rumble with
any enemies and specific settings.
--URNS OF POWER
There are six total urns to obtain: Gaia, Gorgons, Olympus, Prometheus,
Fates, and Poseidon. Four of them are obtained in the main game while
the other two have to be earned from Challenge of The Titans. Once you
find an Urn, it can only be used when playing a Bonus Game. Pause the
game during gameplay and view the Stats screen to activate that Urn's
special power.
--BONUS COSTUMES 1 & 2
Beat the main game to unlock a fish costume and the Hydra Armor.
--BONUS COSTUMES 3-5
Beat Titan Mode to unlock the Dark Armor, the Athena skin, and the
Hercules skin. And before you ask, YES, Athena and Hercules are just
skin swaps for Kratos.
--BONUS COSTUME 6
Collect 20 of the Cyclops eyes to unlock this costume. You only obtain
4-5 total cyclops eyes in the main game, so how do you get 20 without
having to replay the game so many times? HINT: Challenge #1 of
Challenge Of The Titans!
--BONUS COSTUME 7
Achieve a God or Titan ranking in all seven challenges for the
Challenge of the Titans to unlock the armor that Kratos wore at the
beginning of the game. This costume doubles your stats and doubles the
damage of your combos!
--IN-GAME MOVIES - HIGH RESOLUTION
--IN-GAME MOVIES - STORY FORMAT
--CREDITS
--SKIP CUTSCENES
During Bonus Play, certain cutscenes and all FMV's can be skipped
during the game by pressing the X Button.
--DISC 2 EXTRAS
Do I need to explain all of the content that is on Disc 2? Nah. You can
view them yourself. Just be sure to finish the game first BEFORE
watching the second disc because there is an assload of major spoilers!
-----------------------------------------------------------------------
-----------------------------------------------------------------------
+++ CHALLENGE OF THE TITANS +++
Are you up to it? Ready for some action?
--CHALLENGE 1 - BLIND FURY
--BONUS: SHATTER TWO ENEMIES
For this battle, equip Euryale's head and freeze the Cyclops first (so
he doesn't distract you). Freeze the other two enemies and then shatter
them to get the bonus. Now attack the Cyclops and grab that eye!
+++NOTE: You can replay this challenge to gain more Cyclops Eyes! Gain
20 eyes to unlock a special costume!
--CHALLENGE 2 - DEATH FROM ABOVE
--BONUS: KILL 15 ENEMIES IN THE AIR
The best weapon to use is either the Athena Blades or the Spear Of
Destiny. For the spear, use the Triangle + Triangle combo to toss an
enemy into the air and attack them. Try to avoid fighting the bigger
enemies and focus on the smaller ones.
You can only toss the satyrs, soldiers, and gorgons into the air! You
can't fling the berserkers or minotaurs into the air so don't even try!
--CHALLENGE 3 - GORGON GRAVEYARD
--BONUS: SHATTER 35 ENEMIES
Equip the Barbarian hammer and Euryale's head. Use the Super Gaze
attack (L2 Button + Triangle) on each enemy and then pound on them with
a hard attack with the hammer to shatter them. Use the Fleece to defend
from the other gorgons!
--CHALLENGE 4 - PROTECT THE WEAK
--BONUS: KEEP TRANSLATOR'S HEALTH ABOVE 50%
This is a very lengthy challenge. The translator sits on a glowing
circle. Every 30-35 seconds, the circle will move to a different area
and you MUST move him towards the circle's new location or he will
start to lose health. As for the enemies, abuse the Amulet and pound
all of them with your hardest combos until the game says you are done.
--CHALLENGE 5 - REAP THE REWARDS
--BONUS: COLLECT OVER 600 ORBS
--CHALLENGE 6 - SURVIVAL OF THE FITTEST
This is also a very lengthy challenge. Your health will continually
decrease throughout the challenge and you gotta keep the dead bodies
flowing (sort of like Shinobi). Survive the onslaught to complete the
challenge!
--CHALLENGE 7 - PERFECTION IS DIVINE
Hopefully you've perfected the art of countering with the Fleece
because there's no other way to complete this challenge! Keep your
distance from the petrified minotaur and pound combos onto the other
enemies. You MUST kill the priests or else the challenge won't end!
Once all the other enemies are gone, deal with the minotaur and kill
him with a fatality!
-----------------------------------------------------------------------
-----------------------------------------------------------------------
--BIG THANKS:
Daniel Teter, Anthony Pendleton, psychomantyss, Cameron Swartzell,
yellowsub99, Termite, Adam Hogan, AnimatheCaniba, Jabari Robinson,
freaky_00, Matthew Kubesh, semper rye, pumpkinseed, and Kevin Walter
Remember, there's no point in having a revolution unless it's a party!
-----------------------------------------------------------------------
-----------------------------------------------------------------------
This FAQ is only for use on GameFAQS. You may not copy, reproduce, or
link to this FAQ without permission. If you want to use this FAQ on
your website or publication, please e-mail me at kroqjock@gmail.com. I
have no problems with anyone who asks. March 2007.

Tactical, beautiful, and wholly unique, the GOTY-winning sci-fi RTS returns with Homeworld 3. Assume control and battle through fleet combat in dazzling, fully 3D space while the award-winning story unfolds on a galactic scale.