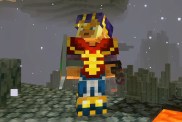
A Minecraft custom skin is just a small PNG file, so they’re easy to share and you can download them from all sorts of places. However, one of the most popular sources is The Skindex, which has thousands of files available. You can install Minecraft custom skins in Bedrock and Java editions, but the process is different for both of them.
Each Minecraft custom skin download is a PNG file with the front, rear, left, right, top, and bottom of the body and outer layer. These are easy to modify in a graphics editor or a dedicated Minecraft skin editor, so take the time to make any alternations you want before installing the skin.
How to install custom skins in Minecraft Bedrock
To install a custom skin in Minecraft Bedrock, follow these steps:
- Launch the game.
- Choose “Profile” in the lower right corner.
- Click on “Edit Character”
- Select the second tab on the menu on the left to move to the “Owned” section.
- Click on “Import”
- Select “Choose New Skin”
- Find the downloaded skin on your computer in the window that pops up.
- Choose the correct skin type (classic vs. slim).
Now, you can select this skin under the Owned tab at any point.
How to install custom skins in Minecraft Java
It’s a bit more complicated to add custom skins to Minecraft Java. There are two methods you can use:
- Minecraft Launcher
- Web Browser
Add skin with Minecraft Launcher.
To add a custom skin with the Minecraft Launcher:
- Launch the program.
- Go to “Skins” at the top of the launcher.
- Click on “New skin.”
- Under “Skin File,” choose “Browse.”
- Find the custom skin PNG in the window that pops up.
- Once it’s loaded, name it, choose the right player model type, and click either “Save” or “Save & Use.”
You can now find the skin in this section of the launcher from now on.
Add skin with Web Browser
- Go to the official website.
- Log in with your Microsoft account.
- Choose the “Change Skin” option on the My Games screen under Minecraft: Java Edition.
- Choose the correct shape for your model.
- Scroll down and click “Select File,” then choose your custom skin PNG.
Whenever you launch Java Edition, you will be wearing your custom skin.