...;-==-
.x########,#
####x= X###X. #+Xx=
X#####+## ,#x+=x#### .. #+X+=
+#+ +#######x#x==-==-. .;+. #=x#=
#X #= .==--;;,.,;X####=-+; #=+#
## = .+=-;,,;, ; =#x.+#x+#
.#. = x=;,,;;;, -###### -#-xX##
###+--;,;;;;,.## ##.###;,+ ##
+#; # == ,;;;;;.#= ## #,;+
-#=#=##-,;;;;.-# x. .+ x-,#
# x x;,;;, # +## #.; +;+=
# # .# -# # # ,######=;#
## .#=x### X## #x+++x# ,#
## -### -==; ##x###### #
## ##, -;; #- ##
# ## #= -=# =#
###-#- ;# X####=.,# ###
#XX#+# #.+ . .; +## #
#### #x##+#X #==+##X =+-;+x.-#++ .# ####+
##+=- # -##Xx#xx####+X#=X#X;,-,;##-=# ####X##.# -Xx####=x#
,=; ,x### ... .+.. ,. =#. +## +#,.= # X#######X####
.. -X-. -# .. .x##x+X#x ##x## X, ;=.-#--== #=-+##.
-=;. # x =#,.=###+. ,=+;# # ,x= # .;=- ,=. -x+###
+. .x =-# ##=## ,,-;# # #x###,.;;;;. x###+
+# ## =#####.###+x=;,x###=. .,;x### -## #, ..;###
## ,x.= ## # +###########-, # xx+ x ##X###
##X- X =# -##=#xx++++++X### #; .=#= x ; .-#####x
,#### #+#X###Xx+++x#,X=## + + -#.-# =####----; ;#=
######x-#####xx# #-###X = . --+ .-+#####x #
###### +#+##,##++=x+,=###++,.;##+-==-;.,#xx#=x
X########. ##x#x,##+X#x;. #+X######x.----,;#+x+#
##. .,;. # ##x##-###X -=+--#xxxxxxx#,;---; #-##
# ,-+=. +# ###=; #x=#X#- #+xx++x+#=,--; ###
# ##-,=# =# X+ .-- #= .#+-==++++# ,##-
## +##+ #x # x#;-x# ##x+==-=x+ ;+####
#,# # # =- #############+
##..;##- x# xx X##-######=,
# x=#--####### #=+==+###=x . #
#X=-,. ,. ;## #;+;...,;-+ - #
X-=-;;,.-+.,. +# ,#.#=x+X+++++#+x #
Xx=--;-,;+,--;##= #-=--; x...,,;-+x##
,xx++++=xx++=+## x#-+=-;;x+----;;--;#
###XXX######### # #x+==-x------=++.#
.=++x+ ... #=,+xxXxxxxxxxXX++=#
####x==+x#xxxx+=X###
;+XXxxxxxxxXx+.
~*~*~*~*~*~*~*~*~*~*~*~
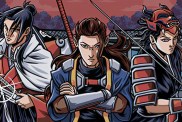
Sonic Rush Adventure FAQS/Walkthrough
Version 0.98: 11/22/07 (Happy Thanksgiving!)
By Angnix
[email protected]
Friend Code: 064535-752843
Wii#: 7035-3047-5500-7479 (in case you like Miis)
(Note, e-mail me a code and I might add you)
Also I play on Random sometimes...
~*~*~*~*~*~*~*~*~*~*~*~
~*~*~*~*~*~*~*~*~*~*~*~
VERY SPECIAL NOTE
~*~*~*~*~*~*~*~*~*~*~*~
You may or may not have noticed the things I said in my last guide update.
For example:
"Sorry, I haven't been in the mood lately to work on this much."
Yes, I got so depressed I couldn't work on this guide for a while. I am
now finally coming out of it.
I'll try to keep up with updating it now, I'll be fine. I know certain
people that look forward to my updates, I promise, I'll get better!
Thanksgiving did help. Nice turkey, so much left over, I know what I'll
be eating the next few days @_@
Oh, and where I am living now, I don't even have internet access and when
I get it, it won't even be high speed, so sorry if I can't race much online.
~*~*~*~*~*~*~*~*~*~*~*~
Help Me Out!
~*~*~*~*~*~*~*~*~*~*~*~
If you help me with this guide, your name will go in the Special Thanks
Section forever.
The more you help out with this guide or give me suggestions, the better
it will be!
Current Help: Guide Accuracy mostly. Look for errors (even spelling and
grammar mistakes, I'm apparently known for them.)
Also, specific Unlock Details for the Sound Test and Movie Theatre, I.E.
what Mission unlocks what particular Sound Test item or Movie Theatre
Scenes, I don't remember them all.
~*~*~*~*~*~*~*~*~*~*~*~
Thanks Too:
~*~*~*~*~*~*~*~*~*~*~*~
A special section honoring those who have helped me with this guide!
People I have raced so far, there's those who's skills are greater than
mine, I salute you :D
Light the Hedgehog- Scoring Error
Chaos Gamma- Inconsistencies in Vehicle references in Chaos Emerald
section.
AL into the Future- Water Cannon mistakes
bigboss223 from GameFAQs- Found out you can wipe the ink blot away at the
end of the Coral Cave Boss.
IGN.com Sonic Rush Adventure Guide, nice source for Basic Info (Link in
next section)
Skorchic- Posting link to IGN guide.
pkmnfreak75- Correction to Boost Section where I accidentally left in
Sonic Rush Special Stage info.
BlackStarX- Disconnecting during a race will earn you an instant loss and
loss of points.
You only gain Tension during Two Player if you are in Second Place.
Bendilin- Viking Cup stages change after you upgrade a ship.
wario58- Posted a great tip on GameFAQs about the Glove item in two-
player, if it's used on you and you hit a checkpoint further ahead, if
you quickly die you will restart at the further checkpoint again.
~*~*~*~*~*~*~*~*~*~*~*~
Useful Web Links:
~*~*~*~*~*~*~*~*~*~*~*~
A new section I thought of, web links you might find useful:
http://www.sega.com/gamesite/sonicrushadv/
Sega of America's official site, contains lots of info, screenshots and
the World Leader Boards!
http://www.sega-europe.com/en/sratemp/index.html
Same website as above with more of a European flavor, if the above
website was a Hershey's bar, this one is a Cadbury Dairy Milk.
http://segapass.sega.com/sra/leaderboard.cgi?t=en
A direct link to the worldwide leader boards in English. See who's the
fastest in each level and in what general area of the world they are from,
or search your best friend's friend code and see how they are doing!
http://boards.gamefaqs.com/gfaqs/gentopic.php?board=939095
GameFAQs.com messageboard for this game, I'm here a lot.
http://guides.ign.com/guides/900363/index.html
IGN online Guide for this game, many useful things, including a
Walkthrough.
~*~*~*~*~*~*~*~*~*~*~*~
Legal Notes:
~*~*~*~*~*~*~*~*~*~*~*~
This guide cannot be placed on any site without my permission. Sonic
and all related characters copyright Sonic Team/Sega.
Sites with permission to post any of my FAQS:
www.GameFAQS.com (This is the major site I update to)
www.Neoseeker.com
www.cheathappens.com
faqs.ign.com
www.cheats.de
www.supercheats.com
www.wogaming.com
1up.com
www.gamerstemple.com
http://www.gameplayworld.com
http://www.cheatcc.com
www.spong.com
GamerHelp.com
GameSlander.com
www.7cheats.de
www.mogelgott.de
www.gamerevolution.com
~*~*~*~*~*~*~*~*~*~*~*~
VERSION 0.98 IS HERE!!!
~*~*~*~*~*~*~*~*~*~*~*~
Wow... just wow. Back at E3 2004 when the Nintendo DS was announced, it was
also announced that a Sonic game would be created for this new system.
Then we got Sonic Rush. I fell in love with the game, and also Blaze
became my new favorite character, yay! Then a year later came Sonic the
Hedgehog Next Gen... well... yeah, Blaze is back, but now her story is more
confusing than ever... then came Sonic Rivals for PSP I never picked up...
But now the game I've been waiting for 2 years now, Sonic Rush Adventure!
Arrr... let the fun begin!
New to this Version:
~*~*~*~*~*~*~*~*~*~*~*~
Small after Thanksgiving so I'm actually falling asleep update.
I added details for the Coral Cave and Haunted Ship Boss, Separated the
Act and Boss Sections, created sub-sections for Two Player with
corresponding table of Contents/Numbering Changes, and added a section
for Harder Mission Tips and put in a walkthrough for Mission 95.
What I'm Adding in the Future:
~*~*~*~*~*~*~*~*~*~*~*~
I would appreciate any outside info for any of these sections! Ordered in
rough importance (yes, I did change the importance, for anyone that
noticed)
More tips for some of the harder Missions
Sound Test/Movie List/Unlock info
S-Rank Tips/Time Bonus Times, number of Rings for Max Bonus
Full Unlock Details
~*~*~*~*~*~*~*~*~*~*~*~
Table of Contents:
~*~*~*~*~*~*~*~*~*~*~*~
1. FAQS (Frequently Asked Questions
2. Story
3. Characters
4. Character Moves, Tricks, Combos, Tension Gauge and Boosting
4.b. Common Gimmicks
5. Item Boxes
6. Gameplay Tips and Sonic Newcomers Guide
7. Story Mode Walkthrough
8. Southern Island
8.1. Menu
8.2. The Places and People of Southern Island
9. Materials, the Sea Chart and Ships
9.a. Materials
9.b. The Sea Chart
9.c. The Sea Stages
9.d. The Ships
9.d.1. Wave Cyclone
9.d.2. Ocean Tornado
9.d.3. Aqua Blast
9.d.4. Deep Typhoon
9.e. Upgrading Ships
10. Acts
10.a. Plant Kingdom
10.b. Machine Labyrinth
10.c. Coral Cave
10.d. Haunted Ship
10.e. Blizzard Peaks
10.f. Sky Babylon
10.g. Pirate's Island
10.h. Hidden Islands
10.i. R Hidden Islands (Time Attack/Two Player only)
11. Bosses
11.a. Plant Kingdom Boss
11.b. Machine Labyrinth Boss
11.c. Coral Cave Boss
11.d. Haunted Ship Boss
11.e. Blizzard Peaks Boss
11.f. Sky Babylon Boss
11.g. Pirate's Island Boss
11.h. Final Boss
11.i. Extra Boss
12. Hidden Island Locations
13. Emeralds
13.a. Chaos Emeralds
13.b. Sol Emeralds
14. Missions
14.a. Medal Locations
14.b. Flag Locations
14.c. Harder Mission Tips (Mission 95 Walkthrough for now)
14.d. Missions List
15. Ranking
15.a. S-ranking Miniguide
16. Tension and Points List
17. Time Trail
17.a. World Leader Boards
17.b. Viking Cup
18. Two Player and Connecting
18.a. Nintendo WFC and Friend Settings
18.a.1. Online Score Prediction
18.b. Race
18.c. Collect Rings
19. Questions?
20. Version History
~*~*~*~*~*~*~*~*~*~*~*~
1. FAQs (Frequently Asked Questions)
~*~*~*~*~*~*~*~*~*~*~*~
There are just certain questions that keep coming up again and again and
again about this game I want to make clear at the beginning.
Remember, there is more guide after this section!!!
Questions Contained So Far:
~*~*~*~*~*~*~*~*~*~*~*~
My data wasn't saved!
Where do I find such and such Emerald?
I'm stuck! Where do I go next?
Where is my Friend's Code?
How do I unlock Mission 18?
How do I unlock Mission 100?
I need more Materials! Do I have to sail out again?
Why can't I sail out to Sky Babylon?
Q1: My data wasn't saved!
A: Unlike Sonic Rush, most of the game data is not saved automatically,
please choose the Save option from the menu often.
Q2: Where do I find such and such Emerald?
A: That's already in this guide later on, I see it a lot on the
messageboards.
Q3: I'm stuck! Where do I go next?
A: In a future update, I'll do a walkthrough. There is already a
Walkthrough in the IGN guide, see the Web Links Section.
Q4: Where is my Friend's Code?
A: You will not receive one until the first time you connect to WiFi.
Then at the Vs. Machine, look under "Nintendo WFC," then "Friend
Settings," then "Confirm Friend Code."
Q5: How do I unlock Mission 18?
A: You need to complete Mission 3 first, then talk to Setter again to get
18 unlocked.
Q6: How do I unlock Mission 100?
A: You need to complete the first 99 Missions.
Q7: I need more Materials! Do I have to sail out again?
A: No. Go to the Menu Screen and choose "Stage Select" and you can replay
any Act/Boss you have encountered at sea again, and earn more Materials.
Q8: Why can't I sail out to Sky Babylon?
A: I'll admit, I messed this up in the previous versions of my guide.
Indeed, you can't sail out to it, even after beating Hidden Island 2 and
finding it the first time.
I guess because it floats in the sky, and the game developers thought it
was stupid to be able to land there?
Anyway, you don't need to sail out to it again, as explained in the
question about, use "Stage Select", or "Sea Chart" from the menu when you
are at Southern Island.
~*~*~*~*~*~*~*~*~*~*~*~
2. Story:
~*~*~*~*~*~*~*~*~*~*~*~
(From the Sonic Rush Adventure US Website)
One day a mysterious energy signal appears on Tail's radar, and he
quickly grabs Sonic to go and investigate. As they fly further and
further across the ocean, a sudden storm comes up and blows them way off
course. Soon after, Tails loses control of the plane and they go into a
tailspin over one of the islands.
The two of them emerge from the crash just fine - but very lost - so
they set off to find some help. Soon they meet an excitable raccoon named
Marine, who tells them they've landed on Southern Island. She never stops
talking for a second, and she is all in a tizzy that her dreams of
sailing around the world have been shipwrecked. Tails is a wiz at fixing
things and he offers to help her rebuild her ship, in the hopes that it
might help him and Sonic find a way back home.
While Sonic explores the island for Materials, Tails starts building and
soon produces four ships. With these fast-action vessels, Sonic has a
blast racing across the high seas where he discovers not only hidden
islands, but also a sneaky band of pirates on a hunt for (you get three
guesses): a)new boots b)a juicy pineapple c)treasure.
You guessed it, these tricksters, led by the notorious Captain Whisker,
have piles of loot in their sights and they're not going to let anyone
get in their way - especially not Sonic the Hedgehog! Though he's fast
and they haven't been able to slow him down yet, they aim to put Sonic
out of the race for their precious jewels.
Strangely enough, as Sonic races through the chaotic world, Blaze appears.
What has brought her from her alternate dimension? It's up to you to
unravel the mystery!
~*~*~*~*~*~*~*~*~*~*~*~
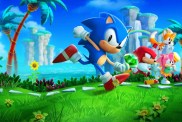
3. Characters:
~*~*~*~*~*~*~*~*~*~*~*~
(From the Sonic Rush Adventure US Website)
Sonic the Hedgehog:
Any time something seems off, Sonic springs into action, as no doubt a
bigger catastrophe is brewing. When he and Tails crash on Southern Island,
he has the nagging feeling that it isn't an accident that they've landed
there. If they don't act fast, he fears they might never get home - but
that's before he realizes there are much bigger troubles to worry about.
Blaze the Cat:
Blaze hails from royalty in an alternate universe and she's never without
her purple cape, which thinly disguises her ability to use fire - they
don't call her "Blaze" for nothing! When cornered by an enemy, she will
throw off the cape and create a fiery inferno or shoot fire from her
hands. She is the keeper of the Sol Emeralds and it's a task she takes
very seriously. When she hears of the thieving pirates, she travels
through the dimensions to investigate. She is as surprised to see Sonic
as he is to see her and when she tells him her tale, they both realize
there is far more at stake than they thought!
Miles "Tails" Prower:
This brilliant two-tailed fox is Sonic's best friend and a very skillful
mechanic. When he and Sonic become stranded on Southern Island, Tails
constructs ships that they hope will get them off the island. As Sonic
brings him new Materials, he builds four widely varying ships. With these
vessels, Sonic explores the surrounding islands - where he uncovers a
whole heap of trouble!
Marine the Raccoon:
Marine is a lovable raccoon from Southern Island with a passion for the
sea. She makes everyone call her Captain and she builds the ship of her
dreams so she can sail around the world. However, on the SS Marine's
maiden voyage, Marine realized she forgot to add one vital part to her
ship - the brakes! Tails offers to help her rebuild it, and she is so
excited she doesn't know whether to laugh or cry - so, instead she just
talks a lot. Sonic and Tails can't understand half the things she says,
but she's a lot of fun to have around.
Captain Whisker:
This surly pirate captain is used to encountering foes on the high seas,
but Sonic presents him with some unique challenges: not only is he fast,
he's also more fearless than most! The captain has a short temper,
especially when he's being tested, but luckily his crew is fiercely loyal,
and he's able to evade Sonic and keep up his search for the treasure.
Johnny:
The right-hand man of Captain Whisker, Johnny is a big talker who doesn't
like to lose - ever. He is most comfortable at sea and he is always
seeking worthy opponents to race, but few are brave enough to challenge
him until Sonic. Has Sonic met his match?
~*~*~*~*~*~*~*~*~*~*~*~
4. Character Moves, Tricks, Gimmicks, Tension Gauge and Boosting:
~*~*~*~*~*~*~*~*~*~*~*~
Whale Point is the in-game tutorial for moves you can play again any time,
but here is a detail description for them all.
The two playable characters are Sonic and Blaze of course, Blaze unlocked
after Zone 3's boss battle. From that point on, you can choose to play
any level in the rest of the story as Sonic or Blaze! Compared Sonic Rush,
there are a few differences in how the tricks are scored and how many
bars you get in your meter, but other than that and a couple of visual
differences and the fact R up tricks take longer, if you are familiar
with doing "Advanced Tricks" and using the R and A button instead of the
B, you'll do fine.
Sonic and Blaze only have a few minor differences in moves and the same
button combinations, so I'm doing this as one section with Sonic and
Blaze specific stuff clearly labeled.
In Act Moves:
~*~*~*~*~*~*~*~*~*~*~*~
Boost Start: At the very beginning of an Act when not playing it as part
of a Mission, or if you did not just previously die in that Act and start
at the beginning again, press Y just before the word Go! appears to have
a faster start.
Press and hold right or left: Run right or left, keep pressed and you
will gain speed. After a while you will go into Boost Mode, when you go
into Boost Mode, you will have a burst of wind with Sonic or fire with
Blaze and after images appear, Boost Mode is discussed later.
Press down: Pressing down while standing still will cause you to crouch
down, useful in dodging some attacks. If you crouch down long enough and
you are on the bottom screen, the view will eventually change and you can
see what is below you.
Pressing down while moving will start you spinning, useful for attacking
enemies. Doing this with Sonic is a good way of getting around loops if
you don't want to go into Boost Mode, but Blaze's spin is slower and that
would just slow her down.
Press up: Pressing up while standing still will cause the character to
look up, eventually the screen view will change so you can see what's
above you if you happen to be on the top screen.
A or B button: Spin(Sonic)/Axel(Blaze) Jump, use to jump or to attack an
enemy. Sonic spins into a ball while Blaze turns into a fiery top.
Press and hold down + A or B button then release: Spin (Sonic)/Burst
(Blaze) Dash, used for attacking enemies or to instantly increase speed
for getting up slopes, if you press the A button once and then release
both buttons, you will get the most powerful Spin, if you keep holding
down then release the A button, the character will eventually rev down a
little and then releasing down will result in a less powerful Spin.
Sonic's Spin Dash is faster and lasts longer than Blaze's Burst Dash.
A button, then R button: Jump Dash and Homing Attack (Sonic)/Burst Hover
(Blaze), both moves are go for moving to the right or left in a sudden
burst. Sonic's Jump Dash is fast and short, Blaze's Burst Hover is slower,
lasts longer and she can glide for 3 seconds and even change direction
from right to left in the air. Sonic can attack enemies with Jump Dash,
in fact if you are close enough to an enemy with Sonic and press R even
in mid-air Sonic will use Homing Attack and head right toward the enemy,
but Blaze can't with Burst Hover. With Homing Attack, you can also attack
multiple enemies in a row.
Tricks:
~*~*~*~*~*~*~*~*~*~*~*~
These are special mid-air maneuvers using the A, B and R button, they are
almost exactly the same as in Sonic Rush except for a point calculation
difference and the stars that determine the gain on your meter. There are
several kinds of tricks that can be preformed in certain situations,
usually after jumping off a spring or on a rail, etc... Tricks generally
give you extra points (maximum of 20,000 per Act) and help fill your
Tension Gauge which I will discuss in the next small section, but tricks
differ in points/tension and sometimes won't give one or the other. If
you use the same spring or other trick object more than once, the amount
of points/tension you get will normally go down until eventually you will
get none, and you can only get Combos the first time you touch an
individual trick item or if you switch trick items, so it's best to keep
moving quickly.
R button + Up Mid-air Trick: Hop Jump(Sonic)/Axel Tornado(Blaze). Similar
to the same trick from Sonic Advance 2, 3 and Rush, (though in SRA it
takes a bit longer) it can be used after jumping off a spring, being
launched off a ramp or out of a cannon, or after being propelled through
a boost hoop, after certain Gimmicks (discussed below) or in general
situations where you are in the air after bouncing off some sort of
Gimmick or other level object. Used to jump higher up, most effective if
used during the highest point in your jump, useful in reaching areas you
cannot normally get to. R button tricks are also used during Advanced
Tricks described later. The differences between Sonic's Hop Jump and
Blaze's Axel Tornado are:
Sonic: Doesn't go very high and can't attack enemies.
Blaze: Much higher and faster than Sonic's and can attack enemies.
R button + Left or Right Mid-air Trick: Same bonus and same situation as
the other R button trick. Humming Top(Sonic)/Jump Step(Blaze), this
propels the character sideways real fast, good if you want to go more
sideways into an area, unlike in the Advance games you don't need to face
the direction you want to go. The differences between Sonic's Humming Top
and Blazes Jump Step are:
Sonic: Propels Sonic very quickly to the side and can attack enemies.
Blaze: Can't attack enemies, but Blaze can "phase" straight through
enemies, basically go through them without harming Blaze or the enemy
(True in Sonic Rush also, I keep forgetting to mention this).
R button Rail Trick: Points and Tension. Just hit the R button while
grinding a rail, you can only hit R a maximum of three times in a row on
most rails and get up to 1700 points. Unlike in Sonic Rush, you can't
infinite trick off Rails. (Note, I don't know if the bonus can go higher
than 1700 on a long rail, I haven't seen that yet.)
A button Springboard Trick: Points. Off the edge of a springboard (I call
these ramps in my earlier guides. Same concept as in the Advance series
and Rush, but not only are you launched forward but you also get Points.
You can follow this up with any of the B button tricks described below.
A button end of Rail Trick: Points and Tension. Off the end of a rail,
press the B button and you can then follow that up with more tricks.
B button and Advanced Mid-air Tricks:
Points and Tension. Press B a bunch of times to do tricks on the way down
during the same situations you would use an R button trick described
above. Tension and Points bonus go down if you trick off the same object
more than once, so keep moving.
Combos:
~*~*~*~*~*~*~*~*~*~*~*~
New to Sonic Rush Adventure, you will notice stars and a number appear in
the right-hand corner of the screen. You get 1 star for each time you
press the B or A button when tricking, the number of stars corresponds to
an extra bonus you could earn on your Boost Meter.
But there's a catch... in order to earn those stars and a huge boost on
your meter, you have to follow the B button tricks with either an R or A
button trick, discussed below, and the stars will go to your meter! But
if you don't press R or A, then your stars will go away!
If you hit a different trick item, like for example one spring after
another, then you can keep your star count going even longer, but this
doesn't work if you keep hitting the same spring or other trick object!
Tension Bonus: About 3 Bars for each Star (I'll have to check this out
later, I think the bonus increases)
If you want to get fancier add in the A button and R Button Tricks and
try Advanced tricks. In general A button is pushed last and finishes off
the trick and can send Combo Stars to your meter, and is usually done
near the ground, you can only push A again if you do an R button trick
right afterwards, but you can only do one R trick in the whole sequence...
here are a few Advanced trick button combinations, the Double Advanced
gives you the most points and tension and works best with Blaze, but
slows you down the most.
Unlike in Sonic Rush, you don't have to press B at least two times before
pressing A.
Advanced: B as much as you can, than A
R button Assisted Advanced: R button trick, B as much as you can, then A
Advanced and a Half: B, then A, then R button, then B button till you hit
ground
Double Advanced: B at least two times, than A, then R button trick, then
B a few times, than A before you hit ground
Tension Gauge:
~*~*~*~*~*~*~*~*~*~*~*~
The gauge on the left hand side of either the top or bottom screen is the
Tension Gauge. You get Tension by doing Tricks, hitting a checkpoint,
hitting one of the Tension Item Boxes or Defeating Enemies, you lose
Tension by using the Super/Fire Boost or getting hit and losing rings.
You start off a zone or at a checkpoint with the gauge 100% full, but it
can go up to 300%. All white bars means you have zero tension, then it
fills up from bottom to top with blue bars to 100%, between 100 and 200
it fills up with orange bars, then past 200 to 300 red. Look in my new
Tension and Points List to find more specifically what certain things
give you what amount of Tension.
Boost Mode: When you are in Boost Mode, you travel extra fast, there are
a few ways to enter Boost Mode. The easiest way is to tap X or Y if you
have a little Tension, this will activate Super/Fire Boost, a more
powerful boost than this for a split second and that will activate Boost
Mode. Another way is to run, preferably downhill, if you run long enough
you will burst into Boost Mode, the more Rings you have, the sooner you
will burst into Boost Mode. You can also achieve Boost Mode if a speed
booster propels you forward or if you hit a horizontal spring at high
speed. Boost Mode cannot harm enemies like the Super/Fire Boost can,
discussed next.
In Sonic Rush Adventure (Maybe only in Two Player Races, I don't see it
in single player games), for every second you are in Boost Mode you get
bar on your Super Boost Meter, explained below.
Super (Sonic)/Fire Boost Mode: On top of the regular Boost Mode left over
from the Sonic Advance series, there is a new more powerful Boost.
Anytime you have Tension, you can use the Super(Sonic) or Fire(Blaze)
Boost where you gain a lot of speed and can defeat enemies, kind of like
Boost Mode but more extreme, but using this reduces your Tension quite a
bit. When the gauge is at 300 percent, for a short period of time the
character glows and the gauge blinks and you can do a Full Boost where
you are Invincible and even faster. Here is the complex part... if you do
not activate the Full Boost within 5 seconds of the gauge/character
starting to blink, the tension gauge and character stops glowing and you
will just be at 300 percent but doing just one more trick will make the
character glow again and you can keep it glowing by getting more tension
also. But if you do use it but don't gain more tension while using it,
then you will be only able to use it for the remainder of the 5 seconds
after gaining the tension to keep it glowing and after you used it the
Tension Gauge goes back down to 200 percent. But then again, if you use
this Full Boost and you continue to defeat enemies and do Tricks you can
maintain the Full Boost until 5 seconds have come by without gaining more
Tension, afterwards the Tension Gauge going down to 200% of course. This
type of boosting is helpful if you want to travel fast, defeat enemies,
becoming more invincible and even helps you push heavy objects much
faster (in this game the Mine Carts).
New to Sonic Rush Adventure: You get a 1 bar (5%) bonus for every second
you are in Two Player Multiplayer!
Extra Zone Specific Moves: I'll discuss this in the Extra Zone section to
help prevent spoilers.
Sailing: For now, discussed the Boats Section, though I might change
things around in future versions of this guide.
~*~*~*~*~*~*~*~*~*~*~*~
4.b. Gimmicks
~*~*~*~*~*~*~*~*~*~*~*~
Devices throughout the acts that propel you forward someway. Some
gimmicks have to be operated a certain way and sometimes hints in the
form of a little symbol telling you what button to push pop up.
Common/Hard to Use Gimmicks (There are more in the Act Descriptions):
Thin Floors:
Floors that look thinner than normal can often be jumped or tricked
through to get to the higher level.
Thick Floors/Doors:
Can be smashed by either Jumping or Super Boost to get to new areas.
Summersault:
Found in several Acts, you flip over this gimmick, and for a short period
of time the B button appears, pressing it at that moment will send Sonic
or Blaze through the air. Sometimes, the same summersault will launch
Sonic and Blaze different places.
Vine:
Found in Plant Kingdom and similar Hidden Islands, you need to hang on to
it, and jump off at the greatest point of the swing.
Hang glider:
Found in Machine Labyrinth and similar Hidden Islands, pressing up will
sent it upward at a pre-determined height, then it will slowly decent. Be
careful! Pressing the A button or running into something will make you
crash! This is a gimmick that takes getting used to. You can also Boost
while using the Hang Glider, if you get on it while Boosting sometimes,
this may be a glitch however..
Mine Cart:
Found in Coral Cave and similar Hidden Islands, first push it to get it
going, it's much easier if you Super Boost into it. The Mine Cart goes
forward automatically, but you can slow it down by pressing Left, and you
can also Jump, but that's it. During the 3D underground areas, all you
can do is jump.
Snowboard:
Found at the beginning of Blizzard Peaks Act 1 and Hidden Island 12, the
snowboard goes forward automatically. You cannot go backwards at all,
remember that, but you can still Boost when using it.
Anti-gravity devices (Gold Balloons):
Found in Sky Babylon, they operate kind of similarly to the metal
platforms in Sonic Rush's Altitude Limit. Hanging on to one, you can
steer right or left, but you can't control how fast the device goes up.
If you crash into something, you have to try to land where you got the
device in the first place, because another one will soon appear to
replace it.
Water Guns:
Found in Pirate's Island, when you stand in front of it, the cannon
automatically goes up and down. Press A when the cannon is pointing in
the direction you want. These water jets can kill enemies, and the water
jet turns into a rail you can grind on. Watch out however, the water jet
eventually disappears!
Dolphins:
Found in Pirate's Island, the Dolphin automatically goes forward. You can
go in any direction and pressing backwards will slow the dolphin down and
pushing forward speeds it up. If you run into a wall you will fall off
your dolphin, a good general tip is when you have a choice, go the
upwards path, you won't fall into a hole if you mess up up there. There
are various hoops you can go through, you will earn a Combo when you go
through, them, but you must hit the Green hoop at the end to earn it! The
Green Hoop will also spring you high up into the air.
Timed Gate: Found in Pirate's Island and also Hidden Island R-3.
Basically you can only pass through the gate before the time displayed
above it, afterwards a waterfall comes down and blocks that route.
~*~*~*~*~*~*~*~*~*~*~*~
5. Item Boxes:
~*~*~*~*~*~*~*~*~*~*~*~
Acts:
~*~*~*~*~*~*~*~*~*~*~*~
Same as in Sonic Rush, but no balloons and now with a nice trick
increaser...
5 Rings
Random Rings (Ring symbol with question mark): 1, 5, 10, 30 or 50 Rings.
Barrier (Green Bubble): Protects you once from losing a life or losing
Rings/Tension when hit.
Magnet Barrier (Electric Bubble): Like Barrier but also draws in nearby
Rings.
Invincible (muti-ray star pattern): Become immune from attacks that would
cause loss of Rings for a short period of time. Cannot save you from
being crushed or running out of time. For some reason can save you from
drowning in this game.
High Speed: (arrow pointing down and to the left): Allows you to perform
tricks faster for a short period of time.
Tension Bonus (Up pointing arrow): Increases Tension by 100%
Max Tension Bonus (fire burst): Completely fills your Tension Gauge
1 up: One extra life.
Sea Stages
~*~*~*~*~*~*~*~*~*~*~*~
Either touch or shoot the item boxes.
Repair (white gear): Repairs your ship by a certain percentage
Boost up (white burst): Increases the Boost power of the waterbike.
Random Ring Bonus: Same as in acts
Score Bonus (S): Increases your score by a certain amount
Two Player
~*~*~*~*~*~*~*~*~*~*~*~
Random Ring Bonus: Same as in normal game play
Slow (half-circle with two crescents): Slows down opponent for a short
period of time
Max Tension Bonus (One arrow pointing up, the other down): Your Tension
Gauge becomes Maximum while your opponent's goes down to zero.
Confusion (exclamation point): Sends your opponent out of control for a
short period of time
Attract (hand): Brings your opponent to the area where you are, just
behind you.
~*~*~*~*~*~*~*~*~*~*~*~
6. Gameplay Tips and Sonic Newcomers Guide:
~*~*~*~*~*~*~*~*~*~*~*~
For Sonic Newcomers:
Many things in this game are very familiar to people who play a lot of
Sonic
games both new and classic and very familiar to you if you played Sonic
Rush, but now I will for those that haven't played a Sonic game up until
now. Most of the general info below can be applied to almost any normal
Sonic game from Sonic 1 made all the way back in 1991 to the present.
Know your enemy:
Dr. Eggman, also called Dr. Ivo Robotnik, an mad scientist with dreams of
taking over the world. Since the first Sonic Game, he has been trying to
get his hands on the powerful Chaos Emeralds.
If Eggman gets a hold of the Chaos Emeralds and controls
them properly, he could take over the world.
The mad doctor traps innocent small animals inside robots often called
Badniks
to try to stop Sonic from ruining his plans. That is the reason why small
Animals pop out of his robots when you destroy them.
Running and Spinning:
Speed is the focus of a Sonic game usually, and often the faster you run,
the
more points you earn. Read the moves section to find out the fine art of
spinning various ways. But be careful! You are vulnerable to Badniks when
you run, so you need to spin jump or spin in general to kill them!
Basic In-Level Things:
Some basic things have been in a basic Sonic level from day 1...
Springs: Bouncy things that send you through the air, but not spinning,
so
don't hit enemies.
Loops-de-loops: Sonic had always been running through crazy loops in the
course...
Spikes: Whether they are just stationary or they are going in and out of
the ground, ouch they hurt!
Rings:
Mysterious, floating, spinning gold colored Rings seem to hang out
everywhere
in the Sonic World. Collect 100 of them and you earn an Extra Life and
they are worth points also. But a Ring is more than a random thing to
collect. If you are hit by a Badnik, spikes, boss or something else that
isn't Instant Death (explained below), then you loose all of the Rings
you are holding and Rings go bouncing around everywhere, but at least
you didn't die! Try to pick up as many Rings again as you can, because
the dropped Rings will start to fade away.
But if you are hit by one of these objects and you have no Rings, you
will die!
Item Boxes:
You will also find tv monitors (in some games bubbles)you can smash.
These give you various things, the most basic item box items are:
Rings: It's nice when you can smash a monitor and get lots of Rings at
once
instead of having to collect a lot of single Rings.
Shields (Barriers): These nice bubbles protect you from losing your Rings
one
time, but then you loose your shield. Sometimes shields do other things,
like
attract Rings.
Invincibility: Stars or a rainbow burst (depending on game) protect you
from
everything that would cause loss of Rings or death without Rings for a
short
period of time.
Remember, you can still die from Instant Death things, explained below.
Super Shoes: In most games allow you to run faster. In this game, the
Speed Up item increases the speed of your tricks and in general the Super
Boost replaces this in Sonic Rush and Rush Adventure.
Look in the game's Items section to find out about Tension related items
in this particular game.
Death:
As explained in the Rings sections, a Ring is the best way to avoid
loosing a
life.
If you have extra lives, then you start at either the beginning of the
level or If you touched a Checkpoint you start there. If you don't, Game
Over!
There are certain things that will kill you instantly no matter how many
Rings
you have or even if you have an Invincibility item, they are:
Bottomless pits, fall into the nothingness at the bottom of the screen
and you
are dead.
Crushing: The pressure of being pressed against two objects is just too
much...
Drowning: Sonic can only live 30 seconds underwater and he can't swim!
(This game specific, Blaze lasts 45 seconds). A countdown begins from 5
when you are close to drowning, either get out of the water, or find
rising air bubbles from the ground and breathe one in.
Special Stage and Chaos Emeralds:
The most mysterious objects of them all, in most games you can enter the
Special Stage to try to earn them (see Emeralds section for this game).
Chaos Emeralds have mysterious powers and in the Rush series so do the
very similar Sol Emeralds... not much is known about them, but often
something very special happens when Sonic has all 7... If you do not
collect all of the Chaos Emeralds and you beat the game, you get a
message to go and collect them all and what turns out to be sometimes a
not-so-good ending to the game.
General Tips:
Typical Sonic games stuff such as Crushing and Drowning are instant death,
keep at least one ring because if you don't have one ring you will loose
a life,
100 Rings=one extra life, to prevent drowning breath in air bubbles,
don't step
on spiky things, etc...
R button Tricks are even more important in this game than in the Advance
series and Sonic Rush, so master them!
Learn how to do Tricks and use your Boost, but actually you can beat this
game
without them if you want to, but you won't get S-ranks!
Don't go too fast, this game has quite a few horrible holes and other
nasty
things you can get into, especially if you use the R button too much...
but once you learn this game really well you can speed right through it.
(Though Rush Adventure has fewer bottomless pits than Rush.)
Silly Easter Egg: Poke Sonic or Blaze when they are on the bottom screen
to see what happens...
~*~*~*~*~*~*~*~*~*~*~*~
7. Story Mode Walkthrough:
~*~*~*~*~*~*~*~*~*~*~*~
This is a brief description of Story Mode and where to go. For Tips on
Sea Stages, Acts/Bosses and other things, see their respective sections.
When you start off, you can play as Sonic only.
Whale Point-
Complete Training and Gather Blue and Iron Material.
Marine's House-
Talk to Tails a couple of times so he builds the Wave Cyclone.
To Plant Kingdom-
Sail out with the Wave Cyclone to Plant Kingdom, it's to the West.
Tabby-
Found after completing Plant Kingdom and then will show up on Southern
Island.
To Machine Labyrinth-
Sail out with the Wave Cyclone, you will start at Plant Kingdom and draw
a line to Machine Labyrinth, the Southwest.
Building the Sailboat-
After completing Machine Labyrinth you need the sailboat to continue, you
need Five Green and Five Bronze Material. If you don't have enough, open
the Menu and use Stage Select to replay Plant Kingdom and Machine
Labyrinth Acts and Bosses.
Sailing West from Machine Labyrinth
The First Chaos Emerald/Hidden Island 1-
Head West from Machine Labyrinth, you will encounter Shallows, so keep
redirecting your course around them. Eventually you will hit the first
Chaos Emerald race, see the Emeralds sections for more details.
Continuing on, you will hit Hidden Island 1.
Hidden Island 1/Coral Cave-
Get to the Goal of Hidden Island 1 in order to gain access to the Coral
Cave Zone.
Unlock Blaze-
Complete Coral Cave to unlock Blaze. From now on, you can play any
Act/Boss with Sonic or Blaze.
Building the Radio Transmitter-
You need 5 Green, 5 Bronze Material and 1000 Rings, replay levels until
you have enough.
To Kyloks' Island/Haunted Ship-
After the radio transmitter is build, sail East with the Ocean Tornado
from Southern Island to Kyloks' Island. Now Kylok will appear on Southern
Island. Continue sailing East to find the Haunted Ship Zone.
Building the Hovercraft-
You need 1 Blue, 1 Iron, 2 Green, 2 Bronze, 5 Red, 5 Silver Materials,
might take some replaying of levels in order to complete it.
Choice of Path, North or West?
To Blizzard Peaks and Sky Babylon-
Now there are two places you can go! Head North from Haunted Ship to
reach Blizzard Peaks to unlock Norman after beating that level, or
Southeast to Daikun's Island (Daikun then shows up on Southern Island),
then to Hidden Island 2, and after beating that head to Sky Babylon.
Both of these Zones must be complete to continue on!
Building the Submarine-
Now you need 1 Iron, 1 Green, 1 Bronze, 2 Red, 2 Silver, 5 Aqua, 5 Gold
to build the Deep Typhoon. Replay levels/Hidden Island till you got them
all and then sail North to Pirate's Island... and you find the door is
locked! You need to find the clues...
The Three Clues-
There are three Hidden Islands you need to find, or at least replay again.
Some of the characters on Southern Island will give you clues, but here
are the locations as I give them later in the guide:
Hidden Island 3: Aqua Blast, Haunted Ship, Two to the right and 3 up.
Hidden Island 4: Wave Cyclone, 1 Left and 3 up from Hidden Island 2 (next
to Sky Babylon)
Hidden Island 5: Wave Cyclone, Haunted Ship, About 3 down.
Unlock the Door!-
At Pirate's Island, use the stylus to turn the clue pieces so they match
the clue pictures. Now you can play this Zone!
Final Boss-
Sail north from Pirate's Island to reach the Final Boss!
Extra Boss-
Collect the Chaos Emeralds and Sol Emeralds (see the Emeralds section for
directions and the Boss section for tips).
~*~*~*~*~*~*~*~*~*~*~*~
8. Southern Island:
~*~*~*~*~*~*~*~*~*~*~*~
Marines home sweet home is your base of operations!
Navigate the island by pressing either the directional buttons or tapping
with the stylus. On the top screen appears a picture and description of
your destination and little icons at the bottom with pictures of who
happens to be there, different characters appear in different locations
as you find them and progress through the game. Also when you build new
ships, docks for those ships appear on the island too.
You can even change the appearance of Southern Island if you clear
certain missions!
~*~*~*~*~*~*~*~*~*~*~*~
8.a. Menu
~*~*~*~*~*~*~*~*~*~*~*~
Anywhere on Southern Island, you can access the Menu by pressing the Y
button. On the top is a mini version of the sea chart, the ships you have,
number of lives and Tails to give you helpful hints. Also number of Rings
appears at the top of the bottom screen.
Stage Select- You can choose any Act, Boss or Hidden Island you have
already cleared, so you don't have to sail out to them anymore. A picture
of the Materials you can earn appears below the level picture and Tails
tells you also.
Sea Chart- View all the Acts, Chaos Emerald Locations (Johnny) and
Hidden Islands you have found so far.
You also use this to stage select, but you will go back to Act 1, then go
to Act 2 and the Boss for that Zone in order for a Zone.
But you can't use it to go back to Chaos Emerald locations, you have to
sail out to them again or when you unlock Viking Cup with Norman, you can
play them from there too under the Wave Cyclone section.
I talk about the Sea Chart a bit more in the Materials/Ships section of
this guide.
Save- Very important option, this game almost never autosaves please save
often!
Items-
Shows what items you have picked up and number of Rings you have, three
sections.
Materials- self explanatory, what materials do you have, see the
Materials section later on.
Emeralds- All of the Chaos and Sol Emeralds you have collected.
Medals- Medals are found in certain Missions, there is one for every Act.
~*~*~*~*~*~*~*~*~*~*~*~
8.b. Places and People of Southern Island:
~*~*~*~*~*~*~*~*~*~*~*~
Marine's House:
~*~*~*~*~*~*~*~*~*~*~*~
Front Room: Marine, Tails and eventually Blaze
Marine- The keeper of the Missions! Choose Missions from her option menu
to see a list of all Missions unlocked. You get Missions by clearing
certain Hidden Islands or other things, or after completing certain
things then talking to someone on Southern Island, refer to the Missions
section for more info.
Tails- The master of the Materials! If you want him to build a new craft
or something else, or later on upgrade your crafts, first talk to him,
then choose the second menu option to get instructions on what Materials
you need. Grab Materials by completing Acts and Hidden Islands, there's
more about this later in the guide of course.
Back Room: Setter, Versus Machine, Time Attack.
Setter-
I guess he lives there too, he's your options menu and gives you some
missions, here are his options:
Talk: If you complete certain Acts, Bosses and Islands, if you talk to
him he might give you some Missions. If you clear his Missions, he will
build things on Southern Island.
Change Player's Name- Defaults to the name in your Nintendo DS settings,
but you can change it to something else for this game.
Options-
Boss Difficulty: Defaults to Easy, but you can make them harder by
choosing Normal
Time Limit: Defaults to off, but if you want to make it harder, turn them
on to give yourself only 10 minutes to complete an Act.
Clear Data: Erase everything and play the story from the beginning! (I
haven't done this yet, don't know if it clears wifi data also. I have
heard it does not)
Versus Machine- Your portal to the world of Wifi, I wrote a separate Wifi
section for this guide.
Time Attack- Your portal to the world of Time Attacking and the World
Leader Board. There is of course a section about this also.
Whale Point:
~*~*~*~*~*~*~*~*~*~*~*~
Training for the Act levels, not very necessary if you are very familiar
with the game Sonic Rush, but it's there in case you need it. Completing
it earns you one piece of Blue Material and one piece of Iron Material.
Seagull Beach:
~*~*~*~*~*~*~*~*~*~*~*~
Muzy: Appears after defeating the Final Boss.
Taik- He might give you a Mission, then when you clear it talk to him
again and you will get a new sound (all missions work like this)
Sound Test- Different sounds unlocked by completing some parts of the
story and completing Muzy and Norman Missions.
Ship Docks:
~*~*~*~*~*~*~*~*~*~*~*~
First you have to build them as part of the story, then a new dock
appears.
Hop on the vehicle to go exploring or choose Training to practice using
the ship, explained later, or talk to any characters standing there after
you have found them during the story, here are all the characters:
Wave Cyclone:
Kylok: Appears when you find Kylok's Island in the story (Before Haunted
Ship)
Apparently loves movies. Talk to him to grab his missions, and then by
completing them, you can unlock the cutscenes and 3D movies from this
game.
Tabby:
Complete his missions, and he will add animals to roam Southern Island.
Ocean Tornado:
Gardon: (I think appears soon after completing the Ocean Tornado)
A very important character, he gives you the Sol Emerald missions which
you need to beat to unlock the Extra Ending, an explanation of which is
in the Emeralds Section.
Norman: Appears after beating Blizzard Peaks
Talk- He will give you four Missions on the vehicles, they are pretty
hard!
Viking Cup- Four levels you can time attack with each of the four ships
and for the Wave Cyclone you can also Time Attack the Chaos Emerald
stages. See the Viking Cup section in the Time Trail section for more
info.
Aqua Blast:
Colonel: (I think appears soon after completing the Aqua Blast)
Doesn't give Missions, but at certain points in the game he'll give you
info or an island decoration... for a price...
Dakun: (Appears after finding his island in the story, before Sky
Babylon)
If you clear his missions, he will build you something on the island.
???:
Something else appears after you get all the Chaos and Sol Emeralds... what
could it be... not telling right now, I will in the future when I have the
Extra Zone section complete.
~*~*~*~*~*~*~*~*~*~*~*~
9. Materials, the Sea Chart and Ships
~*~*~*~*~*~*~*~*~*~*~*~
~*~*~*~*~*~*~*~*~*~*~*~
9.a. Materials
~*~*~*~*~*~*~*~*~*~*~*~
Simply put completing Acts, Bosses, Hidden Islands and Whale Point will
earn you Materials that Tails can use to build ships, a radio tower, and
upgrade the ships later on after Final Boss, discusses later. What
act/boss you play and your ranking determines how many material and what
type you receive. Often to continue the story, you will have to repeat
levels that will give you the materials you need. When you pick a level
on the Sea Chart or Level Select, a picture of the materials you can get
appears below and Tails tells you.
Acts and Bosses Materials:
~*~*~*~*~*~*~*~*~*~*~*~
Give you one type of Material depending what Zone you are in, the number
determined by Rank:
C rank- 1
B rank- 2
A rank- 3
S rank- 4
Material Types:
Plant Kingdom- Green
Machine Labyrinth- Bronze
Coral Cave- Red
Haunted Ship- Silver
Blizzard Peaks- Aqua
Sky Babylon- Gold
Pirates Island and Final Boss- Black
Hidden Islands and Whale Point Materials:
~*~*~*~*~*~*~*~*~*~*~*~
What you get doesn't vary by Rank and is the only place you can get the
rarer Blue and Iron Materials.
Whale Point and Hidden Islands similar to Whale Point:
One piece of Blue and one piece of Iron Material
Hidden Islands similar to a Zone:
Usually one piece of Blue or Iron Material, plus two pieces of Material
of the zone it resembles, see below.
Hidden Island Materials:
Whale Point: Blue, Iron
1. Blue, Iron
2. Blue, Iron
3. Blue, Iron
4. 2 Red
5. Blue, Iron
6. Blue, Iron
7. Iron, 2 Green
8. Blue, Red
9. Iron, 2 Bronze
10. Blue, 2 Bronze
11. Iron, 2 Red
12. Blue, 2 Aqua
13. Iron, 2 Aqua
14. Blue, Iron
15. Blue, 2 Silver
16. Blue, Iron
~*~*~*~*~*~*~*~*~*~*~*~
9.b. The Sea Chart
~*~*~*~*~*~*~*~*~*~*~*~
After your ship is built, you go to that ship's dock on Southern Island
and you can choose to take the training lesson, or set sail for another
Island or Emerald Race, or just to go where you want to! But to get where
you are going, you need to know how to use the Sea Chart!
There's a version of the Sea Chart in the Menu that you can tap to just
look at location names, or instantly go back to any island you have found.
Mark your course!
Any orange dots on the map you can use as a starting point, they appear
on some islands you have already visited and vary in location by Ship.
Use the stylus to draw a route where you want to go. The bar at the top
shows how far you can draw, it changes color to red when you start
running out of route!
You can make the route any length you want, and as straight or as curvy
as you want. This will affect how long the sea stage is, and how curvy
the route you will take will be!
Green Dots are Islands you have found, but can't launch out from.
Orange Dots are Islands you have found, but can launch out from. Begin
drawing with the stylus from these.
Sometimes during story mode, there is a certain place you have to launch
off from, but there are certain places that will become permanent places
you can launch out from, these vary by ship.
I have listed all the starting off points for each ship under each ship's
section.
You don't have to sail out to islands once you find them, if it's a stage
then use Stage Select, or look at the complete Sea Chart in the Options
Menu to start at Act 1 and play the Zone in order.
Return to Chaos Emeralds again through Norman's Viking Cup if you want to
instead of sailing out to them.
During the Story, places you are suppose to go to continue are marked
with orange flags, but you can explore out from these if you want to.
Areas you have not visited are covered in Dark Blue, but when you travel
the places you have been become clear. If you look closely, you might see
Zones hidden in the Dark Blue, and lighter blue spots that indicate
shallow water, Hidden Islands and Johnny(Chaos Emeralds) like to hang out
here... Chaos Emeralds are marked by Johnny's head and if you already
completed it you can replay them again in the Viking Cup when you get
that later on, or sail out to that location again.
If you run into places you can go with a ship because you could not see
them in the Dark Blue, you will be asked to set another course in another
direction.
Pink areas are places you can't go to in that ship. Also sometimes Tails
will say you simply can't go that way with that ship, just try again with
a new ship or try a new course.
Brown areas are the Shallows, the Sub and the Ocean Tornado can't go
there!
White areas are ice flows. You need the Aqua Blast or the Sub to travel
to these areas.
Purple areas are foggy. You can't see anything or shallow areas through
the Dark Blue here, so that means you need to head out into them and
search more thoroughly for possible Hidden Islands. So a Dark Blue area
on the map that looks empty at first might in fact end up being covered
in Fog!
Now you have charted your course, time to set sail!
~*~*~*~*~*~*~*~*~*~*~*~
9.c. The Sea Stages
~*~*~*~*~*~*~*~*~*~*~*~
Arr, it's time to set sail on the high seas! There are four different
types of sea stages corresponding to the four ships, but before I get
into details for the four ships, here's the Basics!
Moving:
~*~*~*~*~*~*~*~*~*~*~*~
Different enough for the four ships I'll discuss them separately later,
but you either steer the ship with the stylus, or the ship automatically
steers, and you can also Boost/Attack enemies with either the buttons or
the stylus also.
Taking Damage:
~*~*~*~*~*~*~*~*~*~*~*~
At the top left of the Sea Stage is a blue bar that represents how much
damage you can take. Getting hit by enemies, or their ammo, small
islands/rocks, or bombs or other things will cause varying amounts of
damage, and this bar will go down. If the bar goes all the way down, you
will find yourself back at Windmill Village!
You can repair Damage with the Repair Item Box by a certain precent, but
it varies, and you can't tell how much of a repair you will get until you
hit it/shoot it.
Upgrading your ship doubles the amount of damage you can take.
Scores and Combos:
~*~*~*~*~*~*~*~*~*~*~*~
You receive Points for each enemy you defeat, bomb or projectile you
destroy, or Ring you pick up in the Sea Stages.
At the end of a stage, you get to see how many total points you have
collected, along with the number of Rings you grabbed, number of Enemies
you destroyed, and the Max Combo, the highest number you managed to get
your Combo meter to read!
Combos in the Sea Stages are earned by shooting/hitting enemies/bombs or
Rings in a row. The higher the Combo, a multiplier is added when you get
points for getting an enemy/Ring, for example you will start seeing 2X200
instead of just 200 for a particular score, they go up by intervals of 50,
so if your Combo Number is between 50-100, you get a X2 Bonus, 100-150 a
X3, etc...
Sailing Conditions in Different Areas:
~*~*~*~*~*~*~*~*~*~*~*~
The area choose to sail in can greatly affect the Sea Stage, though these
are general rules.
Sometimes for example, it might be foggy in the middle of nowhere, or
sometimes you might see islands in the middle of the ocean, but in
general:
Shallows- So shallow, the Ocean Tornado and the Submarine can't sail here.
When on the Wave Cyclone or Aqua Blast, there are various small rocks and
Islands sticking out of the water that will try to get in your way.
Open Sea- Not much out there, it's nice sailing generally, except for all
the enemies...
Purple Fog- The purple fog is mysterious and makes it harder to see, you
can't really tell on the Sea Chart what kind of area you are about to
sail into. Sometimes fog appears in other places too.
Ice Flows- The Ocean Tornado and the Wave Cyclone can't handle Ice Bergs,
but the Sub can go under them, and the Aqua Blast is a hovercraft that
came more safely navigate them. There's no difference with the Sub levels,
but with the Aqua Blast, the ice becomes an obstacle like the small
islands in the Shallows.
Sea Stages Item Boxes:
~*~*~*~*~*~*~*~*~*~*~*~
Either touch or shoot the item boxes.
Repair (white gear): Repairs your ship by a certain percentage
Boost up (white burst): Increases the Boost power of the waterbike.
Random Ring Bonus: Same as in acts
Score Bonus (S): Increases your score by a certain amount
~*~*~*~*~*~*~*~*~*~*~*~
9.d. Ships
~*~*~*~*~*~*~*~*~*~*~*~
There are four Ships that Tails builds for you so you can sail to new
Islands. Talk to Tails in Marine's House, then talk to him again and see
what Materials you need to build that ship, explained below.
~*~*~*~*~*~*~*~*~*~*~*~
9.d.1. Wave Cyclone:
~*~*~*~*~*~*~*~*~*~*~*~
To Build-
One Blue and One Iron Material after Whale Point
Sailing Out Points-
Southern Island, Plant Kingdom, Machine Labyrinth, Coral Cave, Kylok's
Island, Hidden Island 16, Haunted Ship, Daikun's Island, Hidden Island 2.
Your first Ship, this water bike is fast, but it can't go very far, and
it can't head into iceberg laden waters or find underwater entrances. You
use this ship to grab the Chaos Emeralds, so learn it well!
See the Emeralds section for more specific Tips on how to Grab the Chaos
Emeralds and where to find them.
Controls:
~*~*~*~*~*~*~*~*~*~*~*~
Moving Back and Forth-
Slide the stylus left and right in order to move Sonic forward and to
change directions. If you take the Stylus off the screen, you will slow
down and eventually stop.
Boost-
The amount of Boost you have appears in the upper-right hand corner of
the screen and only applies to this ship. It's kind of similar to the
Tension Meter in the Acts, but is just one simple bar.
You start with 30%, and you earn More Boost by grabbing Rings, performing
Tricks off Ramps, and defeating Enemies/plowing away Purple Bombs, which
in this ship you can only destroy with Boost or by jumping off a Ramp.
Activate Boost by either tapping the Stylus on the screen twice, or
holding the R or L buttons down, I personally find it much easier to just
use the R and L buttons for this.
Similar to in Acts, Boost allows you to travel faster, and you can plow
through enemies/bombs unharmed, but the meter goes down quickly when you
use it. But just like in Acts, if your meter is full and your character
is glowing, then you can keep up your boost forever if you keep getting
Rings/Tricks/Enemies in rapid succession (Though I think in the Chaos
Emerald races this isn't true)
Trick Ramps:
~*~*~*~*~*~*~*~*~*~*~*~
Ramps have arrows going in a certain direction painted on them, when you
hit a ramp, you are launched into the air, and a series of arrows/dots
appears, just slide your stylus along them the direction the arrows are
pointing to do a Trick, this will help increase your Boost Meter. If you
don't do it just right, you will fall back down into the water and earn
no Boost Bonus.
Sometimes, more than two sets of arrows will appear, and sometimes the
Ramp has a Question Mark and you don't know what will appear!
When you have just tricked and are surrounded by the yellow swirling
energy, you can hit enemies/bombs unharmed.
Sometimes Purple Bombs will block a Trick Ramp, you will have to use
Boost in order to throw the bombs out of the way first.
Enemies/Bombs:
~*~*~*~*~*~*~*~*~*~*~*~
In a future version of this guide, I might detail all the Sea Stage
enemies, but anyway, for the Wave Cyclone the only way you can defeat
enemies is to plow into them with Boost, or hit them when you are
surrounded by the yellow energy after Tricking off a Ramp. Defeating
Enemies increases your Combo and gives you points, though they can slow
you down significantly.
Tips:
~*~*~*~*~*~*~*~*~*~*~*~
It's best not to activate Boost until it's completely full, because the
Boost doesn't last very long at all, and unlike in Acts is hard to keep
up if your Gauge is not full to begin with.
Boosting through Purple Bombs is a good way to avoid them, but if you are
trying to Time Trail via the Viking Cup, or trying to grab a Chaos
Emerald, they can slow you down too much and it's best to avoid them.
~*~*~*~*~*~*~*~*~*~*~*~
9.d.2. Ocean Tornado:
~*~*~*~*~*~*~*~*~*~*~*~
To Build-
5 Green and 5 Bronze Material after Machine Labyrinth.
Sailing Out Points-
Southern Island, Plant Kingdom, Machine Labyrinth, Coral Cave, Kylok's
Island, Hidden Island 16, Haunted Ship, Hidden Island 2.
This sailboat can go far and has three different types of weapons for
battles, but it can't go into very shallow water or ice burgs or find
underwater entrances.
Controls:
~*~*~*~*~*~*~*~*~*~*~*~
Fire a Weapon-
Stylus! Tap your stylus where you want the weapon to fire. Weapons take a
short time to reload. Use Weapons to attack enemies and to grab Items and
Rings and destroy other things for Rings.
Switching Weapons-
You can either tap the three weapons with the stylus at the bottom of
your screen, or use the D-pad as so:
Left- Guns
Up- Cannons
Right- Flamethrower
The Guns
~*~*~*~*~*~*~*~*~*~*~*~
6 Shots before reload, the Gun's bullets are small yet precise, but they
cannot harm larger enemies at all. They are best for destroying small
enemies and destroying enemy bullets coming straight at you.
The Cannon
~*~*~*~*~*~*~*~*~*~*~*~
Three cannonballs before reloading, they deal a lot of damage, but are
slow to fire and it's hard to hit smaller enemies and bullets fired at
you with them. They are best for quickly destroying huge enemies.
The Flamethrower
~*~*~*~*~*~*~*~*~*~*~*~
Deals some damage to all enemies and covers a large area, but it's not
the best for precise attacks, such as destroying missiles coming at you.
Best for grabbing lots of Rings/Items and if there are lots of things on
the screen.
Enemies:
~*~*~*~*~*~*~*~*~*~*~*~
There are several types of enemies in this stage, I'll detail them all in
the future, but they fall into a few different categories:
Small- Best destroyed with the guns.
Large- Guns are useless against them, but these enemies often fire things
back at you, so you need to be ready to switch to the guns in order to
defend yourself. The Flamethrower can also destroy them, but it takes
longer.
Enemy Projectiles- Many varieties, but basically if you see something
fired at you, hit it with the Guns before it can deal damage!
Kamikaze- A few small enemies will plow themselves directly into you,
destroy them with the Guns before they get a chance!
Tips:
~*~*~*~*~*~*~*~*~*~*~*~
If you are just trying to get through this Sea Stage, then I suggest
going on the defensive, use the Guns to shoot incoming fire, and the
Flamethrower for wide Damage, only use the Cannons on the larger ships if
there are just plain too many larger ships, or you are going for a large
score.
Shooting at small islands and buoys will increase your combo, and once
they are destroyed Rings will pop out of them, just like with the Enemies.
~*~*~*~*~*~*~*~*~*~*~*~
9.d.3. Aqua Blast:
~*~*~*~*~*~*~*~*~*~*~*~
To Build- 1 Blue, 1 Iron, 2 Green, 2 Bronze, 5 Red, 5 Silver Materials
after Haunted Ship.
Sailing Out Points-
Southern Island, Plant Kingdom, Machine Labyrinth, Coral Cave, Kylok's
Island, Hidden Island 16, Haunted Ship, Blizzard Peaks, Daikun's Island,
Hidden Island 2.
A pretty fast hovercraft, it can go almost anywhere, even over ice, but
it can't find underwater entrances.
Controls:
~*~*~*~*~*~*~*~*~*~*~*~
Moving Back and Forth-
Similar to the Wave Cyclone, move the stylus back and forth.
Charge/Shooting enemies-
When you have the stylus on the screen, the Charge Meter on your right
fills up rather quickly. When you take the stylus off the screen, you
will fire a shot that can destroy enemies or at least deal some damage to
large enemies directly in front of you. The longer you keep your stylus
on the screen, the greater the charge and the larger and more powerful
your blast will be.
Remember you cannot aim the blast, it's directly in front of you.
Defend-
Defend yourself with swirling yellow energy by either twirling the stylus
around, or using the R or L button. When you defend, you can deflect any
objects/enemies for a few seconds, but you do slow down.
Enemies:
~*~*~*~*~*~*~*~*~*~*~*~
Pretty similar to the enemies with the Wave Cyclone, you can destroy them
with Charge or Defend.
Tips:
~*~*~*~*~*~*~*~*~*~*~*~
Use the Charge when there is a large amount of enemies in front of you so
they will throw less projectiles at you. Defend when there is too much
stuff coming at you for you to effectively destroy with Charge.
~*~*~*~*~*~*~*~*~*~*~*~
9.d.4. Deep Typhoon:
~*~*~*~*~*~*~*~*~*~*~*~
To Build-
1 Iron, 1 Green, 1 Bronze, 2 Red, 2 Silver, 5 Aqua, 5 Gold after Blizzard
Peaks and Sky Babylon.
Sailing Out Points-
Southern Island, Plant Kingdom, Machine Labyrinth, Coral Cave, Kylok's
Island, Hidden Island 16, Haunted Ship, Blizzard Peaks, Hidden Island 2,
Pirate's Island.
Elite Beat Agents.... never played this DS game myself, but I hear these
stages are very similar to that game.
This submarine is long range and can find underwater distances and go
under ice, but it can't go into the shallows.
Controls:
~*~*~*~*~*~*~*~*~*~*~*~
Work that Stylus!
You only use the Stylus in this stage. Tap the stylus preferably when the
circles turn while around the enemies. If an arrow is on the enemy, you
need to follow the enemies' motions for a while before a shot is fired.
Also tap Rings and Item Boxes to receive them when they are closest to
you, Item Boxes also get circles around them.
Basically, the timing of tapping the stylus corresponds to the beat of
the Music. When you tap at the correct time, you will see the word
"Great!" but you can also get scores of "Good", "Ok" or Miss. (I'll have
the points list later).
If you miss an enemy, they will either just go away, or worse they will
attack you! Different enemies seem more likely to attack than others.
Tips:
~*~*~*~*~*~*~*~*~*~*~*~
If you are not really going for a huge score, try just tapping the stylus
like crazy when loads of enemies appear to destroy as many as you can,
though trying to keep up with the beat also works really well, though
with loads of enemies it gets a bit confusing which one to attack first,
but remember you can attack before the circle turns white often.
~*~*~*~*~*~*~*~*~*~*~*~
9.e. Upgrading your Ships:
~*~*~*~*~*~*~*~*~*~*~*~
After you beat the Final Boss, if you gather more Materials Tails can
improve your ships even further! The upgrade cycle is Wave Cyclone, Ocean
Tornado, Aqua Blast, Deep Typhoon, then one more time in that order. Your
Ship is able to take more damage, and I think increases in Speed. If you
upgrade, you can get the Chaos Emeralds a lot easier!
~*~*~*~*~*~*~*~*~*~*~*~
10. Acts
~*~*~*~*~*~*~*~*~*~*~*~
Gain new Acts and Bosses to play as by Exploring around in the various
ships! There's a grand total of 7 Zones with two Acts and a Boss each, 16
Hidden Island Acts, and the Final and Extra Boss!
You can always go back to a specific Act or Boss after you have found
them in a ship by hitting Stage Select, or you can go to a Zone with the
Sea Chart, or sail out to that Zone/Island again!
(But you can't sail out to Sky Babylon, after beating Hidden Island 2 the
first time, go back with Stage Select or Sea Chart under menu)
In this game, there are 7 regular Zones, plus 16 Hidden Islands and the
training stage Whale Point, plus the three R Hidden Islands lap courses
only found in Time Trial and Two Player, and the Sea Stages discussed
separately. Some of the Hidden Islands are similar some of the Zones,
while others are like Whale Point and can almost be thought of as another
Zone. The Acts for each Zone share common Gimmicks and Obstacles, here's
a brief description of each and Tips for each! Bosses have their own
section.
~*~*~*~*~*~*~*~*~*~*~*~
10.a. Plant Kingdom
~*~*~*~*~*~*~*~*~*~*~*~
Plant Kingdom plus Hidden Island 6 and 7.
Material: Green
A lush tropical forest with Giant Mushrooms, reminds me of something like
Sonic and Knuckle's Mushroom Hill, or Sonic Heroes' Frog Forest.
Gimmicks:
Vine-
You need to hang on to it, and jump off at the greatest point of the
swing.
Mushrooms-
Very bouncy, you can trick off them like a spring, it's best to bounce
direction from one mushroom to another.
Trees-
Giant Trees grab you with their arm and spring you high up in the air.
This Gimmick takes a while, so it's a good one to skip if you are trying
for Time Trials.
Flippy things-
What else could I call them? Red on one side and green on the other, when
you are flipped over to the top, jump to get up to a higher area.
3D Part:
Plant Kingdom 1,
You are on a set of three vines, just press right or left to jump from
one to the other, make sure to jump to another vine to avoid purple mines,
or to grab Rings.
Enemies:
Pterodactyl-
Try to dive-bomb you from the air, no problem if you happen to be Super
Boosting, or if you are not, they generally miss you if you are running,
if you are bouncing off stuff, you might want to consider using an R-move
to attack.
Triceratops-
They charge at you, but Super Boost or a good Spin Dash will take care of
them.
Fish-
Appear out of nowhere and attack you when you are running on top of water,
taken care of easily if you Super Boost (X/Y).
Tips:
For the S-rank, find the shortcuts, general at the top of the level. Easy
overall.
~*~*~*~*~*~*~*~*~*~*~*~
10.b. Machine Labyrinth
~*~*~*~*~*~*~*~*~*~*~*~
Machine Labyrinth Plus Hidden Islands 9 and 10.
Material: Bronze
This bronze steam machinery seems pretty high-tech!
Gimmicks:
Hang Glider-
Pressing up will sent it upward at a pre-determined height, then it will
slowly decent. Be careful! Pressing the A button or running into
something will make you crash! This is a gimmick that takes getting used
to. You can also Boost while using the Hang Glider, if you get on it
while Boosting sometimes, this may be a glitch however.
Steam-
In most Sonic games, steam is harmful, but here it's a Trick Object that
pushes your high in the air!
Steam Pinwheel-
You automatically go around in a circle, jump off it when you are facing
the direction you want to go.
Drums-
They are automatic, but keep pressing B to earn Trick Points while going
through them.
Enemies:
Mecha Skeletons-
These crazy robots have long arms with wrenches, if you get too close,
they will swirl those arms around and hurt you, so they have quite a wide
attack radius! Try to jump on them, or just Super Boost.
Rocket Pack Skeletons-
Have a funky Rocket Pack, they move up and down in the air and try to
block their way, R trick them, or Super Boost them!
Blue Shorts Fat Robots-
Spray a jet of Steam at you, trying to push you backwards, often into
something unpleasant, jump over them from afar, or just Super Boost as
always!
Tips:
Lots of Trick Points possible, but you need to still try to find the
shortcuts, which like always are mostly the high routes.
Hidden Island 9: Hard, cause it's all Hang Glider, try it with Blaze, she
can float a bit and can help you out if you accidentally fall off.
~*~*~*~*~*~*~*~*~*~*~*~
10.c. Coral Cave
~*~*~*~*~*~*~*~*~*~*~*~
Coral Cave plus Hidden Islands 4,8 and 11
Material: Red
A sparkling, watery cave full of coral, and also sparkling Gems, the Mine
Carts show that it used to be mined for Jewels, reminds me of something
like Lava Reef from Sonic and Knuckles, but watery instead of lava.
Gimmicks:
Mine Cart-
First push it to get it going, it's much easier if you Super Boost into
it. The Mine Cart goes forward automatically, but you can slow it down by
pressing Left, and you can also Jump, but that's it.
Pulley with Hook-
Huge Pulley with a Hook and rope at the end, it sends you down and then
up, you can trick off it like a Spring. The little known fact is you
should hit R before you reach the hook when you are on the pulley, cause
for some reason that part counts as a Rail and you can help fill your
Tension Meter.
Wooden, umm... arm thing...-
Run into it and it will simply take you up to another level in the Act,
you can't trick off it.
Rocks suspended with Coral-
Falling Rocks are instant death, so stay clear so you can use them as a
platform. If it's red Coral suspending the Rock, then you need to either
Jump, R-trick or best of all jump while Super Boosting into the coral to
make the rock fall.
If the Coral is Green, it falls on it's own, you just need to stand back
so you don't get crushed!
3D Part:
Mine Cart, all you can do is jump over Purple Mines and Lava areas, jump
for Rings.
Enemies:
Angler Fish Red-
Their little angler lure thing charges up with a huge Electricity Ball!
Boost or Spin Dash them.
Angler Fish Green-
Shoot out two energy balls toward your direction, easier to jump on than
the red ones.
Crabs-
They can point their claws up and shoot out electricity, don't try to
jump on them, instead Spin Dash or Super Boost of course.
Bats-
Similar to the Pterodactyl enemies in Plant Kingdom
Tips:
Remember to slow the Mine Cart by pressing Left if you want to slow down
when jumping over tricky holes.
Hidden Island 4: Some evil parts with the falling Rocks, toward the end,
try to use R-up at the last moment to grab the right ledge before two
rocks fall on you!
Hidden Island 8: Mine Cart Holes, keep your finger on Left to slow
yourself down when trying to jump over multiple holes.
~*~*~*~*~*~*~*~*~*~*~*~
10.d. Haunted Ship
~*~*~*~*~*~*~*~*~*~*~*~
Haunted Ship plus Hidden Island 15
Material: Silver
The souls of pirates still haunt the wrecked remains of their once
glorious ships! It's good to see a creepy-themed level in a Sonic game...
don't be scared... the flaming skills won't pop out of your DS and grab
you... or will they, mwahahahahahahahaha!
Gimmicks:
Blue Ropes-
Much of the level is dominated by them. You bounce off them and you can
trick, these are the reason why it's a good Blaze Zone.
Anchors-
The rope twirls around until the Gimmick eventually throws you off
sideways, you can trick off it. This Gimmick takes a while and is a good
one to skip during Time Trials.
Barrels-
There's a few here... there's some hanging from ropes, if they are Dark
Brown, they will come down and capture you and go back up in the air! If
you keep pressing A, you can break free. Usually a hindrance, though
sometimes can take you to a higher area. It's best to avoid them during a
Time Trail.
Small Breakable Barrels-
Often contain Springs or Items.
3D Part:
The Cannon! You go through a series of hoops, each hoop has either the A,
B or R button on it. If you press the corresponding button when the
button turns Orange when you hit it, you can earn Combo Stars, but if you
press at the wrong time or the wrong button, you loose your Combo.
Enemies:
Skeletons-
If they see you, they will throw a bone at you. Just Jump or Boost into
them.
Ghosts-
Appear and disappear, they try to throw little black cannonballs at you.
If they are visible, they can be killed!
Blue Flaming Skulls-
They try to attach to you, if they do, they slow you horribly down, to
the point where you can barely run or jump. Get rid of them by activating
Super/Fire Boost.
Tips:
Since this is a very Vertically oriented Zone with lots of Blue Ropes and
other trick objects, Blaze does well here if you keep R uping to higher
areas.
~*~*~*~*~*~*~*~*~*~*~*~
10.e. Blizzard Peaks
~*~*~*~*~*~*~*~*~*~*~*~
Blizzard Peaks plus Hidden Islands 12 and 13
Material: Aqua
Snowboarding and Sonic go way back to Sonic 3. Snowboarding, Ice Cycle
Hugging and Avalanches date back to Sonic Adventure. And if Sonic 06 was
disappointing for the fact that Blaze didn't get a snowboard like Sonic
did, then cheer up! That Avalanche tried real hard to get Sonic and Blaze
in Sonic 06... make sure it doesn't succeed this time!
Gimmicks:
Snowboard-
Goes forward automatically. You cannot go backwards at all, remember that,
but you can still Boost when using it. Like the Mine Cart, Press Left to
slow it down when try to jump over tricky holes and junk.
Random Snowboard Fact, they were invented in my home state, Michigan, and
you thought we only gave the world cars and cereal...
Ice Sheets-
They look like thin sheets covered in snow, but if you simply hit one,
they will bounce you in the air, but make sure to hit them from above or
the side.
Half-pikes-
Send you sliding seeming out of control back and forth through them down
their entire length. You can trick from them, but you can also escape
their grasp completely by R-tricking when in the air! This is highly
recommended for Time Trials.
Long Blue Springy Vines-
Basically grab one, and it will eventually send you up into the air. Kind
of takes a while, might want to try to skip them for Time Trails.
Ice Cycles-
When you hit one of these, you end up spiraling down them, either jump
off to anther ice cycle or just jump off before you get too low and it's
too late.
Enemies:
Snowballs-
They try to fire little energy blasts at you. Hit them once, and you just
expose a little robot inside, it's best to Super Boost.
Gliders-
Skeleton Robots riding large orange hang gliders, it's best to Super
Boost when you see them, they are a bit hard to get out of their way if
you are in the air, then use an R trick to attack.
Snowflakes-
An air obstacle, they sort of just spin when they get near them. This is
a case for Boosting while in mid-air or using a well-placed R-trick.
Tips:
An easy one to Super Boost through, though if you want an S-rank, you
need to stay at the top of the level.
Remember to slow down the snowboard by pressing Left.
~*~*~*~*~*~*~*~*~*~*~*~
10.f. Sky Babylon
~*~*~*~*~*~*~*~*~*~*~*~
Material: Gold
Umm... am I the only person that automatically hears the worlds "I'm Gonna,
I'm Gonna, I'm Gonna" to this zone's theme? Basically, it's an obvious
reference to the Sonic Rider's series, which involved the ancient Sonic
World Babylon Civilization, look into it yourself, but there's an
interesting story connection. Anyway. If you are familiar with Sonic
Riders, this place indeed does resemble the Babylon Gardens, with a
similar color scheme and the same sort of plant growing on the same sort
of pillars.
NOTE:
You can't sail to Sky Babylon with any ship, cause it floats in the sky!
First find it during the Story by beating Hidden Island 2, then go back
to it again with Stage Select or Sea Chart under the Menu Options.
Gimmicks:
Gold Balloons-
They operate kind of similarly to the metal platforms in Sonic Rush's
Altitude Limit. Hanging on to one, you can steer right or left, but you
can't control how fast the device goes up. If you crash into something,
you have to try to land where you got the device in the first place,
because another one will soon appear to replace it.
Purple Ropes-
Pretty much the same thing as the blue ropes in Haunted ship, but there's
far fewer of them.
Fire-
Not so much of a Gimmick as an Obstacle, most of the time, it hurts Sonic
but can't hurt Blaze, but Sonic can Super Boost past it.
Purple Crystals-
Have sparkly stars surrounding them, if you touch the stars you start to
float and you will eventually float on top of them. You are pretty
vulnerable here, all you can do is move left or right until you are out
of the stars again, but they do take you to higher areas.
Enemies:
Mecha Skeletons-
They carry a small knife and try to cut you if you get too close (Not
kidding) jump or Super Boost.
Floating Bots-
Don't do much but try to get in your way when using the Golden Balloon
Gimmick, there is also a couple of places where you can just simply hit
them in a row (don't use Homing Attack with Sonic) for a shortcut.
Blue Robots-
Shoot out a small cannon ball with the launcher they are carrying.
Tips:
Blaze has an advantage here because she's immune to Fire, but Sonic is
faster in this level overall.
The Gold Balloon hard parts just take practice, they are kind of touchy,
only slightly adjustments first before you get the hang of them.
Act 2 (at least for me) was hard to S-rank. I ended up taking all the
shortcuts I could, the highest route with Sonic, and even going out of
the way to grab extra Rings. You have to get through the Act with about
100 Rings preferably, and about less than 2 minutes, 20 seconds! And with
full Trick Bonus. That's not easy...
More of a two-player tip, one of the cheapest deaths ever is your
opponent using a Slow/Confusion while you are on a crumbly floor, try to
jump off it, or with Blaze float, or well... basically you're messed up
most of the time...
~*~*~*~*~*~*~*~*~*~*~*~
10.g. Pirates' Island
~*~*~*~*~*~*~*~*~*~*~*~
Material: Black
First thing that popped into my head when I first saw this level:
Soleanna Castle Town... what's that you might say... it's from the widely
agreed-upon kind of awful Sonic 06 game for X-box 360 and Playstation 3.
That game, and Sonic Rivals for PSP also brought in some very confusing
story elements when it comes to Blaze and Eggman Nega... and if you only
had the DS you might have though this was just a cut and dry sequel... Bah,
I don't want to discuss it right now... but anyway, it's Venice-esqe, like
Sonic 06's Soleanna, that's all you need to know.
Gimmicks:
Dolphin-
The Dolphin automatically goes forward. You can go in any direction and
pressing backwards will slow the dolphin down and pushing forward speeds
it up. If you run into a wall you will fall off your dolphin, a good
general tip is when you have a choice, go the upwards path, you won't
fall into a hole if you mess up up there. There are various hoops you can
go through, you will earn a Combo when you go through, them, but you must
hit the Green hoop at the end to earn it! The Green Hoop will also spring
you high up into the air.
Water Gun-
When you stand in front of it, the cannon automatically goes up and down.
Press A when the cannon is pointing in the direction you want. These
water jets can kill enemies, and the water jet turns into a rail you can
grind on. Watch out however, the water jet eventually disappears!
Catapult-
Slings you into the air sideways. Careful, if you try to jump or trick
too soon, it will not work properly, and you have to walk away then
approach the Catapult again to reset it.
Little Water Fountains-
Look funky and can move back and forth, but in reality are just Springs.
Timed Gate-
Basically you can only pass through the gate before the time displayed
above it, afterwards a waterfall comes down and blocks that route.
Enemies:
Red Robots-
Try to throw cannonballs at you.
Green Robots-
Have some sort of gun, but it fires at your feet basically, a crummy
attack, pretty easy to smash these guys.
Tips:
The Dolphin parts also just simply take getting used to. That's about all
I can say.
For the shortest routes, the Water Guns should always point up, Go the
upper path with the Dolphins, and also R-trick to a higher Rail if you
see it.
~*~*~*~*~*~*~*~*~*~*~*~
10.h. Hidden Islands
~*~*~*~*~*~*~*~*~*~*~*~
Whale Point, Hidden Islands 1,2,3,5,14 and 16
Material: Blue and Iron
The Zone specific Hidden Islands usually give you at least one piece of
Blue and Iron Material also, see the other Zone Descriptions for tips
about them.
It's a Tropical Island Paradise! Reminds me of when I lived in Corpus
Christi a couple of months... palm trees... sand... salt water... yeah... I miss
the tropical seas...
This Zone's has all the Gimmicks of Sonic Rush's Leaf Forest except the
Trampoline.
Gimmicks:
Spiraling Spring-
Same as in Sonic Rush's Leaf Forest Zone. Spirals upward until you
eventually hit the spring in the middle. You can shortcut this Gimmick by
just jumping off the vine early.
Bungee-
Same as in Sonic Rush's Leaf Forest Zone. Hangs off curves, it springs
you high into the air.
Enemies:
Barrel Throwers-
Tiny Robots that throw little barrels, best to Spin Dash or Super Boost
'em.
Purple Giants-
Large Robots that try to hit you with a ball and chain. They take three
hits to defeat, it's best to Super Boost through them three times, but
defeating them takes up precious time and it's best to just Boost past
them.
Floating Bots-
Same as in Sky Babylon.
Tips:
Most of these are relatively simple, I might give more specific tips
later on.
Does Hidden Island 16 seem familiar to you? If it does, that means you
have Sonic Rush, this game's predecessor. If you don't and you like this
game, get Sonic Rush, story links with that story and it makes a lot more
sense, but if you want to keep sane and you have played Sonic 06 and
Sonic Rivals... don't try to connect the plots... seriously, the conflicting
Blaze storylines is headache-inducing...
~*~*~*~*~*~*~*~*~*~*~*~
10.i. R Hidden Islands
~*~*~*~*~*~*~*~*~*~*~*~
These three Looped Stages are similar to Zone X in Sonic Rush, and 2
player in the Classic Sonic 3, they are loops (the stages is sort of
circular, you go around in laps) and you have to complete 5 laps to
finish. They only appear in Two Player Mode and Time Trail.
In Two Player the item boxes are the same as in other Two Player Modes
but without the Attract Item.
In Time Trial, all Item Boxes are Tension and Max Tension.
There is only a certain way to get through each R Hidden Island, R-1 you
basically have to avoid the springs, but here's how to lap R-2 and R-3:
R-2:
An odd and confusing lap stage, Basically the Goal is on the bottom of
the stage, but to get back to it, you first have to go above it, then go
a very specific route, or you will keep going around in circles but never
touching the checkpoint again!
From the checkpoint, when you get to the two small floating platforms,
ignore them, make sure to jump over the small hole beyond (If you are
using Boost you should automatically Boost over it) and then continue.
Now you will literally run above the checkpoint. Now you need to make
sure to jump over the next large hole, you don't want to end up at the
bottom of the course here. Just before the ground curves down, see the
orange hoop? Jump for it! Now jump over the next hole, if you hit the
spring, which leads to an item box, make sure to fall straight down
afterwards, it's actually best to jump over it, then just follow the
course to the checkpoint!
R-3:
Pretty simple... but toward the end out of a loop-de-loop, you end up going
downwards straight into a hole! Basically you jump off to the right very
soon after going through the loop to land on a spring so you can continue
the lap.
There is also a secret shortcut, starting from the checkpoint, don't jump
and fall down into the lower room, then jump over the spring instead of
on it, and you skip a huge part of the loop, but there's a Timed Gate
down there, you can only use that shortcut in the first 24 seconds you
are doing that level.
~*~*~*~*~*~*~*~*~*~*~*~
11. Bosses
~*~*~*~*~*~*~*~*~*~*~*~
The Bosses in Sonic Rush Adventure are very similar to the ones in Sonic
Rush, except the boss is on both screens, the boss has a life bar instead
of a set number of hits, and you can hit the boss about 3-4 times in a
row. They are all 3D in some form or the other. Sometimes you still can
only more in two directions but the boss is animated in 3D, other times
you can move in a circle around it. During a Boss battle, there are no
Tension Gauge or Gimmicks, so all of your Boosting and Tricks are gone.
In general the bosses start out with a couple of attacks that are easy to
dodge, but later on pull out tougher attacks and the earlier types of
attacks get faster or might change a little. Also not all bosses are
attacked directly, often you have to do something first just to reach the
boss or you have to attack the boss either using or shooting back
something it attacked you with.
In this game, Bosses are auto set to Easy, you can go to Setter and
change it to Normal if you want. Some Missions, including the 4 Sol
Emerald Boss ones, are harder versions of these bosses.
Easy Mode changes different things about the Boss to make it easier to
hit, I'll detail this later.
Tips:
Try to keep Rings floating around the field because the more you are hit,
the more Rings scatter when you lose them and they are harder to pick up.
If you pay attention, you can tell what attack the Boss is gonna dish out
next.
Spin-dash first, then jump out of it to run quickly during Bosses. You
end up running faster this way than if you simply just speed up running.
~*~*~*~*~*~*~*~*~*~*~*~
11.a. Plant Kingdom Boss:
~*~*~*~*~*~*~*~*~*~*~*~
Short Description:
~*~*~*~*~*~*~*~*~*~*~*~
It's called the Ghost Rex. It's scary looking, but it's similar to the
Leaf Forest Boss from Sonic Rush, that is, when it lowers it's head, jump
to attack.
Also this boss has a move where it rushes directly at you, if you stand
in the way, you will be hurt. If you attack during this time, you can
keep it back and keep it from doing this.
Final Hit: The Ghost Rex falls down, just hit it in the head one more
time.
S-rank: All 12 Rings (time info coming later)
A few more details/strategies:
~*~*~*~*~*~*~*~*~*~*~*~
Part 1 of the battle, above ground-
Head Slam/Bite:
The rex first stands there and looks menacing, then lowers it's head with
a bite. Sometimes the head hits on the side.
In both situations, avoid by just simply moving out of the way, but not
too far since you have limited time before the head comes back up again.
Rushing Attack:
Pretty much explained in full in the Short Description. This is actually
when you can get the most hits in, it seems to be about 9-11. Attacking
quickly and getting in this number of hits before it pushes you to the
other edge in fact is the only way to prevent this attack from inflicting
damage on you.
Part 2, below ground-
The battle switches when you take away exactly half of the bosses' health.
Now the head slamming attack can be stronger, with the Rex's head going
to the upper screen. But truthfully, treat this attack the same, this
isn't even strong enough to instantly kill you.
Also, there will be a quicker version of the bite attack that is harder
to avoid, try not to stand in one place too long.
~*~*~*~*~*~*~*~*~*~*~*~
11.b. Machine Labyrinth Boss:
~*~*~*~*~*~*~*~*~*~*~*~
Short Description:
~*~*~*~*~*~*~*~*~*~*~*~
It's called the Ghost Pendulum. If you have Sonic Rush, think Night
Carnival. First only the smaller pendulum is there, but soon it's joined
by two more. Jump at them so they hit the top of the boss when they are
not spiky, but you might not hit it hard enough. Hit them from below for
the most force or Spin-dash before hitting the pendulums, but if they
don't make it to the top and are still moving, hit them again and they
often will. Try to hit them again soon after it hits the boss and it
still has lots of momentum to it.
Overall, you will do better if you keep the pendulums moving, i.e. hit
them in rapid sucession.
Watch out for the little rhino bots and the thing that comes down in the
middle, when the stages gets dark, jump!
Final Hit: the boss falls to the ground, just hit it again.
S-rank: All 12 Rings (time info coming later)
A few more details/strategies:
~*~*~*~*~*~*~*~*~*~*~*~
The Pendulums:
All Pendulums are hit the same, it's best to hit them from directly
underneath, or if you hit them with lots of speed, like out of a Spin-
dash or if you were running quickly before jumping into it, but overall
hitting from the bottom works best and is most repeatable. A trick I
should mention, spin-dash first, then jump out of it to run quickly
during Bosses.
Spikes appear relatively infrequently and only during Part 3 of the boss,
but can be a pain if you jump first, then the spikes appear before you
are about to hit the ball, doesn't happen much, but something to look out
for.
Part 1/Little Green Pendulum-
Appears first. Easy to hit boss if you hit it from directly below, or
from the side when it has some motion to it already. Deals only the
smallest amount of damage to the boss.
Part 2/Yellow/1/8th Damage to Boss-
Appears when you deal about 1/8 damage to the Boss. Usually also hits
boss if hit from directly underneath, but not if there isn't a good
amount of speed to your jump also. Does about twice the damage of Green.
Overall, very worth going after this one.
Also during this time, the spiky circular thing starts to sometimes fall
from the middle of the Boss to the ground, when it hits, a shockwave is
produced you have to jump over. The darkening of the stage is your clue
to get prepared to jump when the time is right.
Part 3/Red/1/2 damage to boss
Red is kind of hard to hit, you usually have to hit it two or more times
in rapid succession to get a successful hit, but as you can imagine, it
does twice the damage of yellow. It might not be worth it to keep going
after the red one, when you would do more damage over the same length of
time by just using the green and yellow one.
Also during this time, the Pendulums will sometimes flash red and sprout
spikes... obviously, don't touch.
And finally, the little Green Robot will also appear, further
complicating the boss. All you can do is destroy it so it doesn't get in
your way.
~*~*~*~*~*~*~*~*~*~*~*~
11.c Coral Cave Boss:
~*~*~*~*~*~*~*~*~*~*~*~
Short Description:
~*~*~*~*~*~*~*~*~*~*~*~
It's called the Ghost Kraken. It's a giant squid. The key to this boss to
attack the tentacle that is light green in color. Sometimes it squirts
ink to cloud the view or even at you to slip you up.
Final Hit: Covers the screen with Ink so you can't see anything. But look
at the corners of the screen and you can see well enough, or the funny
thing is you can wipe the ink off the touch screen!
S-rank: All 12 Rings (time info coming later)
A few more details/strategies:
~*~*~*~*~*~*~*~*~*~*~*~
Every single time you hit the Kraken, even the tentacles that don't count
as a hit to the boss, you will make it more angry and change color. When
the Kraken is angry enough, it will turn red and will then force you into
an underwater attack, which is harder to dodge, so in the beginning try
not to hit the other tentacles except the light blue one so you will not
go underwater more than once during the entire boss battle.
Above Water Attacks-
Merry-go-round:
Tentacles circle, just chase down the light green one, the number of
tentacles can vary.
Tentacle Smash:
The boss will try to smash you with two or more tentacles, just avoid the
impacts, pretty easy to do and you should have an opening for a hit. The
attack is harder later on in the boss
Ink Trap:
The boss will squirt out three blobs of Ink at the ground. If you are
covered in ink, you will get hit and can't do anything about it. But if
you avoid the ink, the boss will slam it's tentacles down right on top of
the blots, before it does this, stand by a blot next to the light green
tentacle (you can safely walk on top of the blots) to score some hits.
Pinch:
boss will try to pinch you between the light green tentacle and another
tentacle, jump just as it is about to hit you and score some hits in the
process.
Underwater-
Remember, the Kraken submerges when angry and will only perform two
attacks underwater before surfacing again. When underwater, two of the
tentacles act like pinball bumpers, so you are now in a confined space.
Also before an attack, the boss might cloud the area with ink, though in
reality you should still be able to see well enough to hit the boss.
Other than that, the Boss will try to get you with Smash and Merry-go-
Round explained above.
~*~*~*~*~*~*~*~*~*~*~*~
11.d Haunted Ship Boss:
~*~*~*~*~*~*~*~*~*~*~*~
Short Description:
~*~*~*~*~*~*~*~*~*~*~*~
It's called the Ghost Pirate. It has a variety of attacks, but the most
important is to attack the spooky red thing. Sometimes it's in the Ghost
Pirate's chest, sometimes it's up on the upper level, get to the upper
level using the skull and rope gimmicks on either side.
Final Hit: The red thing floats around randomly, chase it down and hit it.
S-rank: All 12 Rings (time info coming later)
A few more details/strategies:
~*~*~*~*~*~*~*~*~*~*~*~
Overall, when the red thing is in the Ghost Pirate's chest, attack from
behind since all of Ghost Pirate's Attacks are directed in front of him.
You might have to change levels in order to do that, for example use the
rope to get to the top so you can drop down behind him.
When the red thing is up above, attack it like crazy and avoid the
pirate's attacks as said above.
And the red thing can be hit at any time, even when changing positions.
You can attack the Pirate when the red thing is not in his chest and he
might collapse for a while, but it won't do any damage.
Specific Attacks-
Sword Swipe/kick:
It's best to stand back, or better yet sneak in behind him.
Fire Balls:
Jump over them then attack the Pirate, or attack him from behind.
Flame Pillar:
This thing you cannot jump over and goes all the way to the top of the
screen, you will have to get behind the pirate if you have to attack him.
Swoop:
He will break apart, and try to swoop at you, actually a good time to get
in a hit if you time it correctly.
Smash:
The pirate starts doing this when half of his life is gone. He will shoot
way up in the air, and comes down hard on the bottom level with a
shockwave. It's best to stand on the top level until this attack is over,
but he can hurt you on his way down, so get out of the way!
~*~*~*~*~*~*~*~*~*~*~*~
11.e. Blizzard Peaks Boss:
~*~*~*~*~*~*~*~*~*~*~*~
It's called the Ghost Whale. First dodge and destroy the little green
robots, then when it gets near hit it's head to open it's mouth... explore
inside and reach the red thing at the end before time runs out! Hit the
blue devices in the whale to give you more time on the clock.
S-rank Tip: When it is save, Spin-dash in the Whale to gain speed. If you
spin-dash then run, you will run faster.
Final Hit: You are blown out of the whale a third time, then just hit
it's head again while its laying on its side.
~*~*~*~*~*~*~*~*~*~*~*~
11.f. Sky Babylon Boss:
~*~*~*~*~*~*~*~*~*~*~*~
It's called the Ghost Condor. It's way up high in the air and you are
running along a track. Avoid anything red... and hit anything Green to
boost you up to the level of the boss and try to land on one of the
platforms up above so you can then hit the boss. Watch out, you get all
the Rings you can have at the beginning. Dodge the charging attack by
moving quickly from one side to the other.
Final Hit: The boss lowers, hit the head again to finish it off.
~*~*~*~*~*~*~*~*~*~*~*~
11.g. Pirate's Island Boss:
~*~*~*~*~*~*~*~*~*~*~*~
It's called Whisker and Johnny. Similar to the Zone 7 Boss of Sonic Rush
sort of, but you are fighting Whisker and Johnny at the same time. Attack
then any time they are just standing still not doing anything. There are
higher platforms, but you can only switch to higher levels if Whisker and
Johnny are already up there. Watch out for random saws, you might want to
switch levels. They have separate Life Bars and you have to take out both
of them to win.
~*~*~*~*~*~*~*~*~*~*~*~
11.h. Final Boss:
~*~*~*~*~*~*~*~*~*~*~*~
It's called Big Swell or the Ghost Titan or "Mr. Tickler." Like the Final
Boss of Sonic Rush, it's a multi step process to hit the Boss. See the
cannons to the right or left surrounded by Force Fields? First of all,
try to get the boss to direct it's attacks toward the cannons, the force
fields will eventually go down.
Second, the cannon will fire at you, attack it, try to dodge the bullets
and a red rimmed hole will appear.
Now jump in the cannon! A moving target marker will appear, try to match
it up as best you can with the Bosses' head. If you hit it well, you can
hit the boss multiple times, but if you don't, the boss will shrug you
off and you only get one hit.
Also, if you see any red torpedoes, go for them, because they will go
directly to the Boss and get in a hit.
Another interesting tidbit, if you attack the force fields directly, you
can do damage to them also, but it hurts you in return! Kamikazeing like
this saves time, but makes it a lot harder to keep Rings in the long run.
Final Hit: There are two lasers that fire out from the head of the Boss!
Stand perfectly in the middle under the head to avoid them, then when the
head lowers, simply jump up and hit it.
~*~*~*~*~*~*~*~*~*~*~*~
11.i. Extra Boss:
~*~*~*~*~*~*~*~*~*~*~*~
It's called the Egg Wizard, and you get to play as Super Sonic and
Burning Blaze!
Unlock by getting all Chaos and Sol Emeralds, see the Emeralds section of
this guide for more information.
You get to control both Super Sonic and Burning Blaze, who share Rings
which like in all Super Bosses deplete one per second, and you can switch
between them as you wish by just pressing the R button, their controls
are very similar, so I've explained them together, with differences
explained for each:
D pad: Move in any direction on the screen.
D Pad + A or B button: Dash in any direction. This allows you to travel
faster in any direction in a short burst.
X or Y Button: Attack, just pressing the button gives you a weak attack,
while pressing and holding charges up your attack, your attack is fully
charged when the character starts to glow. If you are hit during this
charging process, your concentration will be messed up and you will not
succeed in landing an attack. Sonic and Blaze differ slightly in attacks:
Super Sonic-
A shield appears that deflects objects the boss throws at you, the more
you charge it, the bigger and more powerful it is. Smaller objects like
the Dragons and the blue/green blasts just need a tap of the button,
while larger objects such as Large Missiles and the Meteor from the boss
need a full charge.
Burning Blaze-
A tap gives you a small fire ball, while charging increases it's size.
The bigger fire balls hit the boss easier and do more damage of course.
R Button: Switch character
In general, Attack with Sonic when there's lots of objects, Blaze any
other time. I find it easy enough to S-rank with just Blaze, just
remember to grab Rings, cause you need 50 of them for the S-rank!
I'll expand this description in the future.
~*~*~*~*~*~*~*~*~*~*~*~
12. Hidden Island Locations
~*~*~*~*~*~*~*~*~*~*~*~
Some Hidden Islands you encounter in the story but other ones have to be
specifically sailed to with a certain ship, or at least a recommend a
certain ship below.
Tip: Like real Islands, Hidden Islands are usually surrounded by an area
of shallower water which appear as light blue spots on the map, but the
ones in purple areas of fog are completely hidden.
Locations:
~*~*~*~*~*~*~*~*~*~*~*~
Rough Locations list based on the "squares" on the sea chart. Some of
these need a certain ship or at least I recommend a ship. Try to draw as
directly to the light spot as possible. The Starting Points are the
orange dots you start you stylus at, if you don't remember where these
specific Starting Points are, refer to the Sea Chart in the Menu.
There are also various Maps online, including one of GameFAQs, and one in
the IGN guide.
1. Encountered during the story.
Next to Coral Cave, complete it to unlock this Zone.
Ocean Tornado, navigate around the shallows to the left during the story,
you will also hit a Chaos Emerald race along the way.
2. Encountered during the story.
Next to Sky Babylon, complete it to unlock that Zone. Get originally with
the Aqua Blast, 3 to the right of Daikun's Island
3. Encountered during the story.
Aqua Blast, Haunted Ship, Two to the right and 3 up.
4. Encountered during the story.
Wave Cyclone, 1 Left and 3 up from Hidden Island 2 (next to Sky Babylon)
5. Encountered during the story.
Wave Cyclone, Haunted Ship, About 3 down.
6. Wave Cyclone, Windmill Village, two down and one over (corner of four
squares).
7. Aqua Blast, Windmill Village, two Right and 3 up.
8. Wave Cyclone, In the purple fog, Kylok's Island, About three down and
a little to the left.
9. Aqua Blast, Purple Fog, about 3 up from Plant Kingdom
10. Wave Cyclone, Machine Labyrinth, about 1 Left and 3 Down (in the
corner of four squares near the bottom of the screen)
11. Wave Cyclone, Coral Cave, Two down and one left.
12. Submarine, one up and three left from Pirate's Island.
13. Aqua Blast, Hidden Island 16 two the left and 3 up (extreme upper
left).
14. Wave Cyclone, Two the right and three up from Hidden Island 2 (Next
to Sky Babylon)
15. Wave Cyclone Extreme Lower Right corner of the screen, purple fog,
get there from Hidden Island 2 (next to Sky Babylon)
16. Aqua Blast, From Coral Cave one to the right and 3 up.
~*~*~*~*~*~*~*~*~*~*~*~
13. Emeralds:
~*~*~*~*~*~*~*~*~*~*~*~
14 Emeralds? This is unheard of, right? Not really, in Sonic Rush, Blaze
just got them automatically and the lock-on Sonic 3 and Knuckles from the
Genesis days comes to mind. Sonic has to find Johnny out on the open sea,
while Blaze has to clear certain Missions given by Gardon. Different
enough they deserve their own sections. Grab them all to see the Extra
Zone and find out the true ending of this game!
You can always check how many you have in the Menu, in the Items section.
~*~*~*~*~*~*~*~*~*~*~*~
13.a. Chaos Emeralds
~*~*~*~*~*~*~*~*~*~*~*~
You find Johnny in certain places in the middle of the sea, it doesn't
matter which vessel you are using, but once you run into Johnny you have
the option to challenge him on the spot to a race in the Wave Cyclone, or
just go back there later.
A big red X does appear on the map if you complete a Johnny race, but you
can always either go to Norman, Choose "Viking Cup" and scroll down on
the Wave Cyclone Screen to find the Chaos Emerald races to Time Attack
them, or you can sail out to that spot again to re-challenge Johnny if
you so choose.
Same controls as just sailing around in the Wave Cyclone, but here are
some differences:
When Johnny Boosts, yellow energy Rings appear behind him, catch these
for a burst in speed without having to use your Boost. You might want to
save your Boost until later or at least until the Boost Bar is filled up,
so you might want to do this for awhile. Be aware, you create these
energy rings also that Johnny can use.
Johnny will sometimes throw missiles and stuff at you, and touching him
is bad.
Tips:
~*~*~*~*~*~*~*~*~*~*~*~
Like Hidden Islands, Johnny loves to hide out in light blue spots.
Using your Boost early doesn't help, it's best to keep in Johnny's wake
and collect Rings and Trick Ramps to fill up your Boost, then use it when
it is full to get ahead of him, especially at the end of the race.
Boosting into Purple Mines will prevent damage, but slows you down,
remember this especially in the Purple Chaos Emerald race.
If you have beating the Final Boss, go back to Tails and upgrade your
Wave Cyclone, if you continue you can have two upgrades! This will make
it a lot easier to gather the Chaos Emeralds.
Locations:
~*~*~*~*~*~*~*~*~*~*~*~
Given by the "squares" on the Sea Chart defined by the black grid lines,
head for the light-colored spot. Of course, you have to unlock the
starting points mentioned below before you can head out to a race and
starting points differ by ship, I have given you just one Ship for each
Chaos Emerald to make it easier to describe, but it's possible to reach
them with more than one ship.
Also, these coordinates tell you where they are, you want to try if you
can to draw a straight line to the pale blue spots instead of just
following the squares with the stylus, and they are sort of approximate
because orange starting dots are often on the corners of squares.
As with the Hidden Island locations, the Chaos Emerald Locations can also
be found on Online maps.
Chaos Emerald 1 (Red):
You will encounter this one as part of the story when trying to get
around the shallows in the Ocean Tornado in the Coral Cave area (Zone 3).
It's in front of Coral Cave, and later appears above it.
Shortest: Wave Cyclone, From Hidden Island 16, 1 Right and 1 Down, or 3
Right and 2 up from Hidden Island 1
Chaos Emerald 2 (Blue):
Wave Cyclone, From Windmill Village, about two to the right and two down
(draw straight line).
Chaos Emerald 3 (Yellow):
Wave Cyclone, From Machine Labyrinth, about one to the right and three
down.
Chaos Emerald 4 (Green):
Wave Cyclone, From Kylok's Island, one to the left and two up.
Chaos Emerald 5 (White):
Wave Cyclone, From Hidden Island 16, One square to the right, then two up.
Chaos Emerald 6 (Light Blue):
Wave Cyclone, From Hidden Island 2 (next to Sky Babylon), One square down
and one to the left.
Chaos Emerald 7 (Purple):
Ocean Tornado, From Haunted Ship, stay out of the shallows...
One square right, two up, three right.
~*~*~*~*~*~*~*~*~*~*~*~
13.b. Sol Emeralds
~*~*~*~*~*~*~*~*~*~*~*~
These are Missions, since I have not detailed all Missions yet, I
detailed them below and here are the basic instructions:
First of all go to Gardon that appears on the Ocean Tornado's Dock. Talk
to him, and if you have already cleared the Bosses and Hidden Islands
listed below, he will give you the Sol Emerald mission that goes along
with it. Then talk to Marine and pick that mission out of the list and
clear it to instantly gain a new Sol Emerald. If you cleared more than
one of these bosses or Hidden Islands below, keep talking to Gardon and
he will give you more missions. You can only play as Blaze during all of
these Missions.
All of these Missions are defeat a harder version of the Boss, or get to
the Goal with only one life.
REMEMBER! He will skip around in Sol Emerald number if you have not found
a Hidden Island before a certain boss for example, but he'll give it to
you once you met the requirement.
(I'll add mission-specific tips later)
Locations:
~*~*~*~*~*~*~*~*~*~*~*~
Sol Emerald 1 (Red):
Mission 4- Zone 2 (Machine Labyrinth) Boss Hard
Sol Emerald 2 (Blue):
Mission 7- Hidden Island 6 one life
Sol Emerald 3 (Yellow):
Mission 10- Zone 3 (Coral Cave) Boss Hard
Sol Emerald 4 (Green):
Mission 13- Hidden Island 12 one life
Sol Emerald 5 (White):
Mission 17- Hidden Island 8 one life
Sol Emerald 6 (Light Blue):
Mission 86- Zone 7 (Pirate's Island) Boss Hard
Sol Emerald 7 (Purple):
Mission 88- Final Boss Hard
Tips:
This is hard enough I'll give a tip right here. It's easy to keep Rings
on the field, because some of them are out of reach normally! But use
Blaze's floaty R move after hitting the boss to grab them later on in the
battle, cause you are most likely to loose Rings...
~*~*~*~*~*~*~*~*~*~*~*~
14. Missions
~*~*~*~*~*~*~*~*~*~*~*~
Most Missions are gained in this fashion, after completing Acts, Boss or
Hidden Island, go around and talk to certain people on Southern Island,
and they might give you a Mission or even more if you keep talking to
them. These Missions are added to a list kept by Marine in her house. All
Missions you only get 1 life to complete them, but you get infinite tries.
There are 100 Missions in total. Sol Emeralds are also Missions, so look
in that section for info about them.
After Completing a Mission, you either get a reward by talking with the
person that gave you the Mission again after you complete it, or if it's
an Item (Metal or Sol Emerald) you get it right away.
See the Southern Island Section of this guide for a general idea of what
Missions the different people give and where they are located, here are
types of Missions and some general tips.
Mission Types:
~*~*~*~*~*~*~*~*~*~*~*~
Get all the Sol Emeralds: See that specific section
Defeat the Boss Again: Harder Version of a Boss
Reach the Goal: Get to the end of an Act or Hidden Island with only one
life.
Collect the Rings: Collect a certain number of Rings in a certain period
of time. I recommend faster Sonic.
Reach the Goal within the Time Limit: A Time Trail, get to the end in
that time period.
Find the Medals: An arrow appears that points in the general direction,
find a treasure chest in-level and get rewarded a Medal that appears in
your Items section.
Do a Trick: Do a certain amount of A-button tricks in a certain amount of
time, it only seems to count if you get a Star for the trick, but not if
you keep the Stars. Blaze is better at tricking.
Get a Combo: The explanation is confusing, get up to a certain Combo
number in your Stars. Blaze is better at tricking.
Defeat the Enemies: Defeat a certain number of Enemies in a certain
period of time. Use Sonic, his Homing Attack does wonders.
Defeat the Boss or Reach the Goal with 1 Ring: You start with just one
Ring... that's all you get.
Pass through all the Flags: You have to hit every single numbered Flag in
order. There is a time limit between each Flag!
You do get a reward for completing all 100 Missions... I'll give you a hint,
Mission 100 is unlocked after completing the first 99.
~*~*~*~*~*~*~*~*~*~*~*~
14.a. Medal Locations
~*~*~*~*~*~*~*~*~*~*~*~
Certain Missions require you to find a Medal before a certain period of
Time is up. All of these Missions have Marine's picture.
These Medals are contained in a Treasure Chest just like the one at the
end of a level. There's an small arrow that moves around the edge of the
screen that shows you in general what direction the Medal is in, so you
will know instantly if you passed one!
When you get a Medal, it's displayed in your Items Menu, though I don't
think they really do anything but look pretty.
Anyway, some of these Medals are very tricky, here are general locations
for each of them, read these over and help me improve them if need be!
There descriptions for now are pretty general, the arrow will narrow down
the location for you, so I didn't feel a full walkthrough is needed plus
frankly, I'm busier than when I wrote guides in the past!
24: Find the Medal in Plant Kingdom, Act 1 within 2'00"00.
It's at the very bottom of the level, under a rail, it's easy to fall
down when you see the arrow pointing down and either jump THROUGH the
rail or fall down through it.
28: Find the Medal in Plant Kingdom, Act 2 within 2'00"00.
Blaze Recommended.
On top of a loop-de-loop. With Sonic, you will have to stay at the very
top of the level to eventually catch hoops that will send you up here,
but with Blaze you can also do an R up trick off a large mushroom to get
to this same area if you fall to the bottom of this level.
33: Find the Medal in Machine Labyrinth, Act 1 within 2'00"00.
This is a tough one.
There is a point in the level where you are shot straight up in the air
after a very long tube, then you normally hit two hoops that send you
through a thin floor to more level above and out of reach of the Medal.
Start trying to press R and left while still in the tube! If you can pull
off this R trick before you hit the two hoops, then you will hit the
Treasure Chest!
36: Find the Medal in Machine Labyrinth, Act 2 within 1'30"00.
It's on one of those funky circular things that have steam shooting out
one side, when the Arrow points down after falling into this area, go
left instead of right on the first funky circular thing so you call fall
down onto the Medal.
41: Find the Medal in Coral Cave, Act 1 within 2'30"00.
Near the end of the level, there's a room with a green bouncy thing on
the floor. You will see two lines of rings above it, one going right and
one going left. Jump clean over it to find the Medal instead of bouncing
on it.
44: Find the Medal in Coral Cave, Act 2 within 2'30"00.
There is a large hole you fall down in this level with a green bounce at
the bottom (the arrow will be at the bottom right of your screen at this
point,) fall down the LEFT side of this hole, this might go against what
the arrow says, but this will take you to the correct area after running
over a stretch of water.
49: Find the Medal in Haunted Ship, Act 1 within 2'30"00.
It's on the normal path of the level near the end, it's more of a Time
Trial than anything, Blaze does best in this level if you Trick with her
often.
52: Find the Medal in Haunted Ship, Act 2 within 2'30"00.
Blaze recommended.
Immediately after the first cannon bit, hit the summersault Gimmick, then
make sure to land on one of the floating platforms, then jump on them (to
the left initially) one after another to get to the higher area with the
Medal, or if you are playing with Blaze, you can do an Up R trick after
hitting the Gimmick.
57: Find the Medal in Blizzard Peaks, Act 1 within 1'00"00.
Kind of hard because it's on the snowboard. Not long after the first
half-pike and going up a very tall hill (use an R trick after going up
the first time to get out of flipping back and forth for a long time),
you have to jump to hit one of the ice Gimmicks that bounces you upwards
after hitting it. Try slowing down the snowboard first by pushing Left in
order to time the jump correctly.
62: Find the Medal in Blizzard Peaks, Act 2 within 2'00"00.
Blaze recommended.
Tip: to get a faster time, when you are flipped in the air off the little
curved ice, use a sideways R trick.
The first half-pike, stay in it till about the end, then do an R up trick
to get to higher in the level off of it to find the Medal.
66: Find the Medal in Sky Babylon, Act 1 within 3'00"00.
Blaze recommended.
Floating gray platforms above a rail, jump off the rail onto a platform
and follow them up to the higher area with the Medal. If you go too far,
it's easy to just go backwards on the rail to get back up there.
70: Find the Medal in Sky Babylon, Act 2 within 3'00"00.
Blaze recommended.
Near the end of the level, There's a room with a crumbly floor, then a
room with enemies, you will literally see it on the other side of the
wall eventually. There's a place where you can bounce up and go through a
hole on the LEFT side of the wall, then go to the left till you fall into
a room that has the Treasure Chest at the end.
80: Find the Medal in Pirate's Island, Act 1 within 2'30"00.
Sonic recommended for Speed.
After the second Dolphin ride, the next water cannon should be pointing
up when you fire it.
84: Find the Medal in Pirate's Island, Act 2 within 3'00"00.
Blaze recommended.
After the second Dolphin ride, either do an R up trick after the dolphin
flips you up in the air after the green hoop to catch the rail above, or
if you have Blaze, you can also use an up R trick off the spring below in
the water to this rail.
~*~*~*~*~*~*~*~*~*~*~*~
14.b. Flag Locations
~*~*~*~*~*~*~*~*~*~*~*~
All Flag Missions are Muzy Missions. You get a countdown in the top right
corner of your screen, if it goes to zero before you hit the next flag in
order, you are dead! Of course, there's also a convenient counter to tell
you have many Flags you picked up and how many are left.
Tips:
You have to go fast, but Boosting will speed you up too much, try just
regular Boost Mode.
Press Left to slow down the Snowboard/Mine Cart
For the ice levels, shortcut the half-pikes by using an R trick after
flipping of it.
58: Pass through all the flags on Blizzard Peaks, Act 1 in order.
~*~*~*~*~*~*~*~*~*~*~*~
1. Don't jump on the very first Rail, the flag is under it.
2. You have to jump off a small ledge to reach it.
3 and 4. Straight ahead after 2.
5. After the first half-pike.
6. After the blue vine that bounces you up, use an R up trick to reach a
higher rail with the Flag on it.
7. After 6, when landing press Left to slow down so you don't land to the
right of 7 and don't trick off this rail0.
8. When you climb the hill after 7, slow down by pressing Left, then at
the top of the hill jump to hit a bouncy Ice gimmick to get higher, this
is the same place the Medal was in this level.
9-13. Regular level route after 8, jump over holes, and you might want to
keep a finger on Left to slow you down!
14-16. Soon after 13, slow down by pressing Left, then jump on the rail
you see before going way down to the spring, because these flags are on
that rail and you are more likely to miss 14 if you R trick off the
spring below.
17. After hitting the next spring, don't trick when landing, just press
to the right very slightly so you will not pass by it.
18. After 17, jump into the Hoops before you go around the bottom of the
track.
19. When you hit the spring below 18, don't trick, make sure you land on
the bouncy ice gimmick to bounce up on the rail with 19.
20-23. Normal level after 19, make sure to Boost to get past the
Avalanche!
91: Pass through all the flags on Hidden Island 8 in order.
~*~*~*~*~*~*~*~*~*~*~*~
1-5. Normal path through level, 4 and 5 in the Mine Cart.
6-15. Make sure to jump over all holes you encounter in the Mine Cart,
especially slow down after you hit Flag 5 in order to jump that next hole,
don't go too fast, try doing it with Left pressed down.
16-20. Normal level path.
21-26. Same instructions as 6-15 (wow, I'm lazy today... heh!)
27-29. Found after the 3D underground Minecart section, there aren't any
flags down there.
92: Pass through all the flags on Hidden Island 12 in order.
~*~*~*~*~*~*~*~*~*~*~*~
1. Jump on the first rail.
2. After 1, try to jump on the next rail, but then jump off it BEFORE
hitting the Item Box in order to jump on the one above it, though
sometimes you do make it if you hit the item box.
3-5. Jump off the tops of the three small hills after 2 in order to sail
through the air and catch these three flags.
6. Don't trick off the spring after 5 to land on it.
7-8. Jump quickly when you grab 6 to get 7, then do the same for 8 on the
higher platforms, or fall down below and don't trick off the springs and
only push forward slightly to land on them.
9. Next rail after 8.
10. Land carefully after grabbing 9, push left to slow down.
11. Jump for it off the next rail.
12. Next rail after 11, jump to the next higher smaller rail then jump
again.
13. Land carefully down below once again.
14. Jump over the next two holes, do this while pressing Left.
15-17. Once again, no tricking off next spring, but to grab the next two
you MUST jump quickly and carefully over the next couple of holes, press
Left to help you.
18. Watch carefully, you have to jump at the right moment off the hill to
grab it.
~*~*~*~*~*~*~*~*~*~*~*~
14.c. Harder Mission Tips
~*~*~*~*~*~*~*~*~*~*~*~
Most Missions are pretty straight-forward, but some of them can be quite
a pain. The Medal and Flag Missions are completely explained above, but
here are a few more missions that deserve special treatment.
Mission Included So far:
95
95: Reach the Goal of Hidden Island 16 within 1'00"00
~*~*~*~*~*~*~*~*~*~*~*~
This is one of the hardest missions... though since Hidden Island 16 is
really Leaf Forest Act 1 from Sonic Rush, I knew how to do it two years
ago... Anyway, here's a nice walkthrough to follow, it's best to use Sonic,
and I've done faster myself.
Use Y button Super Boost from the beginning and Super Boost as much as
possible, also Trick off Springs to keep your meter nice and happy. Hit
first spring, then use R sideways to land on the rail.
Off the next ramp, use Up and R to land on top of the huge Loop. Hit next
spring and hit all the hoops in the air.
Now hit the spring on the other side of the rock and continue the natural
path from there, try to shortcut the spiraling vine Gimmicks by jumping
off then and onto the springs in the middle early.
Off the first bungie you hit, use an Up R to get on the higher path, you
will have to land on a small platform if you are Sonic and jump off it
before it falls to continue on.
Now at the next checkpoint, try this. Use Super Boost (Y) and jump with a
good amount of Speed right at the checkpoint. You should be able to
either get on top of a Loop that has an Electric Shield on it, or even
hit the rail past it, then continue the natural route.
At the next spiraling vine gimmick, try jump down to the lower route
instead, I think it's a bit faster.
Try this route a few times, or even figure out other little ways to shave
off time, and you should make it under 1 minute.
~*~*~*~*~*~*~*~*~*~*~*~
14.d. Missions List
~*~*~*~*~*~*~*~*~*~*~*~
I have added more Unlock Details if I know it (I still don't remember
them all, I would like help here). The Character is the Character who's
picture appears for each Mission, in general you need to have defeated
the particular Boss/Act shown and then Talk to the Character before you
can play that particular Mission.
In the future, I might add the full Description, but I don't know if that
is necessary, will take a long time to type, I did this as quickly as
possible for now.
In the two sections above are Medal and Flag Locations. I'll do tips for
some of the other harder Missions in the Future.
1. Defeat the boss again.
Tabby
Plant Kingdom Boss
Decoration, Dinosaur
2. Reach the Goal.
Setter
Hidden Island 9
Decoration, Waterfall
3. Reach the Goal.
Setter
Hidden Island 10
Decoration, Flower Bed
4. Get all Sol Emeralds.
Gardon
Machine Labyrinth Boss
Sol Emerald 1 (Red)
5. Reach the Goal.
Setter
Hidden Island 7
Decoration, Coconut Tree
6. Collect the Rings.
Kylok
Plant Paradise 2
Movie Gallery, (3-11 I think, needs to be confirmed)
7. Get all Sol Emeralds.
Character: Gardon
Hidden Island 6
Sol Emerald 2 (Blue)
8. Reach the Goal.
Character: Setter
Hidden Island 14
Decoration, Coconut Tree
9. Collect the Rings.
Character: Kylok
Machine Labyrinth 2
Movie Gallery
10. Get all Sol Emeralds.
Gardon
Coral Cave Boss
Sol Emerald 3 (Yellow)
11. Defeat the boss again.
Daikun
Haunted Ship Boss
Decoration, Lighthouse
12. Collect the Rings.
Kylok
Coral Cave 2
Movie Gallery
13. Get all Sol Emeralds.
Gardon
Hidden Island 12
Sol Emerald 4 (Green)
14. Reach the Goal.
Daikun
Hidden Island 13
Decoration, Bigger Windmill
15. Reach the Goal.
Setter
Hidden Island 16
Decoration, Coconut Tree
16. Defeat the boss again.
Tabby
Sky Babylon Boss
Decoration, Seagull circling above the island
17. Get all Sol Emeralds.
Gardon
Hidden Island 8
Sol Emerald 5 (Light Blue)
18. Reach the Goal.
Setter
Hidden Island 11 (Also, first complete
Mission 3, then talk to Setter again.)
Decoration, Prettier Flower Bed
19. Collect the Rings.
Kylok
Haunted Ship 2
Movie Gallery
20. Defeat the boss again.
Tabby
Blizzard Peaks Boss
Decoration, Whale appears in waters around island
21. Reach the Goal.
Daikun
Hidden Island 15
Decoration, Watchtower
22. Reach the Goal within the time limit.
Muzy
Plant Kingdom 1
Sound Test 3
23. Collect the Rings
Muzy
Plant Kingdom 1
Sound Test
24. Find the Medals
Marine
Plant Kingdom 1
Medal I
25. Do a Trick.
Muzy
Plant Kingdom 1
Sound Test
26. Get a Combo.
Muzy
Plant Kingdom 1
Sound Test
27. Reach the Goal within the time limit.
Muzy
Plant Kingdom 2
Sound Test 4,5
28. Find the Medals.
Marine
Plant Kingdom 2
Medal II
29. Defeat the Enemies.
Muzy
Plant Kingdom 2
Sound Test
30. Defeat the boss with only 1 Ring.
Muzy
Plant Kingdom Boss
Sound Test
31. Reach the Goal within the time limit.
Muzy
Machine Labyrinth 1
Sound Test 6
32. Collect the Rings.
Muzy
Machine Labyrinth 1
Sound Test
33. Find the Medals.
Marine
Machine Labyrinth 1
Medal III
34. Do a Trick.
Muzy
Machine Labyrinth 1
Sound Test
35. Reach the Goal within the time limit.
Muzy
Machine Labyrinth 2
Sound Test 7,8
36. Find the Medals.
Marine
Machine Labyrinth 2
Medal IV
37. Defeat the Enemies.
Muzy
Machine Labyrinth 2
Sound Test
38. Defeat the boss with only 1 Ring.
Muzy
Machine Labyrinth Boss
Sound Test
39. Reach the Goal within the time limit.
Muzy
Coral Cave 1
Sound Test 9
40. Collect the Rings.
Muzy
Coral Cave 1
Sound Test
41. Find the Medals.
Marine
Coral Cave 1
Medal V
42. Reach the Goal with only 1 Ring.
Muzy
Coral Cave 1
Sound Test
43. Reach the Goal within the time limit.
Muzy
Coral Cave 2
Sound Test 10,11
44. Find the Medals.
Marine
Coral Cave 2
Medal VI
45. Reach the Goal.
Muzy
Coral Cave 2
Sound Test
46. Defeat the boss with only 1 Ring.
Muzy
Coral Cave Boss
Sound Test
47. Reach the Goal within the time limit.
Muzy
Haunted Ship 1
Sound Test 12
48. Collect the Rings.
Muzy
Haunted Ship 1
Sound Test
49. Find the Medals.
Marine
Haunted Ship 1
Medal VII
50. Defeat the Enemies.
Muzy
Haunted Ship 1
Sound Test
51. Reach the Goal within the time limit.
Muzy
Haunted Ship 2
Sound Test 13,14
52. Find the Medals.
Marine
Haunted Ship 2
Medal VIII
53. Reach the Goal with only 1 Ring.
Muzy
Haunted Ship 2
Sound Test
54. Defeat the boss with only 1 Ring.
Muzy
Haunted Ship Boss
Sound Test
55. Reach the Goal within the time limit.
Muzy
Blizzard Peaks 1
Sound Test 18
56. Collect the Rings.
Muzy
Blizzard Peaks 1
Sound Test
57. Find the Medals.
Marine
Blizzard Peaks 1
Medal IX
58. Pass through all the flags.
Muzy
Blizzard Peaks 1
Sound Test
59. Do a Trick.
Muzy
Blizzard Peaks 1
Sound Test
60. Reach the Goal within the time limit.
Muzy
Blizzard Peaks 2
Sound Test 16,17
61. Collect the Rings.
Kylok
Blizzard Peaks 2
Movie Gallery
62. Find the Medals.
Marine
Blizzard Peaks 2
Medal X
63. Defeat the boss with only 1 Ring.
Muzy
Blizzard Peaks Boss
Sound Test
64. Reach the Goal within the time limit.
Muzy
Sky Babylon 1
Sound Test 18
65. Collect the Rings.
Muzy
Sky Babylon 1
Sound Test
66. Find the Medals.
Marine
Sky Babylon 1
Medal XI
67. Reach the Goal with only 1 Ring.
Muzy
Sky Babylon 1
Sound Test
68. Reach the Goal within the time limit.
Muzy
Sky Babylon 2
Sound Test 19,20
69. Collect the Rings.
Muzy
Sky Babylon 2
Sound Test
70. Find the Medals.
Marine
Sky Babylon 2
Medal XII
71. Defeat the Enemies.
Muzy
Sky Babylon 2
Sound Test
72. Defeat the boss with only 1 Ring.
Muzy
Sky Babylon Boss
Sound Test
73. Do a Trick.
Muzy
Hidden Island 3
Sound Test
74. Reach the Goal within the time limit.
Muzy
Hidden Island 3
Sound Test
75. Collect the Rings.
Muzy
Hidden Island 4
Sound Test
76. Defeat the Enemies.
Muzy
Hidden Island 5
Sound Test
77. Get a Combo.
Muzy
Hidden Island 5
Sound Test
78. Reach the Goal within the time limit.
Muzy
Pirate's Island 1
Sound Test 21
79. Collect the Rings.
Muzy
Pirate's Island 1
Sound Test
80. Find the Medals.
Marine
Pirate's Island 1
Medal XIII
81. Reach the Goal with only 1 Ring.
Muzy
Pirate's Island 1
Sound Test
82. Reach the Goal within the time limit.
Muzy
Pirate's Island 2
Sound Test 22,23
83. Collect the Rings.
Muzy
Pirate's Island 2
Sound Test
84. Find the Medals.
Marine
Pirate's Island 2
Medal XIV
85. Do a Trick.
Muzy
Pirate's Island 2
Sound Test
86. Get all Sol Emeralds.
Gardon
Pirate's Island Boss
Sol Emerald 6 (White)
87. Defeat your Rival.
Muzy
Pirate's Island Boss
Sound Test
88. Get all Sol Emeralds.
Gardon
Big Swell
Sol Emerald 7 (Purple)
89. Reach the Goal with only 1 Ring.
Muzy
Hidden Island 6
Sound Test
90. Get a Combo.
Muzy
Hidden Island 7
Sound Test
91. Pass through all the flags.
Muzy
Hidden Island 8
Sound Test
92. Pass through all the flags
Muzy
Hidden Island 12
Sound Test
93. Collect the Rings.
Muzy
Hidden Island 14
Sound Test
94. Defeat the Enemies.
Muzy
Hidden Island 15
Sound Test
95. Reach the Goal within the time limit.
Muzy
Hidden Island 16
Sound Test
96. Reach the Goal.
Norman
Wave Cyclone
Sound Test 57
97. Reach the Goal.
Norman
Ocean Tornado
Sound Test 58
98. Reach the Goal.
Norman
Aqua Blast
Sound Test 59
99. Reach the Goal.
Norman
Deep Typhoon
Sound Test 60
100. Clear All Missions.
Marine
Decoration, Sonic Head on side of Volcano
~*~*~*~*~*~*~*~*~*~*~*~
15. Ranking:
~*~*~*~*~*~*~*~*~*~*~*~
From what I can tell so far, this still is identical to Sonic Rush with
only a couple differences, for example the elimination of the Speed Bonus,
so this is Rush's info slightly tweaked.
For each Act and Boss, you get a Ranking to tell you how well you did
based upon Score. Your Score is totaled at the end of the Act or Boss and
doesn't actually appear on screen during the Act or Boss, you only get to
see how well you did at the end. For the Acts Score is the total number
of points you received for Time Left (the amount of points you get for
certain amounts of time differs by Act, but max is 85000 and it goes down
in intervals of 5,000 points for every 10 seconds from there (not
confirmed for SRA), Tricks (Max you can get is 20,000), and Rings left
(Maximum 5000 for both Acts and Bosses, though the amount of Rings needed
for Max Bonus varies). Bosses are scored based on Rings and Time Left.
The Rankings are strangely similar to Chao Raising Rankings, the Highest
is S, then A, B and C.
Acts, including Hidden Islands:
S Rank: 100,000 or more points
A Rank: between 100,000 and 80,000 points
B Rank: between 80,000 and 50,000 points
C Rank: less than 50,000 points
Bosses:
S Rank: 50,000 or more points
A Rank: between 50,000 and 40,000 points
B Rank: between 40,000 and 30,000 points
C Rank: less than 30,000
~*~*~*~*~*~*~*~*~*~*~*~
15.a. S-ranking Miniguide:
~*~*~*~*~*~*~*~*~*~*~*~
What do you get for all S-ranks? I don't know yet for this game, but S-
ranks get you more materials, but the principles are the same as in Sonic
Rush as far as I can tell despite a few scoring differences, and using
the same principles I have been increasing my ranks in this game.
S Ranking Acts General Tips:
S-ranking Acts and Hidden Island Acts is the same as S-ranking them in
Sonic Rush. There is a balance between Speed and Tricks, if you just rush
through the act and do few Tricks, then you will get a lot of speed and
time bonus points but not many Tricks points and you end up not getting
an S-rank. The trick is to find the right balance of speed and tricks,
which happens to be finding the shortest path in the Act and using the
Super/Fire (Tension) Boost as much as possible to get a high Time and
Speed Bonus but mostly Advanced Tricking every chance you get, especially
in this game where you won't get much of a Tension boost at all if you
don't follow up your B tricks with R or A or both... Sonic is faster and
Blaze is better at tricking... some acts are designed so that Sonic does
better, some Blaze does better, just depends if the act is set up to
favor Speed over Tricks or Tricks over Speed. More specifically about
Tricks, B/A Tricks without the R button does not change the path of
motion after coming off a Trick Object/Gimmick and slow you down little.
The R button slows you down more but in some cases, especially with Blaze
can shortcut an Act too and can make you go faster sideways. So R button
is fine in situations where landing isn't tricky and it will help you get
more points if you need them... but if you are bouncing off a series of
springs where if you mess up you are dead, or going through a long line
of hoops, press the B button a lot to trick and there will be no danger
of dying. In general, most of your tricking should be Advanced, but
compared to Rush, there are fewer bottomless pits and things and overall
you can get away with R a lot more. Plus in this game, there an item box
that increases your trick rate, I've seen INSANE trick bonuses with that,
so it's very important, plus in this game, you score goes higher when you
touch another trick object in a row, which is also different than Sonic
Rush.
Also keeping your Tension Gauge full is not that important, just use it
as much as possible for a fast time, and Rings don't seem to matter much
in most acts, if you are hit and loose all Rings and some Tension just
continue on and you still have a very good chance of S ranking that Act,
since Rings are the least important point getter for S-ranking and in
fact if you plain die and end up at the checkpoint.
Each 10 seconds of time is 5,00O points... so an extra 10 seconds of
tricking that doesn't get you over 5,000 points is a waste of Time Bonus...
keep this in mind...
Note, with this game unlike in Sonic Rush, a Max Ring Bonus means there's
a cap to how high of an S-rank you can get, a score over 110000 is
impossible. Too bad, I loved to score attack Sonic Rush...
S Ranking Bosses General Tips:
(I've confirmed that in Sonic Rush Adventure you might need either ALL or
at least 12 Rings to get an S rank (I haven't gotten many yet) and I
think Extra is still 50.)
For some Bosses a lot of luck is involved... but the bosses still follow
kind of a general pattern, despite the fact bosses are usually random,
Well... sort of random, I'll explain this better below. This time what
matters is Time and Rings... in fact that's all that matters... since the
maximum Time Bonus is 45,000 points and you need 50,000 to S-rank, that
means you have to get Max Ring Bonus (I think 12 for most Bosses, 50
Rings in Extra) to S-rank ANY BOSS... and a fast time...
Try not to get hit or if you do pick up as many of the Rings again as
possible, best way to repick up rings is to Spin-dash into them very soon
after you drop them... try to grab them as soon as possible after
dropping them and don't get hit very much since the more you are hit the
more Rings scatter.
Also as far as I can see, unlike in Sonic Rush, 50000 points is the LIMIT
to score for S-ranking Bosses, so you S-rank it, you really can't get a
higher score at all.
Overall, Sonic Rush Adventure is geared more toward Time Attacking than
Score Attacking.
~*~*~*~*~*~*~*~*~*~*~*~
16. Tension and Points List:
~*~*~*~*~*~*~*~*~*~*~*~
Most of the same info from Sonic Rush, but there have been some changes
in R button, B tricks and other things, so pay attention! I might not
have caught all the differences, let me know if something needs to be
tweaked.
There are many things in the acts that earn you Tension, Points or both
or make you loose tension or points. Remember that each bar in the
Tension Gauge is 5% and this list for your convenience gives bars and
percentage and Points don't show up till the end and for Tricks the
amount you get or loose is the last number shown and they seem to come in
1000 point intervals and if do too few Tricks you can get nothing. Tricks
are more complex, since so many things affect the total amount given and
some trick objects are infinite, but most things give you a pretty
consistent amount of Points/Tension. This is in the form of a list , with
specific level objects, hazards and end of level bonuses, then Tension
and Points received, then specific Notes about that particular
object/bonus.
In Bosses you don't have Tension to worry about, and Points are only
earned by how much Time you have Left and how many Rings are left.
NOTE: I'll have a Points list for the Sea Stages someday.
Enemy (defeating):
Tension: 4 bars/20% for one enemy defeated
Points: none
Notes: Increasing Tension Bonus for hitting more than one Enemy in a
short period time, for example you get 10 bars for hitting two (4x2+2)
and 22 for hitting 3 (4x3+10), 45 for hitting 4 (4x4+29) exc... I'll figure
out the mathematical pattern behind this later...
Checkpoint:
Tension: 10 bars/50%
Points: none
Tension Bonus Item Box:
Tension: 20 bars/100%
Points: none
Max Tension Bonus Item Box:
Tension: 60 bars/300% and blinking. (completely full)
Points: none
Two Player Max Tension:
Tension: 60 bars/300% and blinking. (completely full), Opponents goes
down to 0.
Points: none
Hit by Enemy or other damaging obstacle:
Tension: -15 bars/-75%
Points: All Rings lost (Only 10 in Two Player Mode), -100 points for each
Ring lost.
Notes: A Barrier(Shield) or Magnetic Barrier will prevent Ring and
Tension loss one time. Try to recover Rings before they disappear after
you loose them. Rings are harder to recover the more you are hit.
Two Player Mode:
Tension: 1 bar/5% each second you are in Second Place
R button Rail Trick:
Tension: 9 bars/40% for three in a row
Points: 1700 for three in a row
Notes: Three R presses on the same rail gets you value above and is most
typical, the pattern is:
1 press: 2 bars and 400 points
2 presses: 4 bars and 900 points
3 presses: 9 bars and 1700 points
The more time you delay pressing R, the bonus goes down.
A button End of Rail Trick:
Tension: 4 bars/20%
Points: 200
Notes: A/B and R button Mid-Air Tricks can be done afterwards.
A button Springboard Trick and Rainbow Hoop:
Tension: none
Points: 400
Notes: A/B and R button Mid-Air Tricks can be done afterwards.
Combo Star:
Tension: About 3 Bars for each Star (I'll have to check this out later, I
think the bonus increases)
Points: None
R button Mid-air Trick:
Tension: none
Points: 200, but decreases to 100, then 50 if used off the same object
more than once.
Notes: Can be combined and part of B button trick complex, see Tricks
section for more info. Pressing R after other tricks will reset your
Combo number to zero and will start a new scoring cycle, so you can use B
button tricks again and get a new Combo number and maximize your Boost
Meter gain even more.
B button Mid-Air Tricks:
Tension: 1 bars/5% for one button press, maybe a little more for more,
and one Combo Star for each B press that you earn by pressing the A or R
button (I'll have the specific tension gain later)
Points: 200 for one button press.
Notes: 200 points bonus for each press of B button afterwards off a
single or string of trick objects, ending number is the number you will
receive. Pressing R during the sequence will add more points and will
cause the stars to fly to the Tension Meter, pressing A will do the same.
Bonus received also varies if you do not press B/A and R very rapidly
like for the Rail Trick.
Point and Tension received reduced by half for each time you reuse same
Trick object until finally after reusing the same trick object/Gimmick 9
times in a row you fail to receive a bonus at all.
Time Bonus:
Points: Maximum 85000, minimum down to 0 closer to 10 minutes, the time
limit for getting Max points varies by Act.
Bosses maximum is 45000 and goes down in intervals of 1000 for every 2
seconds and like Acts the bonus varies by time completed (still need to
fully confirm for SRA).
Trick Bonus:
Points: Totaled from Tricks, seems to be rounded off to nearest 1000 with
1000 minimum and 200000 maximum.
Ring Bonus:
Points:
Acts and Extra Zone: Differs from Sonic Rush, max for all Acts and Bosses
5000, varies by Act and Boss how many Rings you need for Max Bonus.
~*~*~*~*~*~*~*~*~*~*~*~
17. Time Trial:
~*~*~*~*~*~*~*~*~*~*~*~
Normal Time Trail is unlocked as soon as you complete your first Act, get
to it in the back room of Marine's House. You are not scored or ranked,
it's just to see how fast you can get through an Act or Boss.
There are the 14 normal Acts, all of the Bosses, all 16 Hidden Islands,
plus 3 Special Acts called the R Hidden Islands.
Only the 14 Normal Acts can be updated on the World Leader Boards,
explained later.
You can also Time Attack 8 special Acts and the Chaos Emerald races via
the Viking Cup, covered in the next section.
There are the different options for the Time Attack Machine:
Time Attack-
Choose a character, then choose one of the Acts/Bosses. After completing
Time Attack, for the 14 regular Zones you have the option to update a new
fast time online on the online leader boards there and now, or not.
Time Attack Records-
Check your best times for each Act Boss with Sonic or Blaze. If it's one
of the regular 14 Zones, you will see the option at the bottom to update
your record time on the World Leader Boards.
Nintendo WFC Ranking-
When you update a Time to the World Leader Board, the current World
Rankings are downloaded automatically to your DS for each Act! How do you
rank with the rest of the world? (I do go by the Angnix here too, so look
for me here and on the Web!)
Nintendo WFC Settings-
Used to set up your Wifi connection if need be.
The four R Hidden Islands are similar to Zone X in Sonic Rush, and you
can also play them in 2 Player Mode. Basically, these are very short mini
acts that loop back to the beginning again, the beginning signified by a
Checkpoint (but you don't get Tension from this Checkpoint). There are no
Rings, and the only Item Boxes are Half and Full Tension Boost, though in
Two Player you get the Two Player specific Item Boxes. You have to
complete 5 Loops of the track in order to record a new time, how fast you
have completed each Lap appears in the lower left hand corner of the
touch screen.
Unlike in Sonic Rush, Ghost Data is not saved every time, but only if you
set a new 1st place record and you replay that level again.
Also once you have completed a level in Time Trial, an option to Replay
appears, and you can watch exactly what you did last time.
Tips:
The routes you take to S-rank Acts are really good for Time Attack, but
try to trick less, especially lay off the R button unless it's a shortcut,
but not too less so you have Boost which is of course is important, and
you can afford to take more shortcuts, especially with Blaze.
Bosses have to be hit as soon as possible, don't worry as much about
keeping Rings since you are not S-ranking... well, unless the Boss hits
you a lot...
Since Bosses are random, it takes Luck for the boss to dish out an attack
pattern that will give you the lowest time, which happens to be when the
boss is using the fewest of it's long attacks where you can't hit the
boss.
Hidden Islands R have a lot of hidden or semi-hidden Tension Boost Item
Boxes... Also it seems to be designed to balance out Sonic and Blaze, so
try for a good time with both characters. Also, these levels, (especially
R2) are tricky to navigate! Practice them often, especially if you want
to race online against people! New! I have described the R Hidden Islands
in Act Descriptions!
~*~*~*~*~*~*~*~*~*~*~*~
17.a. World Leader Board
~*~*~*~*~*~*~*~*~*~*~*~
If you think you are really fast, you can submit your results to Nintendo
WFC via Wifi and see how you rank in the World. The top World times are
downloaded to your DS, and you can also go to this webpage:
http://segapass.sega.com/sra/leaderboard.cgi?t=en ,though the webpage
takes a while to show new times.
When you play the 14 normal Acts, you will get an option to update now
via WFC if you got a new fast time, or you can go back to the Time Attack
Machine later and choose the "Time Attack Records" option and look at it
via the Nintendo WFC Ranking option!
Scores are also displayed next to each person's name. I'm now not sure
what these are exactly... they differ from the Two-player online scores as
far as I can tell... O_O;
~*~*~*~*~*~*~*~*~*~*~*~
17.b. Viking Cup:
~*~*~*~*~*~*~*~*~*~*~*~
Talk to Norman at the Ocean Tornado Dock in order to access this Time
Trail Mode and choose "Viking Cup."
There are two Acts you can Time Trail for each Ship! Just like normal
Time Trail, you can Replay your performance to see how you can improve
next time around.
The Acts change when you upgrade ships, so you have to play then between
each upgrade to see them all.
Also for the Wave Cyclone, if you scroll down, you will see the Chaos
Emerald races you have already completed, now you can conveniently play
them again and time trial them!
(I'll add tips later when I get better at this myself)
~*~*~*~*~*~*~*~*~*~*~*~
18. Two Player and Connecting:
~*~*~*~*~*~*~*~*~*~*~*~
If someone else has a DS, you can race against them through the acts and
4 special Looped Acts, the R acts, that are similar to Zone X in Sonic
Rush. If you are using Wifi, you can also play a Grab the Rings game.
Go to Marine's House and the Versus Machine for these options to connect
to another person:
DS Wireless Play-
Use The Local Wireless feature, one person creates a room and the other
joins. Use when you are in the same room as another person who owns a
copy of Sonic Rush Adventure.
DS Download Play-
If only one person has a Sonic Rush Cart and you are in the same room,
then Player 1 selects Download play option, a room is created. The person
with the other DS needs to choose "DS Download Play" on the start menu
and wait for the game to download.
Check your overall two player progress with the Versus Records option.
Your overall Wins, Losses and Draws for both Local Wireless and Nintendo
WFC play for both Race and Collect Rings.
~*~*~*~*~*~*~*~*~*~*~*~
18.a. Nintendo WFC
~*~*~*~*~*~*~*~*~*~*~*~
You can either choose to play the race with a Random Person(Grand Prix)
or a Friend across the world if your DS has high-speed access to the web
through either a compatible Wifi hotspot (McDonalds or Starbucks for
example, but Wifi spots that require you to log-in first will not work),
or the separate USB connector, use the settings option if you have to set
up a complex connection.
Nintendo WFC Battle-
Connect to the online world! Once you connect, you can choose:
Grand Prix-
The game matches you up with a random person from somewhere in the World!
Racing a Random person, Score (explanation coming later) and
Win/Loose/Draw Records are saved, but name is not. You cannot save this
person's Friend Code.
Friend-
Race someone you know! Their name is saved in your Friends Roster.
Friend Settings-
~*~*~*~*~*~*~*~*~*~*~*~
Friends Roster- you can have up to 30 Friend Codes in here. When you race
that person, their code is replaced by their name.
Register Friend Code- Enter a new Friend Code, the other person also has
to have your code registered in order to play against them. If you have
more than 30 codes, the oldest ones get deleted first.
Confirm Friend Code- Your Friend Code, you get one after you first
connect to WFC.
~*~*~*~*~*~*~*~*~*~*~*~
18.a.1. Online Score
~*~*~*~*~*~*~*~*~*~*~*~
Your Score is displayed by your name when you connect via WFC! It
reflects how well you do in online races in Grand Prix mode against
strangers!
Remember your score does not change if you play against a Friend.
Also, it's an instant loss and loss of points if you disconnect
purposefully from an online race, so remember that!
Here's how to predict changes in score!
Before the race begins, take your score and divide it by your opponent's
score, then refer to the list below:
Less than .5-
You Win- You get 200 points, you opponent loses 35
You Lose- You lose 5 points, your opponent gets 40
Between .5 and .9-
You Win- You get 120 points, you opponent loses 25
You Lose- You lose 15 points, you opponent gets 80
Between .9 and 1.1-
You Win- You get 100 points, your opponent loses 20
You Lose- You lose 20, your opponent gets 100
Between 1.1 and 2-
You Win- You get 80 points, your opponent loses 15
You Lose- You lose 25 points, your opponent gets 120
More than 2-
You Win- You get 40 points, your opponent looses 5
You Lose- You lose 35 points, your opponent gets 200
(I might put it in a chart in the future)
As you can see, it's much more beneficial to go up against someone with a
much higher score than you (your number above less than 1), because you
won't lose many points by trying and you will gain lots if you do win.
And vice-versa, a bully picking on newcombers isn't going to get that
great of a points gain overall, than if they challenged and won against
people with scores close to theirs or even higher.
~*~*~*~*~*~*~*~*~*~*~*~
18.b. Race:
~*~*~*~*~*~*~*~*~*~*~*~
One player chooses to be Sonic and the other automatically has to be
Blaze or the other way around.
Then you get to choose one of the 14 Acts, or one of the three R Hidden
Islands, or you can choose "Opponent's Choice" if you want to let the
other person choose the Act. If you choose two different Acts, then the
game choose one of them randomly. If both people choose Opponent's Choice,
then the game picks one of the 14 Acts Randomly.
The goal is to be the first one to reach the end of the Act before time
runs out, the acts you can play are ones both players have reached. On
the bottom screen is a handy bar showing where your opponent is in
relation to you, and also there's a little Arrow that bounces around the
edge of your screen that gives you a general idea where your opponent is.
Other differences include the fact you don't loose all Rings when you get
hit (You loose 10), your opponent in fact can damage you and steal some
of your Rings, and you gain a bit of Tension automatically when Running
if you are in second place.
The Item Boxes in this mode are different than in normal game play and
switch randomly, from Ring, then to another item, then to Ring, etc very
rapidly:
Random Ring Bonus: Same as in normal game play
Slow (half-circle with two crescents): Slows down opponent for a short
period of time
Max Tension Bonus (One arrow pointing up, the other down): Your Tension
Gauge becomes Maximum while your opponent's goes down to zero.
Confusion (exclamation point): Sends your opponent out of control for a
short period of time, you can't control what direction you are going.
Attract (hand): Brings your opponent to the area where you are. This item
does not appear when you are playing the R Hidden Islands.
Order that Items appear, memorize this! (Remember Attract doesn't appear
in the R Hidden Islands stages)
Ring, Slow, Ring, Confusion, Ring, Max Tension, Ring, Attract, back to
beginning.
Use these above items wisely!
Race Tips:
Stand by the Item Boxes until the item you want appears (See above List)
if you have time, this could be worth it.
It's best to confuse your enemy or slow then down if they are ahead of
you, if you are behind, then use the Glove to make them go way back in
the level!
For Ring Grab, Rings obviously.
Practice the fastest Routes on Time Trial. Use Replay to see exactly
where you need improvement.
Start out with a Boost in the Race stages, press X or Y at the moment
just before Go appears to get a head-start.
You can hurt your opponent and make them loose Rings, but not all of
them!
Slow and Confusion can be devastation to your opponent in some situations.
Confusion is better, with Slow they can usually still move forward, but
with Confusion they could suddenly change direction and fall down a hole!
If you are affected by Slow, try to still keep moving forward, it's a bit
better if you are in the air.
If you are affected by Confusion, you can still move forward for a short
period of time, but the first sign you cannot control the character, just
stop and stand there until the effect goes away, or you may die. Or if
it's not too dangerous up ahead, keep pressing different buttons until
you eventually go forward.
If you are affected by the Glove, if you did not pick up the same item
box earlier yourself, you can often wait by it and then just use the
Glove back on your opponent.
Or a great tip by Wario 58, you have already touched a further checkpoint
in the level and the glove takes you behind it, die and you will end up
back at the further checkpoint. Kind of a dirty trick, but effective. (I
still haven't tested this one out personally myself)
Max Tension Bonus is a pretty good item, but not as good as Slow or
Confusion, because it's relatively easy for your opponent to gain their
Tension Meter back in most situations, it's my lease favorite item, but I
have seen some people on Online Play use it quite a bit, so who knows,
maybe I should use it more.
~*~*~*~*~*~*~*~*~*~*~*~
18.c. Collect Rings
~*~*~*~*~*~*~*~*~*~*~*~
Many of the same things for Race applies.
Try to grab as many Rings you can before Time is up. These four stages
are very short and are in an enclosed space. You are on the top screen
and your opponent is on the bottom screen.
Most of your Rings come out of Item Boxes, but like in Race they also
randomly Switch, so time it just right!
There are various switches you can press, if the switch is Orange, Rings
pop out! Blue switches that have already been pressed turn blue and do
nothing.
Item Boxes reappear after a certain amount of time, and Switches turn
orange again.
Ring Grab Tips:
Grab Rings out of the Item Boxes! The other items are not as useful as
they are in Race.
If there are no Item Boxes or switches active, go after your opponent,
attack them and steal some of their Rings!
~*~*~*~*~*~*~*~*~*~*~*~
19. Questions?:
~*~*~*~*~*~*~*~*~*~*~*~
Got Questions or need help?
First check Section 1, FAQ to see if your question has already been
answered or not or in the rest of the guide.
If not, e-mail me, [email protected]
I prefer e-mails relating only to the FAQS or maybe online battles.
Friend Code: 064535-752843
Wii #7035-3047-5500-7479
I'll only add nice people...
And note about Wii number, I'm mostly after Miis... and maybe mine will
wander over your way... and if you're lucky, you'll see that elusive Angnix
Mii... >_>;
~*~*~*~*~*~*~*~*~*~*~*~
20. Version History:
~*~*~*~*~*~*~*~*~*~*~*~
Version 0.5: 9/23/07
Version 0.51: 9/30/07
Fixed a few errors
Added a couple of Gimmicks
Reread some parts and tweaking
Version 0.6: 10/2/07
A couple of small errors
Flag and Medal Locations
Mine Cart Gimmick
Ring Bonus Info
Final Hit Info for Bosses
Other bits of info here and there
More Questions
Version 0.7: 10/6/07
Errors, and reread the entire guide
Corrected Ring Bonus info
Added Viking Cup as a separate section under Time Attack section
Added/Corrected Lots of Info for Time Attack and Two Player
Missions List
Upgrading Ships section
Brief Description of Extra Boss
Version 0.75: 10/8/07
Added Zone Descriptions and Tips
Version 0.95: 10/15/07
Reread everything, corrected small mistakes and added info.
One more question
Under Act descriptions, described the R Hidden Islands, and the routes
through R-2 and R-3.
Added Timed Gate Gimmick
Added Detailed Ship Descriptions/Controls
Added Story Walkthrough
Version 0.96: 10/19/07
Fixed these errors: sailing out to Sky Babylon, Two Player mode auto
Tension, other small errors
Viking Cup info
Two Player Tension fix
Two Player Grand Prix score change calculations.
Sailing out points for each Ship
Other added/changed info
Version 0.97: 11/4/07
Inclusion of a few minor details I forgot earlier
Full Boss Descriptions for Plant Kingdom, Machine Labyrinth Bosses, an
added thing about Final Boss
Version 0.98: 11/22/07
Added Full Boss Descriptions for Coral Cave and Haunted Ship Bosses
Added Harder Mission Tips Section, and Walkthrough for Mission 95 to this
section
Separated Acts and Bosses into two sections, renumbered where appropriate
Separated Time Trail and Two Player into Sub-sections
### +-X+X#,
##. ### ######- ###
=#,=#######; .###+, ;###+ .#
##.##. .x###= X##= ### +#
x# ## # =## ; ##x X-
# ##. ###### .# ###### ##; #
#- #. ## x#+ ## ## +## -##x#
## ## ##XX , =##=####; . .x## ,##
=###### ## - . =# # = = +# ##
## ## # #+ ;=, X###+ ,# . #
# ;,. =###;x .. ### , ## #-
## #- X# # ###- #
# .###+ =# X -# # ,# ,#X =#
## ##- ###x# -####; #+ ;# + ##. +## #
.# ,#.,,-# -## +### #X.xX###. . ,# X ## ;# # #
=# ## -# #.#####, ###x#x##x#X ,# .# ## =# ###
-# #-# =# .## , #. .# # # +# .# # # +#
x##+ # .#=# - =#= #;##+ ;#.; x#; # # ## #.
## # #, ##= - #== ##. =###-. # #=# #
## ## ## # +# +#+ +Xx +## = +## #
# +# #. # #++ #-,#+#X. #- .## ## -#x
#x #+ =# # -######+=##### + ## -# ## ## =x+ -
## x##+ =# # .#+ +x+x#### ####= ,# =## ##=x
##x =# X +#X##x#+## ;xx=+=;### #=-X## ##### ## ######
##+## ,#- # #+++===-+#=## x= #=X##-#+ .# #. #
#####, # ### # ;#x=++=xX# + xXx =. ## # ###
## # ## ## xx##+#==++xX###=# # +### =#
xxx # #+X##x#- x=+++==-+x###;=x## =##,# +#
,# xx
+### .. +X #.
#x # .# #### ###X## # X### #; ## #
, ## .,# # #x # # ## .## ## # #; .#-# #
;#x.-= # ##- # =#X #X####; ##= # ,## ## ##
## ## ## #x##-### #+ ;# #### #x### # ####
x; # .x =x ## # # ,x #, #x
## #
=#=x#X
(c) Angnix (Angela Petersen) 2007

Star Citizen is an upcoming space trading and combat simulator video game for Microsoft Windows. Star Citizen will consist of two main components: first person space combat and trading in a massively multiplayer persistent universe and customizable private servers (known as Star Citizen), and a branching single-player game (known as Squadron 42). The game will also feature VR support.