XCOM 2 is hard… really hard. The aliens in XCOM 2 are ruthless and punishing. Made worse, they outnumber you to a severe degree. Surviving the campaign is no easy task, and you're going to have to earn your victory.
The sooner you learn the tricks of the game, the better. Below you will find 10 tips for XCOM 2 that will give you a leg up on the alien opposition.
Nick Tan's Tips
Don't use concealment the whole way through, kill everything instead.
It might be tempting to play an entire mission using concealment. I completed one of the blacksite missions, which has you plant a X4 mine in a facility, using stealth almost exclusively. But while doing so ensures that your squad does not sustain any casualties or wounds, it doesn't improve your squad either.
XCOM 2 encourages you to engage in firefights and to survive them flawlessly. And this isn't just because killing enemies gives your squad member experience points so that they can earn precious skill points. It's also because killing an enemy leaves its corpse behind which is a resource for research, items, and gear that you will need later down the road. The odds already aren't in your favor in XCOM 2, so wasting an opportunity not to level by using stealth should be avoided.
Grenades, grenades, grenades!
I can't say enough about grenades. Not only are they one of the few items that you never run out of in your overall inventory (a squad member can still only carry a few grenades into battle), but they always inflict damage so you don't have to worry about missing like standard shots. Given that many missions only give you a limited number of turns, definitely take as many grenades as possible. You may even want to place two or three grenadiers in your team once you have a squad of six available members.
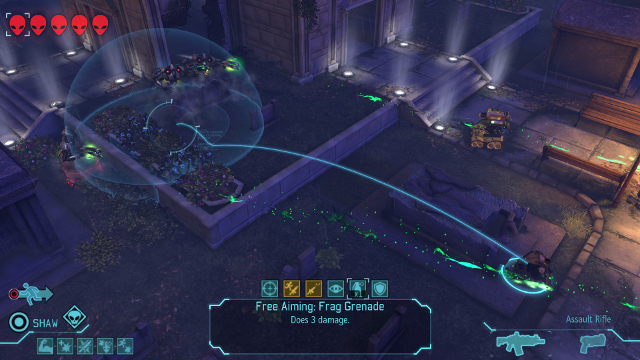
On top of that, they have a variety of uses beyond dealing fixed damage to a group of enemies. Grenades can destroy walls and floors that can leave enemies vulnerable who no longer have any cover to help them, or assist in blowing up vehicles that enemies are silly enough to hind behind. It can also send an enemy down to the ground floor from the rooftop, inflicting fall damage or killing that enemy outright. Once you gain access to the E.X.O. suit, it will also give the trooper wearing it a rocket launcher which is pretty much a grenade on steroids.
Note from Jonathan: Frag Grenades can shred enemy armor!
Save every turn.
Even on the easiest difficulty settings, battles can take a turn for the worse (no pun intended) in an instant. Many times, it's due to discovering a group of enemies from a direction that your squad doesn't have cover for. And worst-case scenario, you're left with two members dead and the rest of your squad panicked, poisoned, or worse. So take the time to save pretty much every turn because you never know if you're going to need a soldier who just died later down the road.
Increase your supply income, intel, engineers, and scientists as a priority.
There's not technically a wrong move when it comes to going around the world map and scanning areas for extra supplies and soldiers, but there are a few options that aren't really necessary. So long as you continue to save properly and make sure that you leave missions without any soldiers dying, you won't need to head out and scan for more soldiers.
Supplies should be your number one priority since almost every piece of gear and item, as well as guerrilla tactics training, requires supplies. You'll want to make contact with other regions and level up their communications beacon to increase the number of supplies that drop across the map. Grabbing scientists and engineers from the black market or otherwise will also speed technology research and room building exponentially, so if there's an opportunity to get them, it's well worth the time. Getting intel is also a good move since you will need it to contact regions, purchase black market items, and reveal the next dark event.
Connect regions carefully.
You only have a certain number of contacts you can have at any given time. At the same time, you need to form a line of regions to reach certain ADVENT strongholds to even attack them in the first place. So it's in your best interest to learn where the strongholds are first before you start planning on which regions you contact first. Adding more communications centers to increase your number of contacts might take a longer time than you might think since other rooms might take higher priority, so don't be too hasty in contacting regions.
Jonathan Leack's Tips
Get Magnetic Weapons and Predator Armor ASAP.
Your research and development has a profound impact on the difficulty of the game. While every research technology is useful in its own way, some are more beneficial than others. Take for example Magnetic Weapons, which allows you to purchase the second tier of shotgun, assault rifle, and handgun. These powerful weapons deal more damage than the defaults allowing you to dispose of the opposition with fewer turns. Meanwhile, Predator Armor outfits your entire team with an additional four HP, which can and will mean the difference between life and death.
It is recommended that you research Magnetic Weapons immediately, and and then shift toward Predator Armor. These two technologies will last you until mid to late game and are worth the early investment.
The Ranger Shotgun is your most reliable damage throughput.
The Ranger is an often underutilized asset of a traditional XCOM squad. Although early on it gives the impression that it's a melee-only unit with light armor, it's much more than that. Rangers can move swiftly and deal incredible damage using their shotgun. The shotgun has a high chance to hit when at close range, as well as better damage throughput than Assault Rifles, meaning that the Ranger should be at the front line of your squad and supported by the other roles.
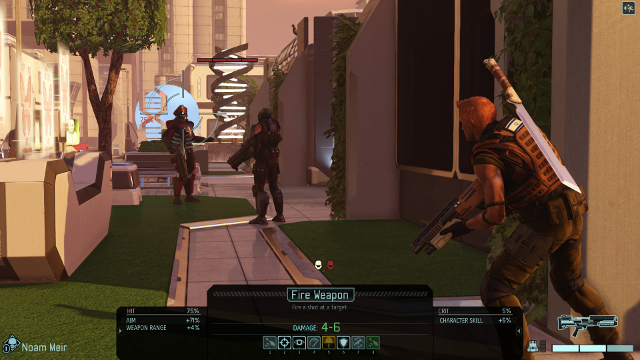
On the topic of Ranger, it is advised that you don't use the sword unless it's tactically safe. The shotgun is simply more reliable and does more damage, making the risk of running up to an enemy with the sword a bad choice in most situations. Instead of using the sword as your primary means of damage, utilize it to dispatch of the last foe in a group, or if you run out of ammo and don't have time to reload. Swords deal extra damage to Sectoids, too.
Pay attention to the line of sight indicator.
You've probably heard that XCOM 2 has received a brand new LoS indicator, but haven't found it in the UI. The reason for that is it's very subtle. To see whether or not you will be able to hit an enemy from a particular position, look for a crosshair next to an enemy's health bar. If a crosshair is visible, you will be able to hit that enemy upon traversing to the new location.
Using the LoS indicator you will be able to find new positions throughout the map that provide advantageous defense while allowing you to fire at enemies, including holes in cement walls and windows.
Prioritize Stun Lancers early on.
Outside of the basic Advent, every enemy has the potential to punish you in a significant way if unchecked. Early on, Sectoids can be a real problem thanks to their Mind Control and ability to incite panic and disorientation. Even then, Stun Lancers are a greater concern.
Stun Lancers are able to move very far very quickly, breaking into your defenses and meleeing your squad for tons of damage. Made worse, their melee often knocks out the affected teammate, rendering them unable to move or take action unless revitalized. In other words, Stun Lancers are the first unit capable of one hit KOing your squad no matter their health. Do yourself a favor and take out these evil ninjas before they can wreck havoc, preferably with a well thought out ambush.
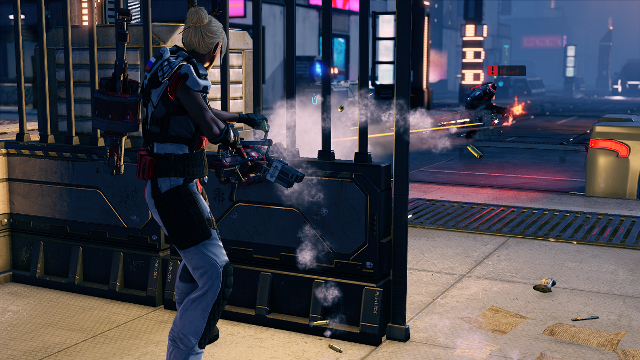
Don't forget about the destructible environment.
XCOM 2 is a game all about cover. If you're out in the open, you're as good as dead. While enemies might find high cover to reduce your chance to hit to astronomically low levels, who's to say that the cover has to be there forever?
Using explosives, heavy gunfire, or the Grenadier's Blast Padding you can blow an enemy's cover into smithereens. Although destroying the cover will take a single turn from one of your squad members, you'll be rewarded with significantly higher chance to hit the foe, and opening it up to a wider angle of attack. If a dangerous enemy is in high cover, it's usually worth the investment provided you can follow up the destruction with some firepower to take it out before it moves to a new location.