
1) What To Do After Heading Out of Vault 111
When you emerge from Vault 111, your first order of business should be to head to the soldier station guarding the vault door for some easy supplies. You can also explore the vault door area a bit for more goodies. Once you reach Sanctuary Hills nearby, you should begin exploring your home after having a conversation with Codsworth. There's a Grognak The Barbarian comic on the kitchen counter and a You're SPECIAL! book underneath the dresser in the baby room that will give you a free SPECIAL point (treasure this because that's all you're going to get!).
Beyond that, you will need to find bobby pins which you might be able to find in bathroom mirrors throughout the town. There's an armed safe (so make sure you disarm the bomb) in the house closest to the wooden bridge entering Sanctuary Hills. These bobby pins will also help for the safe in the root cellar located behind one of the houses around the cul-de-sac. You will need to place a point into lockpicking, though, to access the safe. But otherwise, you will still have the chance to nab supplies and precious gold bars from the cellar in the meantime.
Also be aware that there's a chemistry set behind a different house near the wooden bridge, which is important once settlements become unlocked in the game. This set will allow you to create chems, so I suggest moving the set near the middle of Sanctuary Hills next to the power armor dock, armor station, and weapon station.

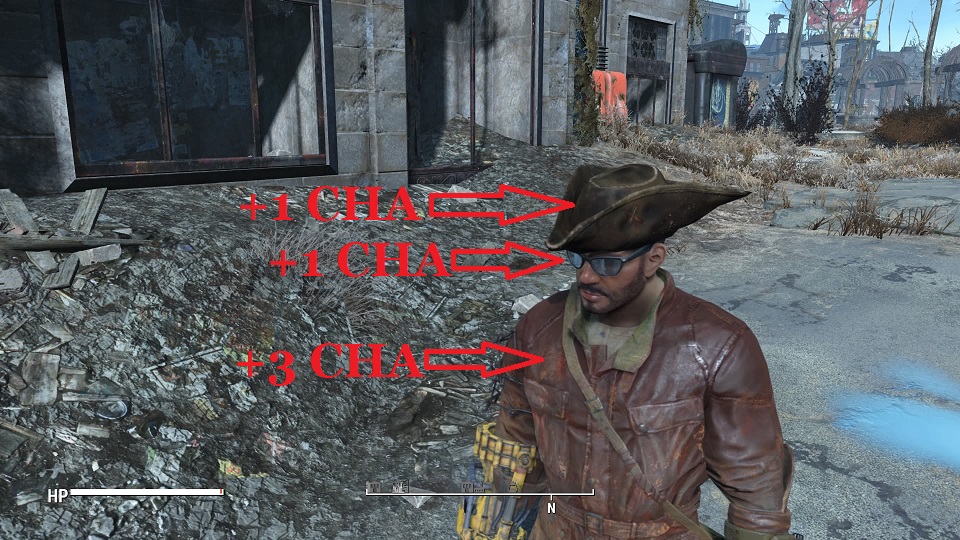
2) Use Charisma-Boosting Clothing Outside of Combat
Charisma controls speech checks in dialogue sequences as well as trading prices with vendors, thereby being the main SPECIAL stat that influences non-combat gameplay in Fallout 4. So during these sections, it's important to save any charisma-boosting clothing in your apparel inventory, including formal hats, black-rim glasses, formal suits, and other related clothing. In particular, Reginald's Suit which you can earn by saving Reginald in a building infested with Super Mutants at Trinity Tower (which is close to Diamond City) gives 3 charisma points.
Putting it altogether, you can get five or more Charisma points which can lower purchasing prices by about 25% and can easily place your Charisma at 10 or above which will let you pass any Charisma check you want. For certain side quests, that can lead to twice the payout for caps by the quest-giver and awards you a fair amount of extra XP for passing each speech check. Yes, this strategy can lead to a lot of clothing swaps, but the benefits, as I've explained, are very well worth it. Why not earn free caps and XP wherever and whenever you can?
![]()
3) Use "Transfer" to Pause Combat and View Loot
One of the stronger improvements of Fallout 4's looting system is the quick menu that appears over a chest and over the corpses of fallen friends and foes. However, it's very easy to forget what particular items do and what their weights are, and finding a corpse can be difficult if it's in the middle of the field. So it's worth using the "transfer" button right after you find (or create) a body.
Not only will this pause combat, so that you can examine items carefully one by one and give you a breather, but you can see the components of each item and you can see the weight of every item in proportion to their weight. It's very easy to load your inventory with unnecessary items and heavier items that don't actually have a lot of value, so hitting transfer on every mark you kill is highly recommended. It's also easy to forget where you've kill somebody since you can't target corpses, but by transferring on a body immediately, you can be more assured that you're walking away with all the loot you can muster.
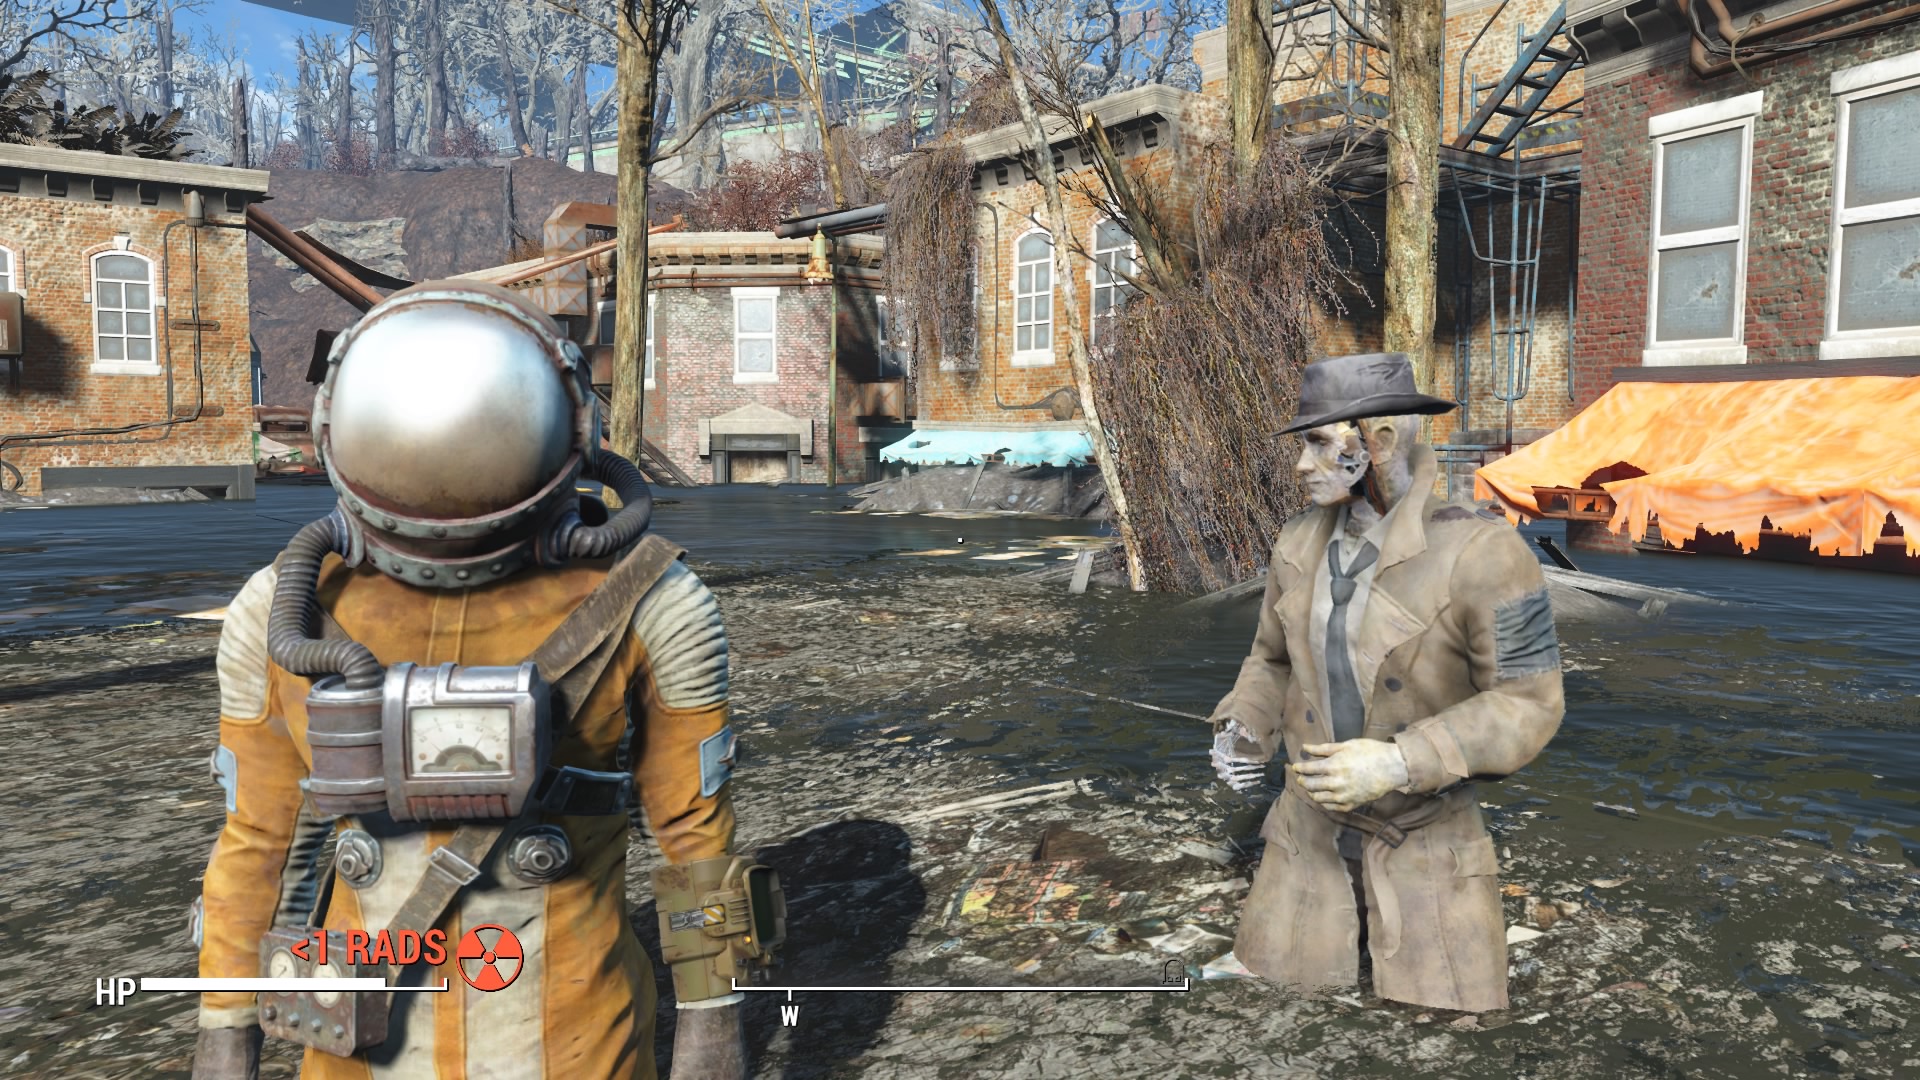
4) Keep a Hazmat Suit in Your Inventory
There are certain sections in the game that will require you to enter areas laden with extremely high radiation, including The Glowing Sea, a tree-less area that dominates the southwest section of the map and is the result of being the epicenter of the nuclear explosion nearly 200 years ago. Yes, you can likely survive these areas by popping a few Rad-X pills and using several packs of Radaway, but having a Hazmat Suit around which can be found in various science labs like the Cambridge Polymer Labs is a great solution.
Sometimes you don't have a Power Armor suit around either (like during Radiation Storms) to mitigate the radiation and using fusion cores for the sake of getting through radiation isn't a great use of it, but having a Hazmat Suit that has 1,000 Radiation Resistance is fantastic and versatile. In the picture above, the Hazmat Suit drops the +10 Rad/sec water to less than 1 Rad/sec. The suit also allows you to spend perk points away from Radiation Resistance and saves you Rad-X and Radaway for more important sections or for selling for lots of caps!
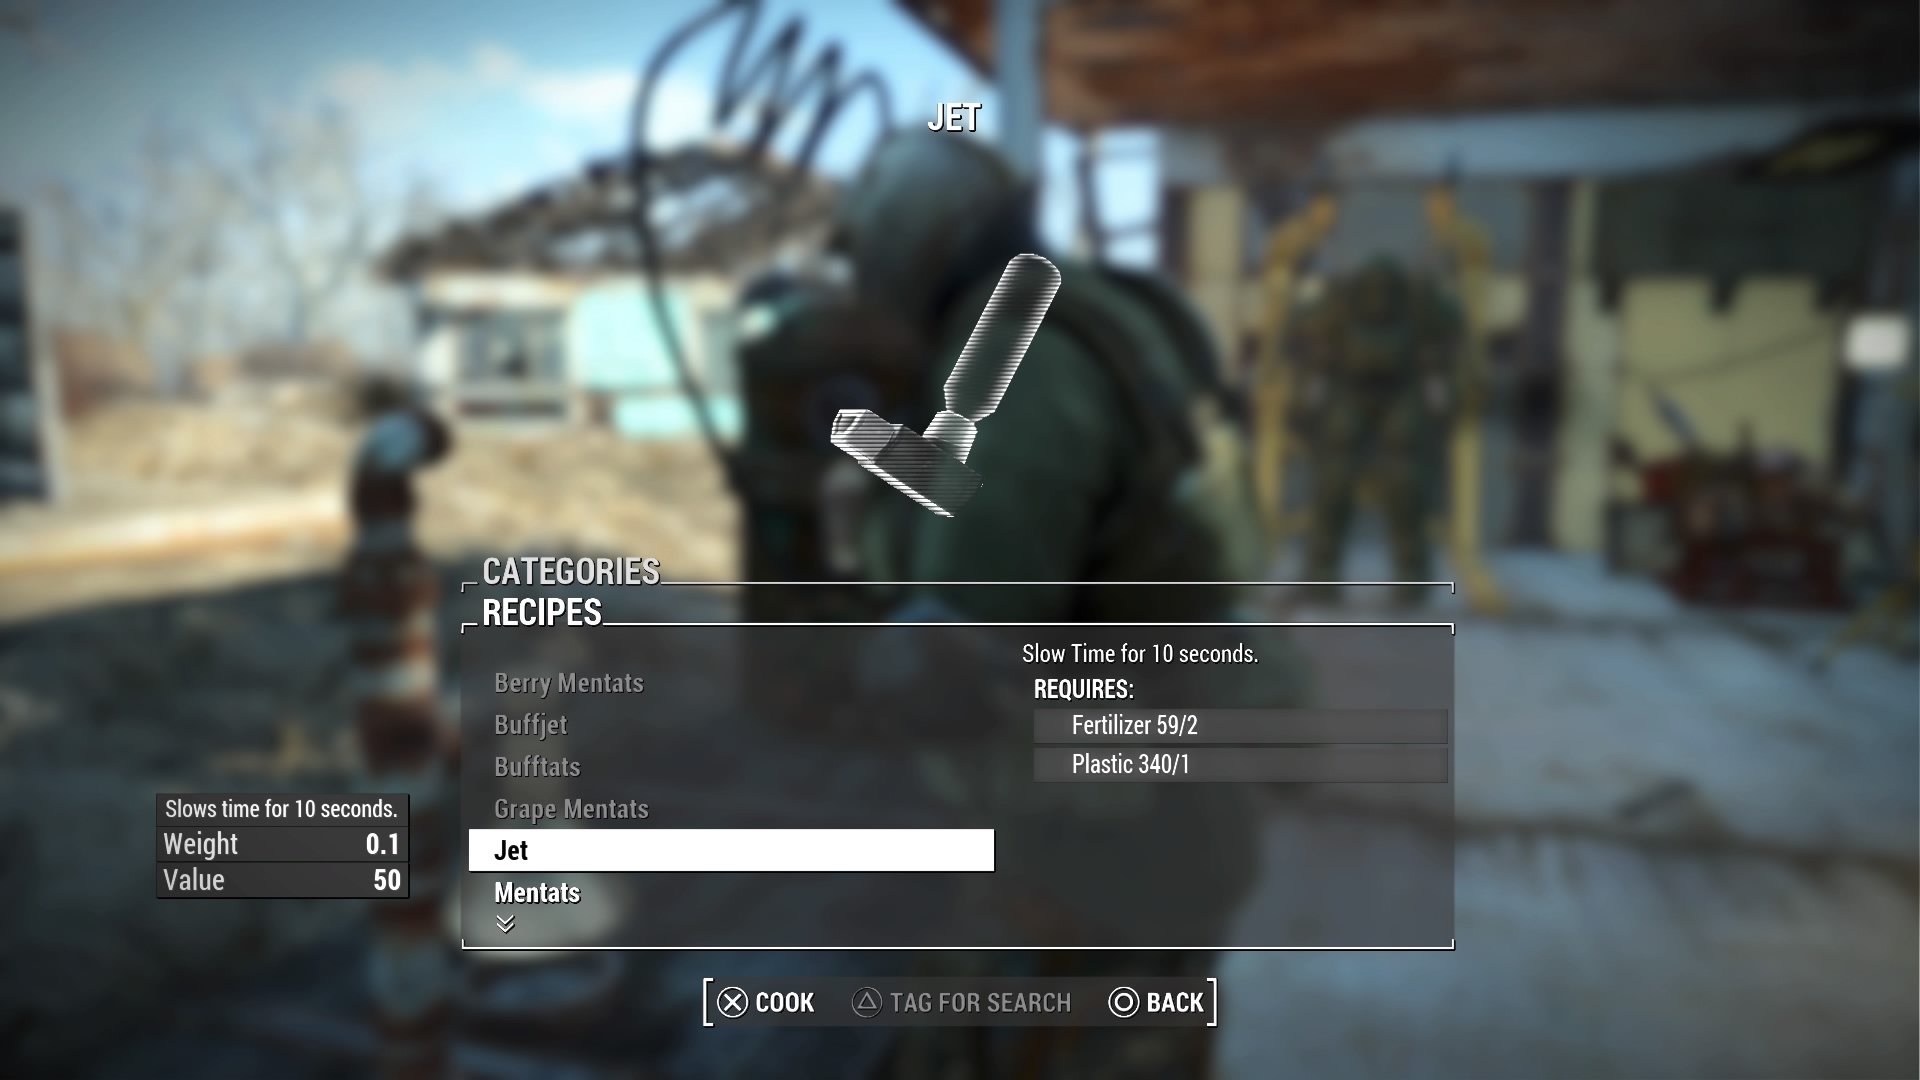
5) Get Caps Quickly: Jet and the Scrounger Perk
Earning caps can be difficult early on when you have nothing to your name. One of the best ways to earn caps early is creating the chem Jet. With just a little bit of plastic that's easy to find with all of the plastic tableware laying around and several bags of fertilizer (some is available at Abbernathy's Farm directly south of Sanctuary Hills), you can create plenty of Jet that's quite lucrative for traders. There's a chemistry workshop set hidden behind one of the first houses in Sanctuary Hills after crossing the wooden bridge into town.
The other method is straight-up ammo, and with all the different ammo types, there's bound to be a few types that you'll choose not to use at all throughout your playthrough. If you can identify those types early on, you can instead turn them into a source of caps quite early. The Scrounger perk under Luck 2 in the perks chart is well worth at least one point not just to get you ammo for the types you need but also the types you can sell. Using Charisma-boosting clothing, as mentioned in a prior tip, will make the exchange even better and will let you avoid putting points into the Trader perk unless you absolutely need the caps.

6) Check Weight Proportions When Collecting Resources and Loot
Carry weight is a limited resource, so it's important to collect items of high value either in straight-up caps or in their versatility in being converted into resources. On the subject of caps, I tend to go for a 1:10 ratio; that's 1 weight for 10 caps. If a gun or piece of loot doesn't meet this general ratio, then I dump it in favor of something else to pick up down the line. Unless you have the Scrapper perk, which allows you to break down guns into components, the 1:10 ratio is a good guide in terms of what you should pick up.
On that note, anything that doesn't have any weight should be picked up immediately, like pencils, pre-war money, and even burnt magazines. All of these are either free caps or just free resources. Be aware of what you pick up in terms of resources with respect to weight. Something like tin cans with weight 0.1 provides 2 steel each whereas some other objects have weight 0.5 and still only provide 2 steel. Yes, go tin cans! Any object with copper for wiring (lamps, light bulbs), and nuclear material for Power Armor mods (board games), and adhesives for any mods (wonderglue, duct tape) are worth collecting too.
Also be careful about how many aid items you carry around. Many of the items apart from stimpaks have a weight of 0.1 or 0.5, which doesn't sound like much until you have 20 of each item and you'll wondering why you only have room for 50lbs of loot. Consider carrying only a limited supply of items and as many stimpaks as you can.
![]()
7) Establish Supply Lines With Local Leader Rank 1
If you're into creating viable settlements throughout the Commonwealth wasteland, then the Local Leader perk is a necessity. It can be rather restrictive given that the perk requires six Charisma points to access, but the first rank in Local Leader is too important to pass up. Without this perk, each settlement has its own independent stockpiile which means that if you dump materials in Sanctuary Hills, they're not accessible at all in any other settlement. That's a lot of unnecessary and tedious inventory management when all you want to do is build some walls, clear trees, make some beds, and lay out a few turrets for defense.
Creating supply lines solves this issue. By selecting a settler in workshop mode, you can assign them to being a trader specifically for creating a supply line to another settlement. When viewing the map on the Pip-Boy, you can see lines connecting each settlement indicating the supply lines that you've established, creating a network that will likely start from Sanctuary and connect itself through the rest of the Commonwealth. In this way, every settlement will have access to your collection of resources no matter which one you're in and give you very easy access to all of your supplies no matter where you are.
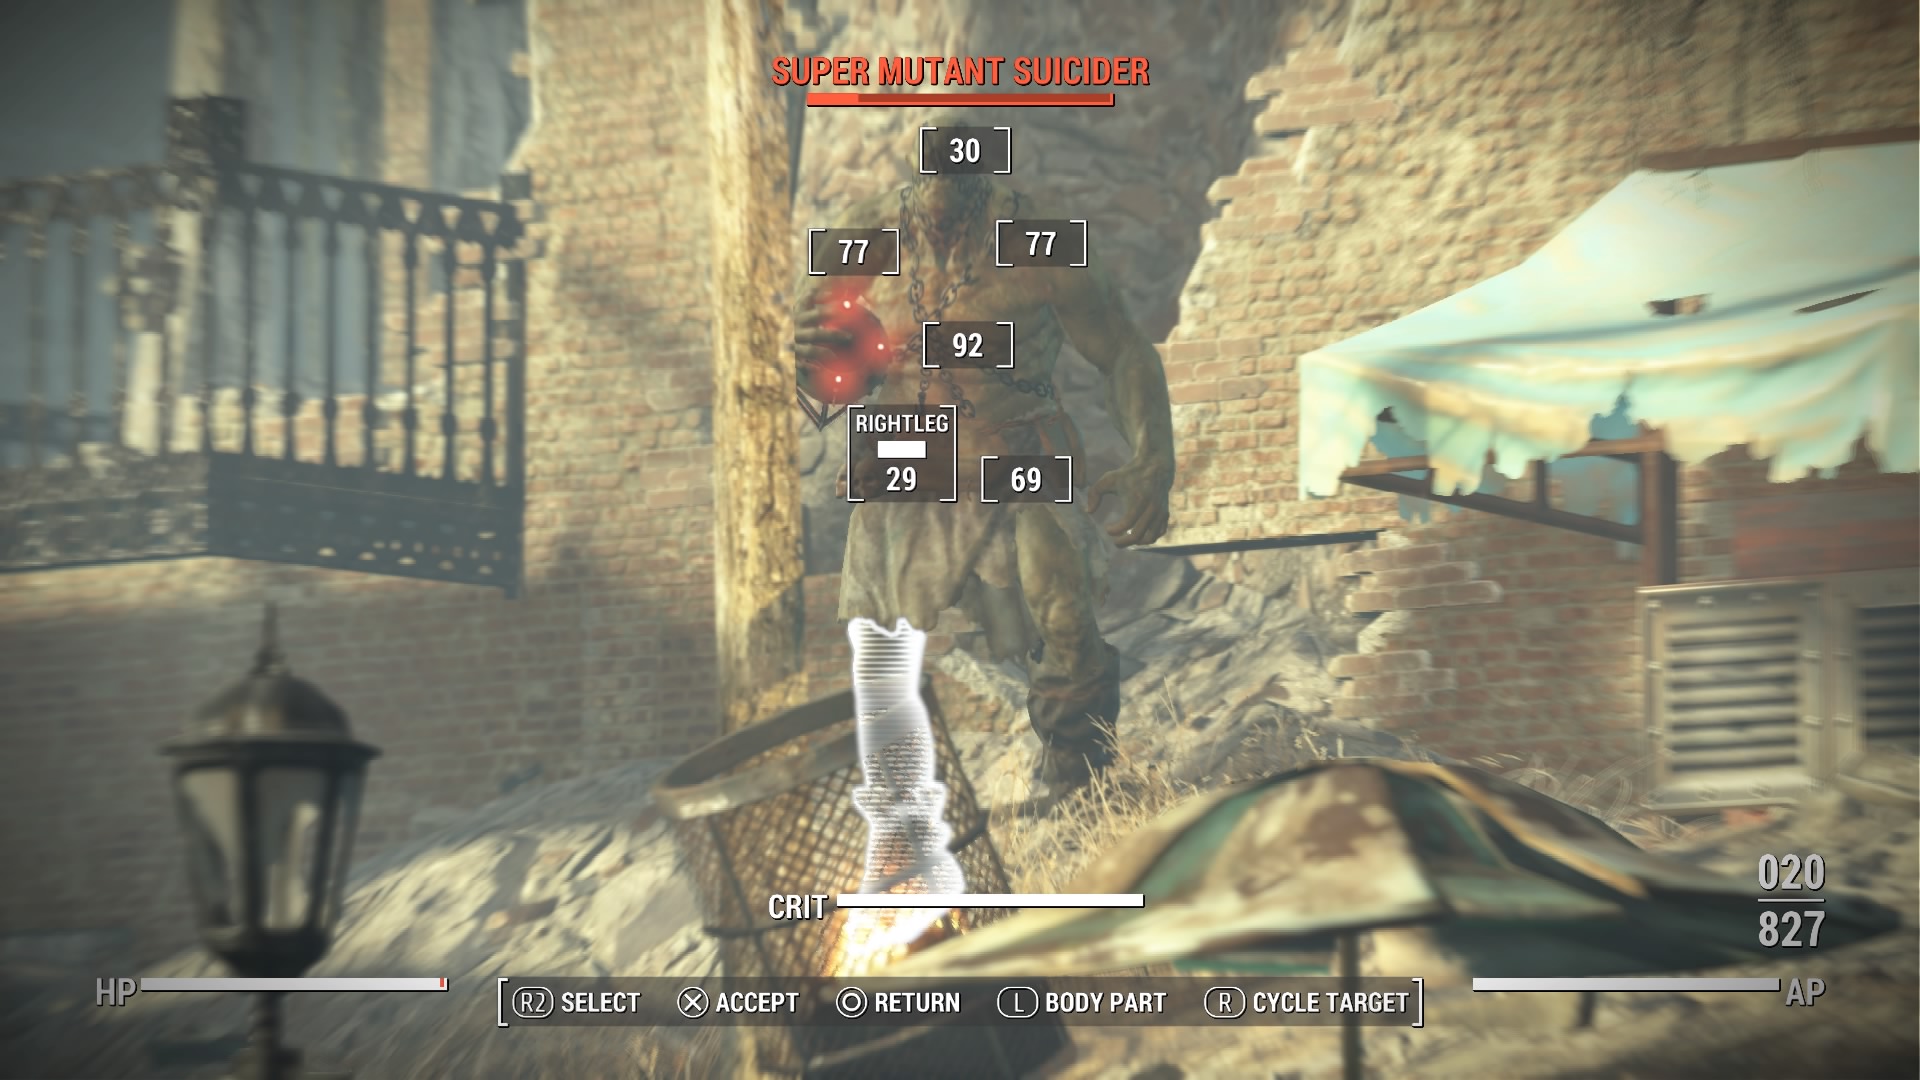
8) Beware of Explosive Objects and Enemies With Big Guns
A good portion of your deaths in Fallout 4 will likely be due to explosions. Raiders and super mutants have no problems throwing a fragmentation grenade or molotov cocktail near your feet. Those aren't so much of a problem… unless there are gas canisters nearby, in which case you'll find yourself ragdolling all over the place. Now, it's sometimes not very clear where these volatile canisters are since they aren't really highlighted anywhere but just be on the lookout for them and quicksave often.
The other thing to look out for are enemies, typically raider psychos or super mutants with tough armor, who wield missile launchers and mini-nuke-propelling fat man launchers. These weapons can easily end your life with a single shot, as you might learn if you start running around Lexington and see a rocket land at your feet from above. Super mutant suiciders with a mini-nuke in hand will also attempt to kamikaze themselves into you, so you'll want to take them out first from afar or make sure you can end their lives in a few shots. The best solution is sniping these foes while hidden behind cover, but if you don't have a sniper rifle handy, the only real way to survive is with a suit of Power Armor and hoping you get close enough to knock out these threats quickly.
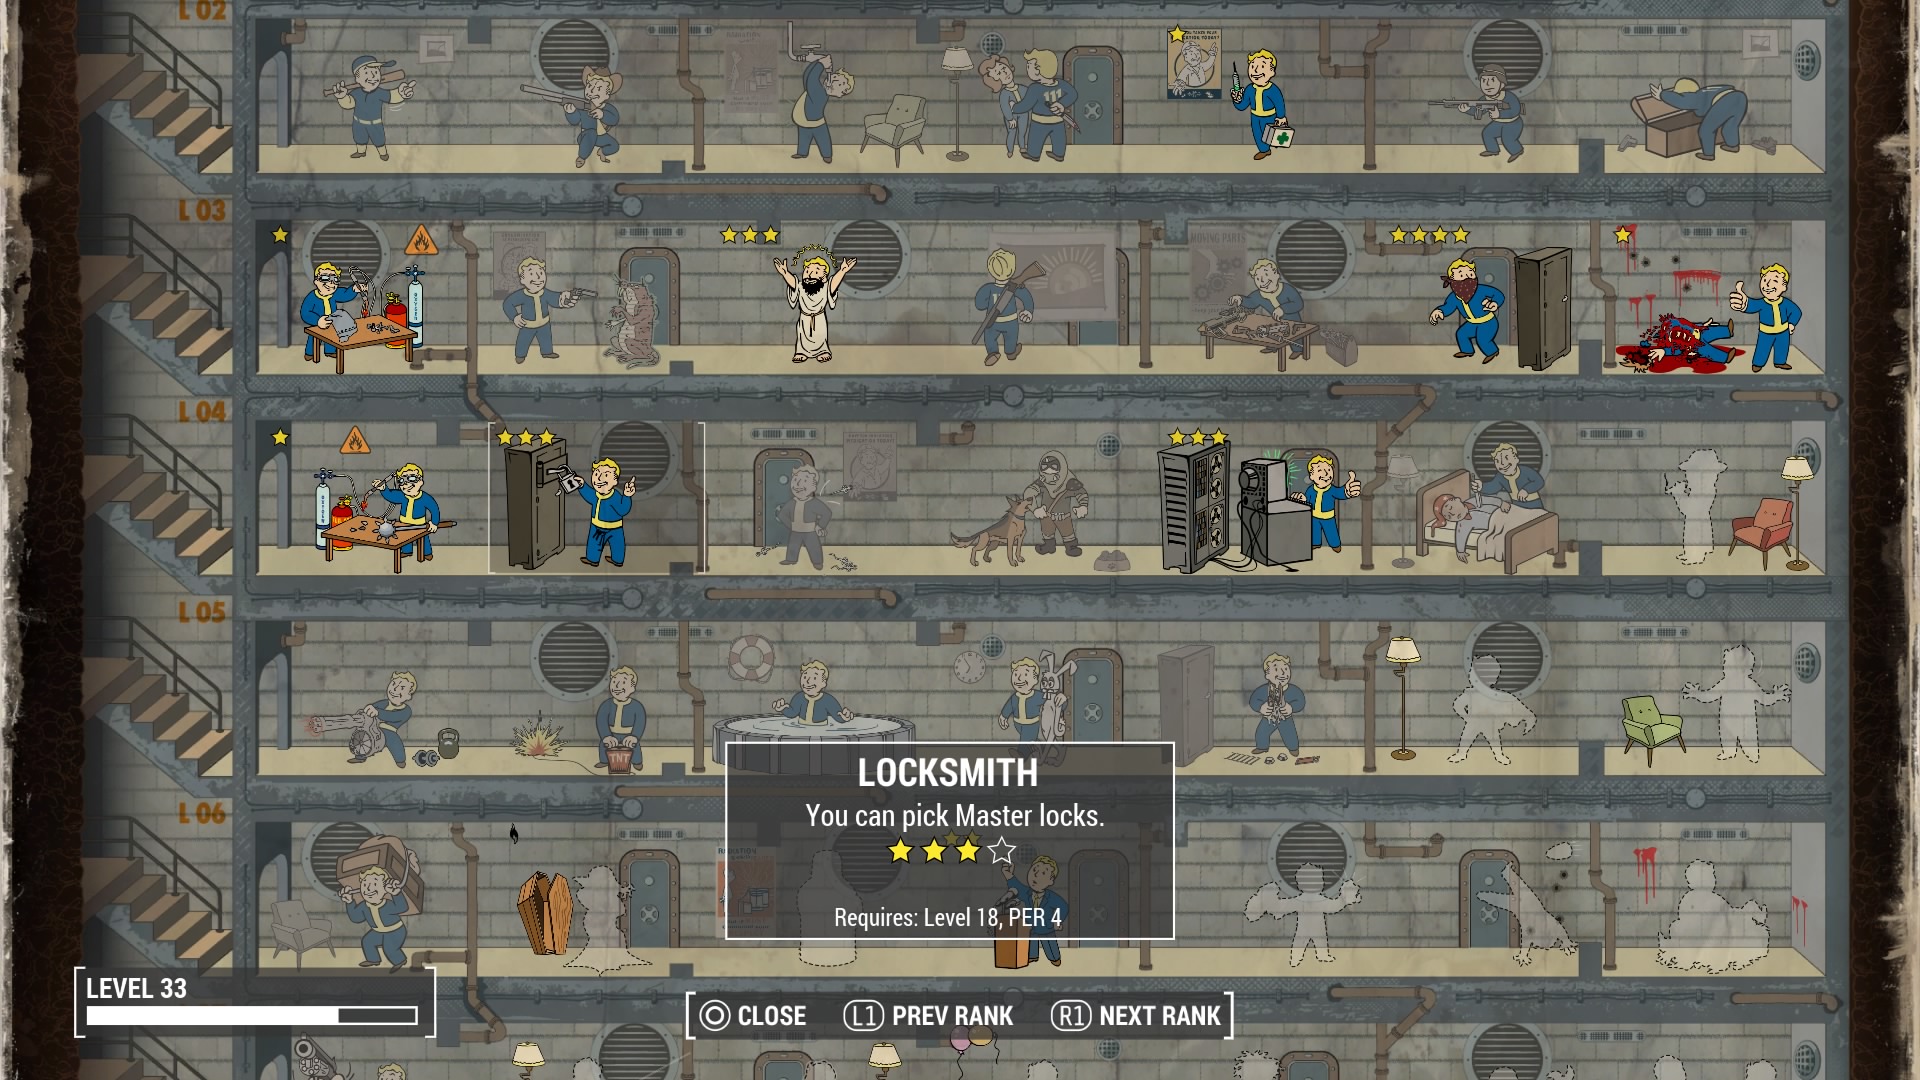
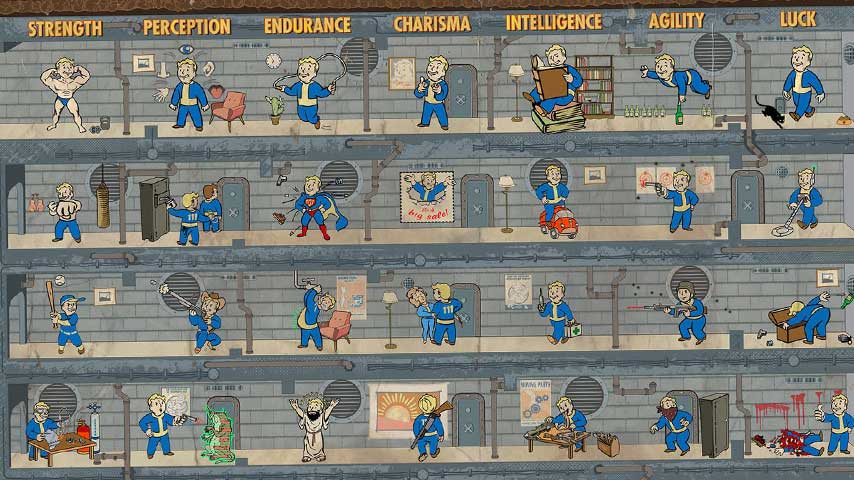
9) SPECIAL Stat and Perk Recommendations
In general, there are several perks to consider that would be appropriate for any build. They're not required by any means, but you should consider your gameplay options if you don't have these perks. As such, these perks require that you have the SPECIAL stats to access them in the first place.
One of the more important decisions to make is whether you want to be able to lockpick safes and hack terminals. Both lockpicking and hacking typically open chests and doors for loot, and hacking has the added bonus of activating protectrons and turrets. If you think you can't go without these two abilities, make sure you start the game with a Perception of 4 (for lockpicking) and an Intelligence of 4 (for hacking).
I would also consider the Strength 3 perk Armorer as well since armor impacts every build. And as I mentioned the Local Leader perk for settlements, you may want to invest six points into Charisma but only if you particularly care about making your life easier for creating settlements.
For a much deeper look at the perk system, check out my guide that rates every single perk in the game.
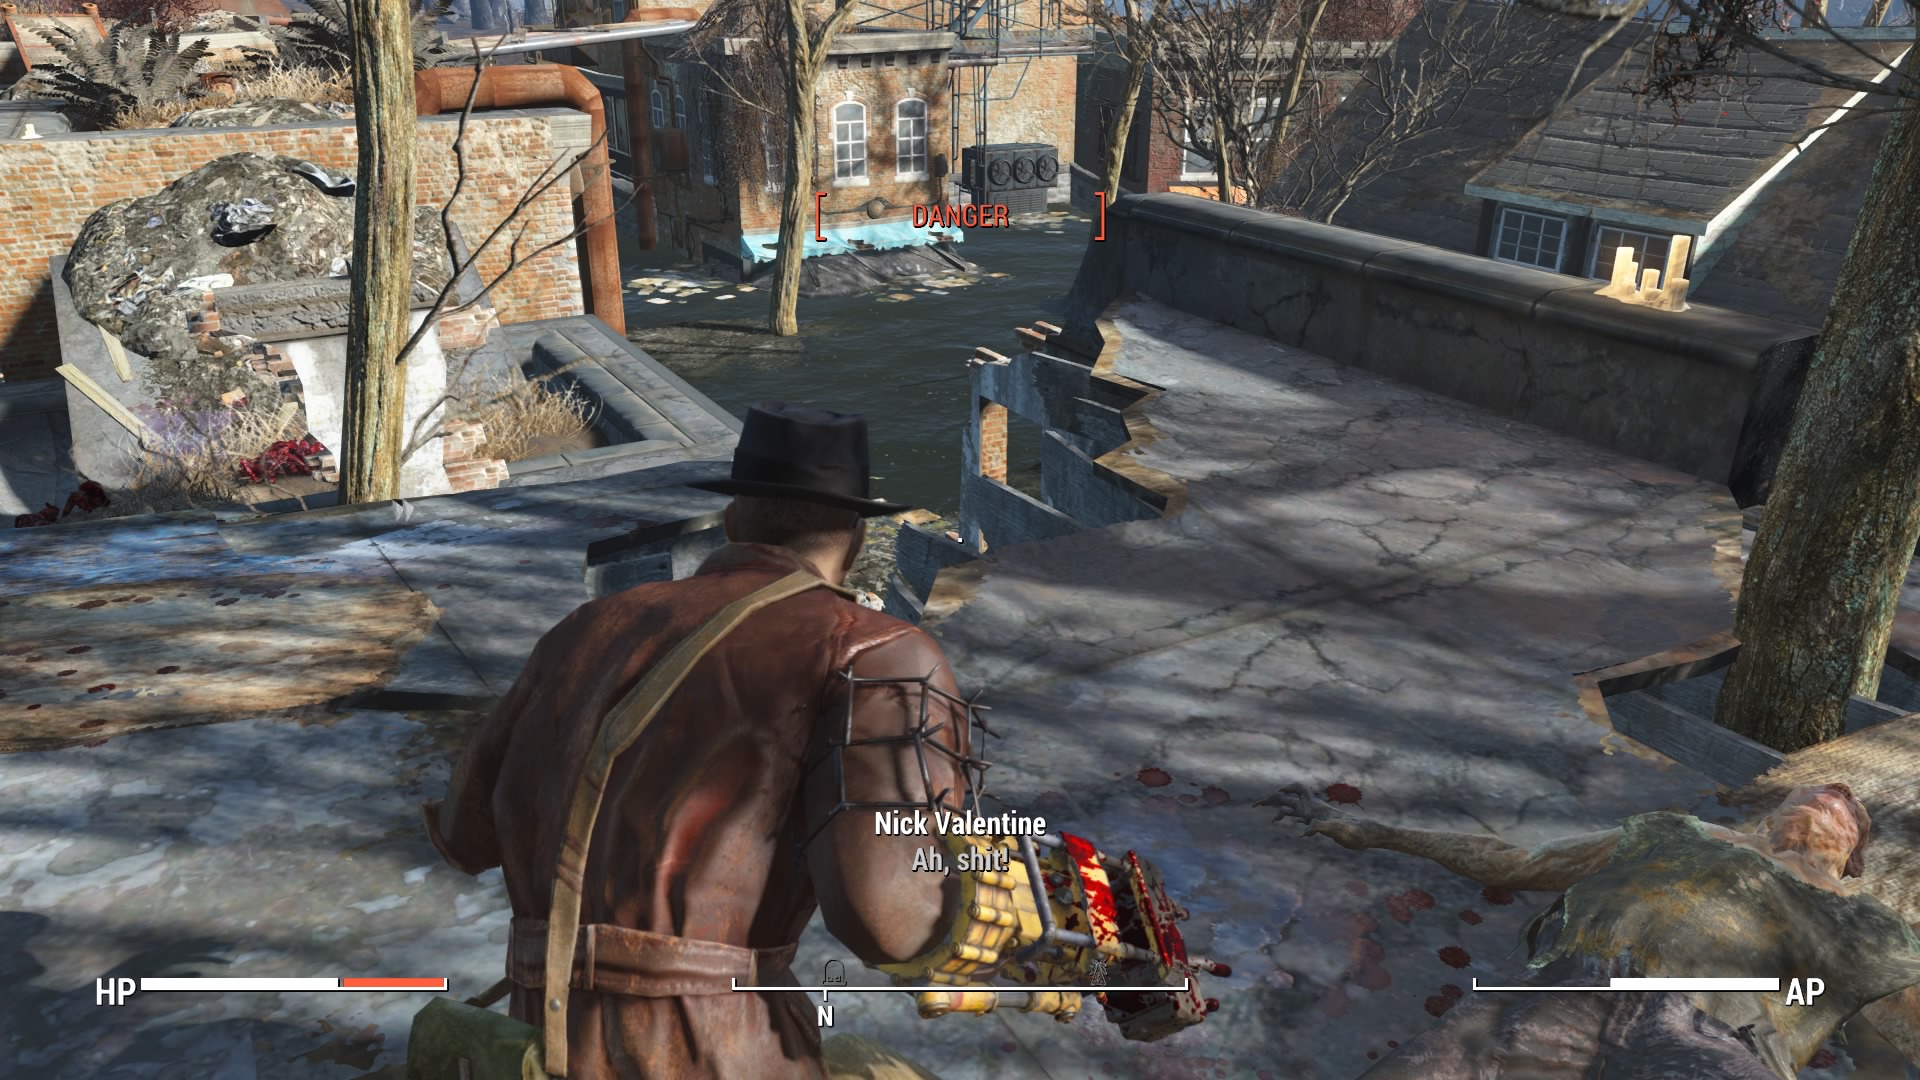
10) Some Unexplained Controls and Mechanics
Here are a few notable parts of Fallout 4 that go rather unexplained…
– The game doesn't really say this at all, since Fallout veterans will know this, but holding down the button for the Pip-Boy will turn on its flashlight. Just be wary when sneaking and exploring since the flashlight can give away your position.
– The sneak indicator has been improved, though it may seem like it hasn't changed at all. The three warning levels remain the same – hidden, caution, and danger – but this time around, the closer the brackets are to the word, the closer you are at the detection level being raised a level. The opposite is also true, with the detection level being lowered if the brackets get wide enough. (For example, In the picture above, the danger level is about to turn into caution with cover.) If you're playing a sneak build, make sure you pay attention to this mechanic to know when to retreat and search for cover.
– VATS can be activated outside of combat. Doing this can reveal enemies and frag mines that you might not see otherwise. So consider tapping VATS manually every now and then even when you're disengaged for a quick scan. If nothing is highlighted in VATS, then you know you're safe.
– You can't wait immediately anymore. You need to find a place to sit or sleep in order to wait. It's a strange choice, but there we go. My guess is that they wanted to make sure that no NPCs would collide into you while you wait.
– By leaning against certain walls, you can peek around corners when aiming down the sights. It's not exactly obvious and it doesn't work against all walls, so definitely check it to make sure it works.

Fallout 4 Coverage Footer
-
Secret UFO Crash Site Easter Egg

Grab your alien blaster. -
A Guide to Base Building
Make the empire of your dreams. -
PC Ultra Graphics with SweetFX
This is how good the PC version can look. -
The Entire Fallout 4 Map
Fallout 4 Full Map. -
Get Perky: A Ratings Guide for Every Perk
Read up on where to spend your Perk Points. -
Fallout 4 Review

Should you buy Fallout 4? -
There\'s a Secret Dev Test Area You Can Visit Where Every Item is Available
Visit the secret dev test area. -
10 Tips Before You Start
Prepare for your post-apocalyptic adventure. -
Bobblehead Locations

Grab all of the bobblehead collectibles for permanent bonuses -
Bloodborne vs The Witcher 3 vs Fallout 4

What was the best RPG of 2015? -
Bugs Galore

These aren't just ordinary bugs. -
Friend With Benefits: A Guide to All 12 Companions
Win over all 12 companions in the game. -
The 10 Most Useful Mods

Want it? Mod it!