===============================================================================
D E V I L M A Y C R Y 3:
------ + ----- + ------ + --
D A N T E 'S A W A K E N I N G
+================================+
+SPECIAL EDITION+
^^-----------------------^^
W A L K T H R O U G H
---=====================---
AUTHOR: PAUL MICHAEL (VHAYSTE®)
CONTACT: [email protected]
~ ~ ~ ~ ~
COPYRIGHT
~ ~ ~ ~ ~
This document is copyrighted to me, Vhayste®. It is intended for
~PRIVATE~ use only. It cannot be used in ANY form of printed or electronic
media involved in a commercial business, in part or in whole, in any way,
shape, or form. It cannot be used for profitable or promotional purposes,
regardless of the situation. Breaking any of these rules is in direct
violation of copyright law.
This document is protected by copyright law and international treaties.
Unauthorized reproduction and distribution of this document, or any portion
of it, may result in severe civil and criminal penalties, and will be
prosecuted to the maximum extent possible under the law. Any characters,
names, places, or miscellaneous objects are copyright of their respective
companies.
A written permision must be obtained from the author if this faq is gonna
be posted on any other websites the author originally contributed it.
~ ~ ~ ~ ~ ~ ~ ~
VERSION HISTORY
~ ~ ~ ~ ~ ~ ~ ~
V1.0
June 26, 2006
--finished normal game with dante
--currently playing as Vergil
--completed weapon and style list for both
characters
V1.2
July 1, 2006
--finished game with Vergil
--completed main walkthrough
--completed miscellaneous details
V1.3
July 3, 2006
--finished hard and very hard modes
--unlocked additional items in gallery
V1.4
July 4, 2006
--inluded blue orb location summary and
red pillar locations
--also inserted devil trigger bonuses
--included item list
V1.5
July 5, 2006
--complete version of the faq
--corrected some minor ambiguities
V1.6
April 10, 2007
--reformatted faq
--added more details in some sections.
~ ~ ~ ~ ~ ~ ~
AUTHOR'S NOTE
~ ~ ~ ~ ~ ~ ~
Welcome. I was originally planning to finish Airforce Delta Strike but got
disappointed soon enough due to the really crappy planes and sluggish control
response. I just remembered that I played this game halfway but never
finished it. I was able to beat the game in normal within the whole day, and
here, I created a walkthrough also.
I've never played the previous installments but Im really interested about
Dante's cool, 'astig' and really kickass character. Not to mention the
controls here are cool and simple. The game also offers a lot of combos to
experiment with. You can even interchange weapons and guns in real time,
giving you a more intense and action-packed brawl.
Just like the faq I created for Drakengard 2, I'll just outline the main things
you should do in the missions. I'll try to note also some hints about the
bosses if needed. The faq is primarily created during normal mode, additions
will be mentioned on the consecutive playthroughs.
In any case there's something missing, incorrect or an addition about the
faq, don't hesitate to email me. I can't promise to personally reply to you
since Im working on a night shift and I take 2 hour long rides fro and to my
home and office. I'll update the faq as needed and I'll automatically give
you credit on my next update.
Have fun!
I just have one question though.... what if Dante and Alicia (Bullet Witch)
pairs together? .....hmnnn...
~ ~ ~ ~ ~ ~ ~ ~ ~ ~ ~ ~ ~ ~
ABOUT THE GAME -- ADDITIONS
~ ~ ~ ~ ~ ~ ~ ~ ~ ~ ~ ~ ~ ~
-- VERY HARD MODE
-- BLOODY PALACE/ Survival Mode (contains 9999 levels)
-- TURBO MODE (20% faster gameplay)
-- NEW CONTINUE SYSTEM
Gold Orbs are enabled at the start of the game. You can also remove
Yellow Orbs and allow infinite Continues. The Gold orbs can be purchased
which allows to revive the player instantly without resetting
bosses or enemies. Its pretty handy since you can continue where you
left off
-- NEW BOSS (JESTER)
-- NEW PLAYABLE CHARACTER (VERGIL)
-- DEMO DIGEST (Plays previous cutscenes)
~ ~ ~ ~ ~ ~ ~ ~ ~ ~ ~ ~ ~ ~
ABOUT THE GAME -- CONTROLS
~ ~ ~ ~ ~ ~ ~ ~ ~ ~ ~ ~ ~ ~
! This applies to the default button configuration
SQUARE - fire guns
TRIANGLE - use devil arms
CIRCLE - use style move/action
X - jump/ roll
L1 - activate Devil Trigger
L2 - switch guns (Dante)
- switch devil arms (Vergil)
L3 - toggle lock-on
L ANALOG - move character
R1 - lock-on
R2 - toggle devil arms
R3 - reset camera
R ANALOG - move camera
D-PAD UP - item screen
D-PAD DOWN - map screen
D-PAD LEFT - file screen
D-PAD RIGHT - equip screen
START - opens menu screen
SELECT - taunts the enemy
~ ~ ~ ~ ~ ~ ~ ~ ~ ~ ~ ~ ~ ~ ~ ~
ABOUT THE GAME -- DEVIL TRIGGER
~ ~ ~ ~ ~ ~ ~ ~ ~ ~ ~ ~ ~ ~ ~ ~
Devil Trigger is like the "super mode"; this transforms Dante and Vergil to
their devil forms. During this mode, all their attributes increases
significantly. Not to mention that they recover HP gradually while in this
mode, which could be very handy in a tight battle.
You need to fill your Devil Trigger gauge, composed of Runes by performing
combos, defeating enemies and/or taking damage. You don't need to have a
full "Rune" bar to initiate it. One rune is enough to activate Devil
Trigger; but in a very, very short time only.
Several bonuses are also added by using different devil arms while in Devil
Trigger mode. Refer to the chart below
+- -+- -+- -+-
| BONUS SKILL | DEVIL ARMS | CONTROLS EFFECT |
+---------------+-----------------+------------------------------------+
| GLIDE | REBELLION | During a jump, hold R1 + X button. |
+---------------+-----------------+------------------------------------+
| ATK SPEED+ | CERBERUS, | (Passive) Faster attack speed. |
| | FORCE EDGE (Vergil) |
+---------------+-----------------+------------------------------------+
| ELEMENT+ | AGNI & RUDRA | (Passive) Enables elemental damage.|
+---------------+-----------------+------------------------------------+
| HP RECOV+ | NEVAN | (Passive) Enhanced HP Recovery |
+---------------+-----------------+------------------------------------+
| DEFENSE+ | BEOWULF | (Passive) Enhanced defense. |
+---------------+-----------------+------------------------------------+
+- -+- -+- -+-
~ ~ ~ ~ ~ ~ ~ ~ ~ ~ ~ ~ ~ ~ ~ ~ ~ ~
ABOUT THE GAME -- WEAPONS -- DANTE
~ ~ ~ ~ ~ ~ ~ ~ ~ ~ ~ ~ ~ ~ ~ ~ ~ ~
GUNS
=====
These are your guns. They are great for blasting, combos and anything else
you can think for a gun. And they come with infinite ammo! Can be upgraded by
spending red orbs to increase damage and other attributes.
EBONY & IVORY - Two .45 caliber, semi automatic handguns. This is Dante's
starting secondary weapon. Although its not that damging
it is a great way to iniate/ continue an air combo since
it allows Dante to 'hover' while firing the guns. The
faster the player presses the fire button, the faster the
firing rate of these pair will be.
SHOTGUN - Its slow rate of fire could be its disadvantage but with
large spread and great stopping power, this is one gun
that you want to use to tame a large group of demons trying
to gangbang you. Not very effective to used in a combo
though.
ARTEMIS - A laser blaster that can lock-on several enemies at once.
Players can charge this weapon before firing for more
devastating shots.
SPIRAL - A large and very powerful sniper rifle that is similar to
a railgun since it can pierce through multiple enemies.
Its firing rate is a bit slower compared to the shotgun but
fires a fatal concentrated shot instead of scattered
shells. Great for taking down/ damaging enemies at a
good distance. You can't target enemies via viewing scope
though.
KALINA ANN - Probably the most damaging weapon you can get. Very powerful,
its rockets deal 'splash damage' than can pwn any enemies
caught within the blast radius. It has good firing rate too;
but its size could limit your movement a bit.
DEVIL ARMS
===========
These are your primary weapons. use with guns for maximum effectivity. They
deal the most damage since you can execute devastating combos with melee
weapons alone. Can be upgraded by spending red orbs to increase damage
and other attributes. The first four styles are the default ones. Quicksilver
and Doppleganger styles must be unlocked first. You need to beat specific
bosses later in the game to unlock these styles.
REBELLION - Dante's detault Weapon. This resembles a broad sword but
our protagonist can still swing it with one hand like its
just a trusted kitchen knife.
MOVE CONTROLS
+-------------+------------------------------------+
| Stinger | Hold R1, then FWD + TRIANGLE |
+-------------+------------------------------------+
| High-Time | Hold R1, then BCK + TRIANGLE |
+-------------+------------------------------------+
| Drive | Hold TRIANGLE, then Release |
+-------------+------------------------------------+
| Air Hike | Press Jump button twice |
+-------------+------------------------------------+
CERBERUS - This a large, flail-like weapon ready to smash any enemy
with its 3 clawlike blades.
MOVE CONTROLS
+-------------+------------------------------------+
| Revolver | Hold R1, then FWD + TRIANGLE |
+-------------+------------------------------------+
| Windmill | Hold R1, then BCK + TRIANGLE |
+-------------+------------------------------------+
AGNI & RUDRA - Twin swords with elemental properties. The swords are
possessed by two demon brothers with the properties of
wind and fire.
MOVE CONTROLS
+-------------+------------------------------------+
| Jetstream | Hold R1, then FWD + TRIANGLE |
+-------------+------------------------------------+
| Whirlwind | Hold R1, then BCK + TRIANGLE |
+-------------+------------------------------------+
| Air Hike | Press Jump button twice |
+-------------+------------------------------------+
NEVAN - An electric guitar (yeah, a freakin guitar which fullfils
Dante's hidden desire to be a rockstar) that has blades
like a scythe and attacks enemies with electricity and
uhmm.... electric bats.
MOVE CONTROLS
+-------------+------------------------------------+
| Reverb Shock| Hold R1, then FWD + TRIANGLE |
+-------------+------------------------------------+
| Bat Rift | Hold R1, then BCK + TRIANGLE |
+-------------+------------------------------------+
| Air Raid | During Devil Trigger, jump then |
| | R1 + X) |
+-------------+------------------------------------+
BEOWULF - A set of 'holy' (probably mithril or steel) gauntlets and
greaves. This allows quick movement and execution of fast
melee combos.
MOVE CONTROLS
+-------------+------------------------------------+
| Straight | Hold R1, then FWD + TRIANGLE |
+-------------+------------------------------------+
| Bst Uppercut| Hold R1, then BCK + TRIANGLE) |
+-------------+------------------------------------+
|Rising Dragon| Hold R1, then BCK + TRIANGLE 2x|
+-------------+------------------------------------+
| Air Hike | Press Jump button twice |
+-------------+------------------------------------+
~ ~ ~ ~ ~ ~ ~ ~ ~ ~ ~ ~ ~ ~ ~ ~ ~
ABOUT THE GAME -- STYLES -- DANTE
~ ~ ~ ~ ~ ~ ~ ~ ~ ~ ~ ~ ~ ~ ~ ~ ~
To further enhance the overall gameplay, Dante will be able to use any of the
6 game-defined styles before any mission, giving him access to special
techniques and moves. You can upgrade these styles and their moves by
spending RED ORBS, which basically serves as the monetary medium of the game.
T R I C K S T E R
-----------------------
This style uses special moves and techniques to evade enemy attacks, and also
to quickly move into striking position.
MOVE DESCRIPTION
+--------------+------------------------------------------------+
| DASH | A dash to any direction. Can be done several |
| | times in a row when levelled up. |
+--------------+------------------------------------------------+
| WALL HIKE | Run up the wall, then kick away. Can be used |
| | with Sky Star. |
+--------------+------------------------------------------------+
| SKY STAR | Dash in mid-air. |
+--------------+------------------------------------------------+
| AIR TRICK | Teleport above an enemy, striking position |
+--------------+------------------------------------------------+
S W O R D M A S T E R
------------------------
Style which allows the player to master different melee weapons. Increases
the player's effeciency in close-range combat by maximizing overall melee
capability. Abilities that players use depends on the weapon equipped.
REBELLION ABILITIES
~~~~~~~~~~~~~~~~~~~
MOVE DESCRIPTION
+--------------+------------------------------------------------------+
| PROP SHREDDER| Dante spins his sword, continously hitting anybody in|
| | front of Dante. |
+--------------+------------------------------------------------------+
| AERIAL RAVE | Slashes the enemy in air. |
+--------------+------------------------------------------------------+
| SWORD PIERCE | Throws the sword towards the enemy. Without his sword|
| | Dante needs to fight barehanded. |
+--------------+------------------------------------------------------+
| DANCE MACABRE| Unleashes a series of fast slashes. |
+--------------+------------------------------------------------------+
|CRAZY DANCE | Stick the sword on the ground while doing Dance |
| | Macabre and spin-kicking all enemies nearby. |
+--------------+------------------------------------------------------+
CERBERUS ABILITIES
~~~~~~~~~~~~~~~~~~~
MOVE DESCRIPTION
+--------------+------------------------------------------------------+
| FLICKER | Swing the weapon around, hitting all nearby enemies. |
+--------------+------------------------------------------------------+
| CRYSTAL | Slam the weapon to the ground, creating huge, sharp |
| | icicles protruding from the ground. |
+--------------+------------------------------------------------------+
|MILLION CARAT | Slam the weapon to the ground, creating a massive |
| | ice pillar in front of Dante |
+--------------+------------------------------------------------------+
| ICE CAGE | Envelops Dante in a thick ice shield that wards off |
| | any attacks for a brief period of time. |
+--------------+------------------------------------------------------+
AGNI & RUDRA ABILITIES
~~~~~~~~~~~~~~~~~~~~~~~
MOVE DESCRIPTION
+--------------+----------------------------------------------------+
|CROSSED SWORDS| Slash enemies using both swords in X-like fashion. |
+--------------+----------------------------------------------------+
| SKY DANCE | Swing both swords in the air and descend spinning |
+--------------+----------------------------------------------------+
| CRAWLER | Thrust both swords in the ground, creating a small |
| | firestorm towards the enemy. |
+--------------+----------------------------------------------------+
| TWISTER | Spin both swords to create a twister of fire and |
| | wind. |
+--------------+----------------------------------------------------+
| TEMPEST | Induce a fiery blast to incinerate the enemy |
+--------------+----------------------------------------------------+
NEVAN ABILITIES
~~~~~~~~~~~~~~
MOVE DESCRIPTION
+--------------+----------------------------------------------------+
| SLASH | Hack enemies using the guitar's hidden scythe-like |
| | blade. |
+--------------+----------------------------------------------------+
| AIR SLASH | Slash enemies in mid-air. |
+--------------+----------------------------------------------------+
| FEEDBACK | Swings the guitar around Dante, hitting enemies |
+--------------+----------------------------------------------------+
| CRAZY ROLL | Zap enemies with electricity while slashing |
+--------------+----------------------------------------------------+
| DISTORTION | Unleashes a barrage of electric bats, some stray |
| | lightning and.... ear-splitting rock music. |
+--------------+----------------------------------------------------+
BEOWULF ABILITIES
~~~~~~~~~~~~~~~~~
MOVE DESCRIPTION
+--------------+----------------------------------------------------+
| ZODIAC | Hit enemies with energy coming from Dante's hands. |
+--------------+----------------------------------------------------+
| THE HAMMER | Smash enemies to ground while in the air |
+--------------+----------------------------------------------------+
| VOLCANO | Punch the ground, sending shockwaves. |
+--------------+----------------------------------------------------+
| REAL IMPACT | A powerful, concentrated uppercut. Can be used to |
| | start an air combo. |
+--------------+----------------------------------------------------+
| TORNADO | Lunge the enemy to the air, then unleash a flurry |
| | of fast kicks. |
+--------------+----------------------------------------------------+
G U N S L I N G E R
---------------------------
Style which allows the player to master different ranged weapons. Increases
the player's effeciency in long/mid-range combat by maximizing overall
capability. Abilities that players use depends on the weapon equipped.
EBONY & IVORY ABILITIES
~~~~~~~~~~~~~~~~~~~~~~~
MOVE DESCRIPTION
+--------------+----------------------------------------------------+
| TWOSOME TIME | Fire guns in two separate directions. |
+--------------+----------------------------------------------------+
| WILD STOMP | Riddle lying enemy's body with several shots then |
| | kick away. |
+--------------+----------------------------------------------------+
| RAIN STORM | Jump overhead, firing both guns while in mid-air, |
| | targetting the enemies below |
+--------------+----------------------------------------------------+
| CHARGE SHOT | Infuses magic into bullets before firing it. |
+--------------+----------------------------------------------------+
| RAPID SHOT | Unleash a barrage of bullets for a short period of |
| | time |
+--------------+----------------------------------------------------+
SHOTGUN ABILITIES
~~~~~~~~~~~~~~~~~~
MOVE DESCRIPTION
+--------------+----------------------------------------------------+
| FIREWORKS | Swings the shotgun around Dante's body, firing in |
| | almost all directions. |
+--------------+----------------------------------------------------+
| CHARGE SHOT | Infuses magic into shells before firing it. |
+--------------+----------------------------------------------------+
| RAPID SHOT | Unleash a barrage of shells for a short period of |
| | time |
+--------------+----------------------------------------------------+
| GUN STINGER | Slams the shotgun to the enemy before firing |
| | concentrated shells in close range |
+--------------+----------------------------------------------------+
| POINT BLANK | Fires the shotgun in point-blank range to the enemy|
+--------------+----------------------------------------------------+
ARTEMIS ABILITIES
~~~~~~~~~~~~~~~~~~
MOVE DESCRIPTION
+--------------+----------------------------------------------------+
|MULTI-LOCK | Targets a single enemy then fires a volley of |
| | projectiles towards it. |
+--------------+----------------------------------------------------+
| SPHERE | Charges the weapon and fires a large concentrated |
| | sphere of compressed energy. |
+--------------+----------------------------------------------------+
| ACID RAIN | Shoots multiple projectiles in the air then rains |
| | down to the enemies, damaging them. |
+--------------+----------------------------------------------------+
SPIRAL ABILITIES
~~~~~~~~~~~~~~~~
MOVE DESCRIPTION
+--------------+----------------------------------------------------+
| TRICK SHOT | Bullets bounce off walls and hit multiple targets |
+--------------+----------------------------------------------------+
| SNIPER | Lock-on the enemy's weak spot then fires a focused |
| | shot, inflicting fatal damage to the enemy. |
+--------------+----------------------------------------------------+
| REFLECTOR | Fires a bullet that bounces of the walls several |
| | times, increasing velocity before hitting an enemy |
+--------------+----------------------------------------------------+
KALINA ANN ABILITIES
~~~~~~~~~~~~~~~~~~~~~
MOVE DESCRIPTION
+--------------+----------------------------------------------------+
| HYSTERIC | Fires a salvo of micromissiles towards the enemy |
+--------------+----------------------------------------------------+
| GRAPPLE | Fires the grappling hook to the enemy, piercing it |
| | and slowly drags it towards you. |
+--------------+----------------------------------------------------+
R O Y A L G U A R D
---------------------------
This style mainly focuses on minimizing enemy damage, absorbing enemy hits
before unleashing collected energy from those attacks. This style also allows
the player to move into a more strategic position. Possibly the strongest
style but requires a lot of skill to master.
MOVE DESCRIPTION
+--------------+--------------------------------------------------------+
| BLOCK&CHARGE | Block enemy strikes, building up fury for release. |
+--------------+--------------------------------------------------------+
| JUST GUARD | By blocking an enemy attack just before it hits, Dante |
| | is not damaged and gains more fury buildup. |
+--------------+--------------------------------------------------------+
| RELEASE | Release all the stored 'fury' charged from blocking |
| | enemy attacks, dealing massive damage |
+--------------+--------------------------------------------------------+
| JUST RELEASE | Releasing just before the enemy's attack connects, |
| | Dante executes a counter-attack inflicting significant |
| | damage, greater than the normal release |
+--------------+--------------------------------------------------------+
| AIR BLOCK | Block in while in the air |
+--------------+--------------------------------------------------------+
| AIR RELEASE | Perform a release while in mid-air |
+--------------+--------------------------------------------------------+
| ULTIMATE | Absorb enemy attacks, recovering HP |
+--------------+--------------------------------------------------------+
Q U I C K S I L V E R
--------------------------------
This style controls time and allows the player to move at blinding speeds.
MOVE DESCRIPTION
+--------------+--------------------------------------------------------+
| TIME LAG | Enemies enter slow motion while you can still move |
| | normally. It consumes runes though you can also |
| | activate Devil Trigger. But that will just make rune |
| | consumption faster. Great tech to eliminate enemies |
| | that has surrounded you. |
+--------------+--------------------------------------------------------+
D O P P E L G A N G E R
---------------------------------
Style that allows Dante to create shadow copies of himself, assisting him in
battle. A second player mode has been added, allowing a 2nd player to control
the shadow of Dante.
MOVE DESCRIPTION
+--------------+--------------------------------------------------------+
| AFTER IMAGE | Summons Dante's shadow. It moves exactly like a shadow |
| | following Dante's every move. Consumes Runes yet he |
| | can still activate Devil Trigger. |
+--------------+--------------------------------------------------------+
!!Note: The two-player mode can also be used in Mission 19, while Vergil and
Dante is fighting Arkham.
!Vergil needs to be unlocked first by finishing the game once with Dante or
start a new game with a DMC3 save file in your memory card.
!!NOTE: When starting a new game for Vergil, save it as another file. Do not
overwrite you game with Dante since you will lose your file with Dante and
replace it with Vergil.
~ ~ ~ ~ ~ ~ ~ ~ ~ ~ ~ ~ ~ ~ ~ ~ ~ ~
ABOUT THE GAME -- WEAPONS -- VIRGIL
~ ~ ~ ~ ~ ~ ~ ~ ~ ~ ~ ~ ~ ~ ~ ~ ~ ~
(Begins the game with all of these)
BEOWULF - A set of 'holy' (probably mithril or steel) gauntlets and
greaves. This allows quick movement and execution of fast
melee combos. Same as Dante's
MOVE CONTROLS
+--------------+-------------------------------------+
| Rising Sun | Hold R1, then BCK + TRIANGLE |
+--------------+-------------------------------------+
| Lunar Phase | Hold R1, then FWD + TRIANGLE |
+--------------+-------------------------------------+
YAMATO - A long katana imbued with dark powers. Can deliver deadly,
very fast slashes almost unseen.
MOVE CONTROLS
+--------------+-------------------------------------+
| Upper Slash | Hold R1, then BCK + TRIANGLE |
+--------------+-------------------------------------+
| Rapid Slash | Hold R1, then FWD + TRIANGLE |
+--------------+-------------------------------------+
FORCE EDGE & YAMATO
- Force Edge is Dante's weapon in the original DMC and the
infamous weapon his father, Sparda used to fight demons.
Both Yamato and Force Edge is equipped you select Force
Edge.
MOVE CONTROLS
+--------------+-------------------------------------+
| Stinger | Hold R1, then FWD + TRIANGLE |
+--------------+-------------------------------------+
| High Time | Hold R1, then BCK + TRIANGLE |
+--------------+-------------------------------------+
| Round Trip | Hold TRIANGLE, then release |
+--------------+-------------------------------------+
SUMMONED SWORDS - Summon dark energy swords which Virgil can control at
will.
MOVE CONTROLS
+--------------+-------------------------------------+
| Spiral Swords| HOLD SQUARE |
+--------------+-------------------------------------+
| Sword Storm | After Spiral Swords, Hold R1, + FWD |
| | then TRIANGLE |
+--------------+-------------------------------------+
|Blistering | After Spiral Swords, Hold R1, + BCK |
|Swords | then TRIANGLE |
+--------------+-------------------------------------+
~ ~ ~ ~ ~ ~ ~ ~ ~ ~ ~ ~ ~ ~ ~ ~ ~
ABOUT THE GAME -- STYLES -- VIRGIL
~ ~ ~ ~ ~ ~ ~ ~ ~ ~ ~ ~ ~ ~ ~ ~ ~
D A R K S L A Y E R
----------------------------
This is Virgil's only style. Though it has limited styles, they are just
enough to give him manuevarability to strike enemies.
MOVE DESCRIPTION
+--------------+-----------------------------------+
| AIR TRICK | CIRCLE, HOLD R1, CIRCLE |
+--------------+-----------------------------------+
| TRICK UP | HOLD R1,then FWD + CIRCLE |
+--------------+-----------------------------------+
| TRICK DOWN | HOLD R1,then BCK + CIRCLE |
+--------------+-----------------------------------+
+++++++++++++++++++++++++++++++++++++++++++++++++++++++++++++++++++++++++
W A L K T H R O U G H
_________ _ _ _ ___________
_ _ ________ _ _____ _ __________ _ _
^ ^^^^^^^^ ^^^^^^^^^ ^ ^
` ~ ~ ~~~""""""
{MISSION 1{ C R A Z Y P A R T Y
~~ ~ ~ ~~~~~~~_~_~_~_______________________________""""""""
"... Violent response to an insane caller "
-- Alright, let's get started. This is a chance to get used to the
controls and the actual gameplay. Players from the previous
installments can actually flyby this mission.
-- You need to fight the most common of enemies here. Just avoid
fighting in the middle of the room to avoid being mobbed.
` ~ ~ ~~~""""""
{MISSION 2{ B L O O D L I N K
~~ ~ ~ ~~~~~~~_~_~_~_______________________________""""""""
"...Bludgeon the devil like an iron hammer "
-- You will taken now outside your office, with a lot of enemies...
Pick up Vital Star. Fight the enemies normally, and eventually
a monster carrying a bomb will appear. Do not attempt to slice and
dice him since he automatically deflects melee attacks. Stay
adistance and kill him using gunfire.
-- Just kill the enemies and then, boss will appear.
!!BOSS- HELL VANGUARD
-- This is your first bossfight. Just go near him, and slash away
until he parries your attack. Roll or dodge away after the parry
to avoid his attack. He will be open after that, take the oppurtunity
then attack again.
Time to time, he will teleport to a diffrent spot, just follow him
and attack. When you notice the ground being distorted, immediately
roll over to avoid his attack. Also sometimes he dashes towards you
while swinging his scythe.
Just use your combos when you have the chance and you should do fine.
` ~ ~ ~~~""""""
{MISSION 3{ T H E D E V I L 'S T O W E R
~~ ~ ~ ~~~~~~~_~_~_~_________________________________ """"""""
"...Invade the colossal tower "
--You can go back to earn some more exp or orbs. Otherwise proceed
as normal.
[66th Sunset Avenue]
--There will be a enemy type here, the Enigma. Just approach them while
evading their blue projectiles. Also, the usual bunch of enemies
are on the streets. Use your guns, the barrels or just kill the bombs
first to make the battle quick.
[BULLS EYE]
--Just destory all breakable items to get orbs. Just hit the symbol
behind the jukeboxes to reveal a firewheel. Just light it all up
to break the blue seal/wall; Get the shotgun from the left wall.
[LOVE PLANET]
--red seal/wall will block your path. Defeat all enemies to continue
[13th AVENUE]
--Jump on top of the sign to find some orbs, then destroy the trash
bins for more. You can try also jumping on the buildings to find more.
--Head to the top of the left building, near the end of the path to
find a statue (Combat Adjudicator). Use combos until you get a
"BLAST!" style ranking for a BLUE ORB FRGMNT. Another fragment is top
of the last building to the right. There is also a secret mission by
entering the doors, in the building to the right.
` ~ ~ ~~~"""""" ~~ """ ''""{
! {SECRET MISSION 1{ T H E E X O R C I S T'"
~~ ~ ~ ~~~~~~~_~_~_~______ _ _ _ ____ _ _ _"" _ _
"Defeat all enemies within the time limit "
--Just defeat all enemies within the preset time to obtain
another BLUE ORB FRGMNT. Just make sure every hit counts.
This one should be fairly easy.
proceed to the end of the path to go inside the tower, and the ice
chamber. A boss will be waiting.
!!BOSS- CERBERUS (WK VS. FIRE)
You may want to stay adistance for the meantime. Or you can just hit
and run. Rush towards the boss and hit him until the ice on his heads
chips out. You can also use your guns to do that but this will last
longer.
Attacks:
1. Frost will begin to form in the ground where you're standing.
Roll over to dodge it. Later in the battle, the duration of
the ice rain will be longer, prompting you to evade several
times.
2. Cerberus will shoot ice projectiles from his mouth. You can parry
it for some green (healing) orbs if you have good aim or timing.
He will be open during this attack so if you're not in the actual
line of fire, you can go to his side, hit his foot and then take
time to hit one of his downed heads until he recovers completely.
3. Halfway on his health, he will start to "pounce" towards you,
knocking you off and dealing heavy damage. You may want to
anticipate his attack to evade quickly. He will lean back, ready
to jump towards you. The chains will retract him back, giving you
ample time to abuse this vulnerability. Keep on attacking him until
he reaches his original position.
4. Also, he will stomp the ground, sprouting out ice shards from the
ground. He will also begin to move faster as he nears death.
5. His basic attacks include bite, strike, shockwave. He will do it
if you stay close to him for too long.
--you will obtain CERBERUS devil arm as an addition to your basic
sword.
` ~ ~ ~~~""""""
{MISSION 4{ T H E U N I N V I T E D O N E
~~ ~ ~ ~~~~~~~_~_~_~_________________________________ """"""""
"...Find the key to the stars"
[CHAMBER OF ECHOES]
--A divinity statue is on the right side if you need it. Head upstairs
take the BLUE door first.
[ENTRANCEWAY]
Kill the enemies that are in your way and continue to next area
[LIVING STATUE ROOM]
Defeat the Enigmas and Lusts to open the sealed door. After that, go
through it.
[Silent Statuary]
Break the statues for some orbs. Light up the firewheel and get on the
elevator
[Incandescent Space]
More enemies will attack. Just get rid of them. There is a BLUE ORB
FRGMNT above the pipe. Use the railing to get to the top.
[CHAMBER OF ECHOES]
Go up to the next level and enter YELLOW door.
[ENDLESS INFERNUM]
Walk up the stairs, it'll crumble.
[CHAMBER OF SINS]
You will ambushed by number of enemies. Just defeat them all and a
portal will appear. Take it to leave the wretched place.
[ENDLESS INFERNUM]
Enter door to proceed
[GIANTWALKER CHAMBER]
!!BOSS- GIGAPEDE (WEAK VS. ICE, FIRE)
This boss is fairly easy compared to Cerberus. You just need to get
to the highest ledge you can find and wait for it to pass. Jump over
its head and keep hitting it. You can still hit it on the other parts
of its body but it will spin around and drop you.
If you're underneath it, it will send out a several purple electric
spheres. They're easy to avoid. Make your way back to the upper
levels if this happens.
You can lock onto it so that you can tell which hole will it come
out. As its hp gets low, its speed increases. After defeating it,
head to the next door.
Get the Astronomical Board, scene. Mission completes.
` ~ ~ ~~~""""""
{MISSION 5{ O F D E V I L S A N D S W O R D S
~~ ~ ~ ~~~~~~~_~_~~________________________________________ """"""""
"...Find the key to the stars"
[GIANTWALKER CHAMBER]
Bloodgoyles will attack you. You need to turn them to stone first
before you can actually kill them. To do that, hit them first using
your guns until they become stones then hit them with your melee
weapons until they break. They will turn back from stone to blood
form if you leave them for a short period of time. And also, they
multiply if you attempt to hit them with a melee weapon in thier
blood form.
Portal will appear. Take it to a boss battle.
!!BOSS- JESTER
"Jester's gonna spank your butt, spank you in the buuuttt!"
Ok, this is the additional boss for DMC3:SP. This guy is very
predictable, and you can always anticipate what's he's going to
do. When he does his taunt just blast your guns at him. He will
dance to dodge the bullets, then teleports far away from you,
fanning himself. This is the time to attack him your melee weapons.
Attacks:
1. He will charge and portals will appear behind him. You need to
roll over to avoid the projectiles being thrown at you.
2. Several charged spheres will appear and encircle the area. You
can also destroy a distinct green sphere to get a healing orb.
You can also try running and hitting him in between the attacks.
Just enter the portal and you will taken back.
[GIANTWALKER CHAMBER]
Head to the exit to go back to the Chamber of Echoes.
[CHAMBER OF ECHOES]
Go to the top, there should be panel where you can put the
ASTRONOMICAL BOARD. An item should be accessible now, and also a
magical "trampoline" that allows you to jump really high.
Go to the fourth floor on the left part of the chamber, examine the
shiny thingy on the panel to obtain VAJURA. Go to the third floor
and through the blue door again.
[ENTRANCEWAY]
Kill the enemies that are in your way and continue to next area
[LIVING STATUE ROOM]
Use the VAJURA as a lever on the 2nd floor crank (before the cage).
Cage should open, obtain SOUL OF STEEL.
Also, get an "ALRIGHT!" rank using the Combat Adjudicator with
Cerberus to obtain another BLUE ORB FRGMNT.
[ENDLESS INFERNUM]
Just take the path leading to the door. You will not fall down
into the abyss. Use the SOUL OF STEEL to open path.
[SURGE OF FORTUNAS]
Walk down the steps then towards the elevator. Examine the red symbol
on the wall for another secret mission.
` ~ ~ ~~~"""""" ~~ """ ''""{
! {SECRET MISSION 2{ U N T O U C H A B L E '"
~~ ~ ~ ~~~~~~~_~_~_~______ _ _ _ ____ _ _ _"" _ _
Defeat all enemies without taking damage.
Two Enigmas are initially visible on the screen. The other two are
offscreen on the left and right. Having the Trickster style here is
really helpful. Just try to score a few basic hits then roll when the
arrows are fired. Defeat all of them, mission completes.
Obtain BLUE ORB FRGMNT.
[SURGE OF FORTUNAS]
Light up the firewheel then jump on the elevator. Enemies will ambush
you, so just fight them off or better yet, just hit them until they're
knocked off the elevator
[AZURE GARDEN]
Destroy all breakable items to obtain orbs, then leap up to the walls
to get some more. Head to the next door.
[FIRESTORM CHAMBER]
!!BOSS - AGNI (WEAK VS. ICE) & RUDRA
This two mimics each other. If one attacks, you can definitely
anticipate the other. They will dash, slash or jump at you.
Just concentrate your hits on one of them if given a chance, if
you're using Cerberus, it will kill Agni easier.
Also, you can knock thier weapons by doing a jump attack, leaving
them vulnerable and you can deal twice the damage. Also, if you
defeat one of them, the other one will take the other sword, equipping
it. Just take note of thier attack patterns and you should do fine.
Just remember that there would be chances when you can attack them
open. Most of the time, they will yell when they'll gonna do an attack
There'll also be times that they will charge thier swords. During that
time, you can rush in and score a few slashes.
Try to attack them from behind as much as possible. Also, you can
parry thier own attack to disarm them for a brief period of time.
After defeating them, you will obtain AGNI & RUDRA twin swords.
Proceed to the door to continue.
` ~ ~ ~~~""""""
{MISSION 6{ F A M I L Y T I E S
~~ ~ ~ ~~~~~~~_~_~~_____________________________ """"""""
"...Clear the trial and forge a new path"
[MUTE GODDESS' CHAMBER]
Get the red orbs on top of the statue. Head through the red door.
[CHAMBER OF THREE TRIALS]
The door on the right is blocked by rock debris and you need to pass
at least two trials to get two essences, needed to power up the laser
and clear the path for you. Get three and you will obtain a fairly
neat weapon. You can choose whichever path you want.
The rooms and trials are:
TRIAL OF THE WARRIOR -- Right door
TRIAL OF SKILL -- Middle door
TRIAL OF WISDOM -- Left door
I suggest taking the Trials of Wisdom and Skill first since they're
easier. But again, it's up you.
[TRIAL OF WISDOM ]
"Your wisdom will be put to the test in the chamber ahead. Use your
lifetime experience: from the crawling infant; to the man standing
tall; and finally to the old man-leaning on his cane."
This is one age-old phrase. An infant walks on four legs, a man walks
on two while and old man leaning on his cane is three. Use the pattern
to find the correct path.
If you happen to enter the wrong door, you will need to defeat all
enemies to exit. You just need to enter 3 correct doors to get to the
chamber that contains the Essence of Intelligence. Exit through any
door.
[TRIAL OF SKILL]
The essence is located in the far-most end of the room. You need to
dodge the series of spikes in all directions. After obtaining the
Essence of Technique, enemies will appear. Defeat them then leave
the room.
[TRIAL OF THE WARRIOR]
Take note of the enemies here. You can't stop them while they still
have the purple shades on them. You need to light up both firewheels
completely to release the shades and make them vulnerable. Also,
the firewheels only stay lit for a few seconds. You need to light
them again if you notice the purple shades back on the enemies.
Just defeat them all to obtain the Essence of Fighting.
After obtaining the essences, examine the odd looking statue. After
putting two of the essences, a laser will fire, clearing your path.
Put in the third essence and you will obtain ARTEMIS.
Head through the door.
[DARK CORRIDOR]
Use Agni & Rudra on the Combat Adjudicator and try to get an
"ALRIGHT!" ranking to obtain a BLUE ORB FRGMNT. Continue, and note
that there are red orbs above the statue and above the stairway.
Walk upstairs to complete mission.
` ~ ~ ~~~""""""
{MISSION 7{ A C H A N C E M E E T I N G
~~ ~ ~ ~~~~~~~_~_~~__________________________________ """"""""
"Duel of the demon children"
[DARK CORRIDOR]
You can backtrack to gather the red orbs on thier original locations.
On the right of the face imprinted door, there is a small ledge.
Jump to reach it and examine the skeleton statue with the red jewel
for another secret mission.
` ~ ~ ~~~"""""" ~~ """ ''""{
! {SECRET MISSION 3{ D E A T H F R O M A B O V E '"
~~ ~ ~ ~~~~~~~_~_~_~______ _ _ _ ____________ _ _ _"" _ _
Stay in the air for 20 seconds or more.
Having a level 2 trickster will help out well here. I had a hard time
doing this myself so you can figure out other ways that suits you
well.
Just remember that Air Hike, Ebony& Ivory's rapid blast in mid-air,
weapon switching, and jumping off enemies actually helps.
You will recieve a BLUE ORB FRGMNT after completing this mission.
[DARK CORRIDOR]
Enter door with face imprint.
[HEAVENRISE CHAMBER]
Fall all the way to the bottom, take door.
[DIVINE LIBRARY]
Some statues here will turn to life when you get near them. You can
attack them and just evade if you notice thier swords glowing red.
Just defeat all of them, you should get an ORIHALCON FRAGMENT as a
drop from one of them. Exit the library.
[HEAVENRISE CHAMBER]
Jump on the glowing floor emblems and make your way to the very top.
Enter green door.
[PITCH BLACK VOID]
Jump of the arches to reach a BLUE ORB FRGMNT on the last small
arch. Go through the blue door.
[SKULL SPIRE]
Your path will be blocked by several statues. Break them into pieces.
Continue forth. Just ignore the door with skull statues for now. Head
to the left corridor, obtain a Vital Star S on the right railing.
Enter door.
[TRANQUIL SOUL ROOM]
You will need to clear the rooms of enemies in order to proceed. Go
to the statue where the candles are lit and new monsters will appear.
These guys call in reinforcements by sticking thier coffins in the
ground, leaving them open to attacks as well. In future battles, you
need to get rid of these guys first. Also, you will know if they're
gonna swing at you if they raise thier coffins.
Obtain SIREN'S SHRIEK from the altar after clearing the room of
enemies. Go to the next area.
[LIFT ROOM]
Get a "STYLISH" rank on the Combat Adjudicator to get another BLUE
ORB FRGMNT. Put the Orihalcon fragment on the center elevator panel
to power it up. Ride the elevator down.
[CHAMBER OF ECHOES]
Use the Siren's Scream on the flames blocking the door on your left.
Enter room.
[ENTRANCEWAY]
Enemies will be waiting here. Get rid of them then walk downstairs to
obtain Gold or Yellow Orb. Enter door upstairs.
[CURSED SKULL CHAMBER]
Destroy the cracked wall and light up the firewheel. A chained sphere
will fall down, destroy it to obtain CRYSTAL SKULL. Enemies will
appear in the area. Just get rid of those coffin guys first.
Exit room.
[CHAMBER OF ECHOES]
Take elevator back.
[TRANQUIL SOUL ROOM]
As you enter another wave of enemies will appear. After the other
enemies die, a Vangurad appears. Defeat it to break the seals on the
doors.
[CURSED SKULL CHAMBER]
Put the crystal skull in the skeleton statue, door opens.
[MOONLIGHT MILE]
Keep hitting the red orb cyrstallization for some free orbs, and just
take the path. Use the Divinity Statue to restock items and power up.
(Boss battle lying ahead!)
[TOP OF THE TOWER]
Door behind you will close. Run up the walkway to initiate boss
battle.
[PEAK OF DARKNESS]
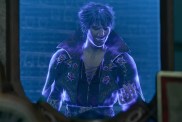
!!BOSS - VERGIL
His attacks are fairly powerful yet predictable. You need to dodge
his attacks and when you have the chance, hit him. When he teleports,
expect that he will appear on your side, ready to strike. Roll away
to evade. Also, just let him finish the combo he started so that he
will be open for a few hits.
Near the end of the battle, he will send out a dimensional wave
towards you, so just roll to evade it. You can also use your guns
when you're at a distance. Also, Vergil can dash towards you rapidly
so watch for it.
Not to mention that he has a technique where he will teleport towards
you and begin a combo. You should be able to get through this battle
fine.
After the scene, mission completes.
` ~ ~ ~~~""""""
{MISSION 8{ A R E N E W E D F E A R
~~ ~ ~ ~~~~~~~_~_~~_____________________________ """"""""
"Burst forth from the great demon's womb"
[LEVIATHAN'S STOMACH]
You need to locate 4 organic membranes and destroy them to release
the tusks blocking the path. Avoid the acid pools (green liquid) in
floor since they can damage you.
-- from the starting position, Dante's left
-- also in the same floor but in the other end.
-- behind the school bus
-- go to the tunnel near the bus and look for a small stream of acid
-- inside the same tunnel, jump two levels, and you will be out in a
bridge. Go right to find the last one. Also there is an orb
formation on the other end.
There is a BLUE ORB FRGMNT just on top of the boat. Just use the
ledges and Air Hike to reach it. You need to cross the boat's tusk
slowly.
There is also a hidden tablet behind the boat's hull. On the bottom,
destroy the cracked wooden planks. Examine it to start a secret
mission.
` ~ ~ ~~~"""""" ~~~ ~ ~~~~~ """ ''""{
!{SECRET MISSION 4{ D E V I L ' S T E E T O R -T O O T E R '"
~~ ~ ~ ~~~~~~~_~_~_~______ _ _ _ _____________ ___ _ _"" _ _
Ride the elevator to the top.
Light the firewheel and jump to the elevator. A group of purple
shaded enemies will join you in the elevator.
Make sure you knock off the enemies as quickly as you can. The
shotgun is good to use here. If they enemies start to crowd, the
elevator will start to go down. Just try to knock them off quickly
as they appear.
Take note that if you leave the platform, the enemies will disappear.
So if you have trickster, just jump to the wall, air hike then
sky star back to the platform.
You'll get BLUE ORB FRGMNT.
[LEVIATHAN'S STOMACH]
Enter the opened path above the bus.
[LEVIATHAN'S INTESTINES]
Follow path, avoid the slimes. There would be a Divinity Statue on
the right that you can use, just in case. Hit the red thin tissue
to open another path.
[LEVIATHAN'S HEARTCORE]
Walk through the next opening.
[LEVIATHAN'S INTESTINES]
A Gigapede will appear and chase you. You can run or fight it. If
you just want to run, just follow the path until you reach the small
opening south. It will be blocked off. Go to the next opening.
[LEVIATHAN'S INTESTINES]
Some more enemies will appear here. Just get rid of them and follow
the path until you reach the opening.
[LEVIATHAN'S RETINA]
Defeat the enemies that will attack you. Just kill them all and
obtain IGNIS FATUUS from the center portion. Now the place will turn
dark and the exit should be lighted. Get out of the place.
[LEVIATHAN'S INTESTINES]
Go to the left opening to find a green orb. Backtrack, follow the main
path. On the left side of it is an opening with a Combat Adjudicator.
Use Cerberus on it and obtain "SHOWTIME!" ranking to get another
BLUE ORB FRGMNT. Hid the red tissue again to reveal an opening and
exit.
[LEVIATHAN'S INTESTINES]
Once inside the tunnel, another Gigapede will chase you. Again, run or
fight it. Enter the opening in the end of the tunnel.
[LEVIATHAN'S STOMACH]
The place is darker now, and also there are more enemies waiting.
Just take the opening above the bus once again to reach the heartcore.
[LEVIATHAN'S HEARTCORE]
Place the IGNIS FATUUS in the middle panel and you will have a
bossfight.
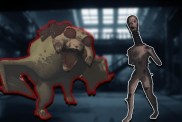
!!BOSS - HEART OF LEVIATHAN
This boss has 3 parts. The main heart which is on the center, the
red heart and the blue heart. The red one abrorbs the red orbs dropped
by the defeated basic enemies (Hell Envies) while the blue one
drains your Devil Trigger gauge. They will try the mob you and you
need to actually inflict serious damage on both red and blue hearts
to expose the weakness of the main heart. Also, attacking with your
guns in the air helps. Note that when the hearts turns red, its about
to fire a laser. Just make sure you anticipate this and evade. Another
this is if you manage to own a holy water, you can use it here. It can
damage all hearts seriously.
` ~ ~ ~~~""""""
{MISSION 9{ F A D E D M E M O R I E S
~~ ~ ~ ~~~~~~~_~_~~_____________________________ """"""""
"Christen the sorceress of the abyss with a blade"
[ROTATING BRIDGE]
Just ignore the control panel on the bridge. Go straight to the
other end and enter next room
[PROVISIONS STOREROOM]
Both doors will be sealed and spider creatures will attack you.
Just use normal attack combos and also air combos would do as well.
Seals should break after defeating the enemies.
[SUBTERRANEAN GARDEN]
The door will be sealed blue. There is a Divinity Statue to the left
if you need to and also another BLUE ORB FRGMNT above it, by the
waterfall. Just walk accross the bridge, jump over the tablet to find
more red orbs. On the other side of the bridge should be a simple
puzzle. You need to destroy some "reflectors" to guide the light
beam towards to the statue. If you ever make a mistake, just light
up the firewheel to restart the puzzle.
This one should be fairly easy for you. Just destroy the one infront
of the statue and the corner left reflector.
The blue seal on the door should break, just enter the door.
[SUB GROUND WATER VEIN]
Just run through the sniping Enigmas here and take the door in the
end of the path.
[ROUNDED PATHWAY]
Take care of the enemies while avoiding the rotating blades. Just
make sure you get rid of Hell Greeds to prevent them summoning more
enemies.
[SUBTERRANEAN LAKE]
Go to the ruins on the right part of the screen, to find a bunch of
red orbs and a green orb. Walk to the other end, find a Combat
Adjudicator. You need to score a "BLAST!" style here to obtain a
blue orb fragment using NEVAN (You may need to come back after
obtaining it). Jump on the pillars heading upwards to find the
SPIRAL rifle for Dante. Ignore the opening by the waterfall for now.
Just enter the door with a colored circle engraving, next to the
Divinity Statue.
[ROUNDED PATHWAY]
Just make your way safely and defeat the enemies along the way.
[PROVISIONS STOREROOM]
Take the AMBROSIA. After that, the exit will be sealed red, needing
you to defeat the enemies. Go back to the Subterranean Lake and
enter the cavern by the waterfall.
[LIMESTONE CAVERN]
Jump to the opening in the side of the cave and examine the red
glowing crystals for a secret mission
` ~ ~ ~~~"""""" ~~~~~ """ ''""{
!{SECRET MISSION 5{ D E S T R O Y E R '"
~~ ~ ~ ~~~~~~~_~ ___ ___ _ _"" _ _
Destroy every destructible objects within the time limit.
There are 50 breakable objects to obtain Blue Orb Fragment.
[LIMESTONE CAVERN]
Take the tunnel and there should be a small opening on the left. Fall
down and obtain DEVIL STAR S glittering on the ground. Backtrack up
and just continue the path onwards. Enemies will be there. Just
follow the path and put the ambrosia on the engraving on the wall
to open a door for you.
[SUNKEN OPERA HOUSE]
Walk to the middle, cutscene + bossfight (Dante)
!!BOSS - NEVAN (WEAK VS. ICE)
You need to get rid of the bats encircling her to deal damage to
her. You can use guns or just plain, har hitting melee combos to
deal with the bats.
After eliminating the bats, she will be stunned on the floor,
defenseless. Hit her hard. She will begin to dissolve into darkness
in the floor; make sure you get away before she is engulfed
completely otherwise, you will be damaged.
Near death, she will be more aggressive. She will launch lightning
attacks and she will also grab you and kiss you, draining your life
and transferring it to her. If you see her charging towards you,
immediately evade. After her grab misses, she will be open for some
attacks.
You will obtain the devil arm NEVAN after the battle. Proceed to the
other door to complete mission.
` ~ ~ ~~~""""""
{MISSION 10 { T H E J O B
~~ ~ ~ ~~~~~~~_~_~~_____________________ """"""""
"Strengthen the silent bridge"
[LIMESTONE CAVERN]
Get the STONE MASK and make your way to the Subterranean Lake.
[SUBTERRANEAN LAKE]
Place the stone mask on the strange engraving / statue on the wall.
A bridge will rise from the water, giving you access to the altar
with the shiny object. Obtain NEO-GENERATOR.
Also run around the right side of the statue to gain access to
another secret mission.
` ~ ~ ~~~"""""" ~~~~~ """ ''""""""""""""''''!!'''{
!{SECRET MISSION 6 { F L I G H T O F T H E D E M O N '"
~~ ~ ~ ~~~~~~~_~ ___ _____________________- _____ _ _"" _ _
Collect every orb within the time limit.
Collect all 40 orbs to obtain blue orb fragment.
[SUBTERRANEAN LAKE]
Run all the way back to the bridge (starting point)
[ROUNDED PATHWAY]
New floating enemies will block your path. You can't attack them
head on. You need to to behind them and chip away the crystals on
thier backs.
[PROVISIONS STOREROOM]
Red seals will block both exits so cleanup the place. There will be
larger arachnids, which of course has higher health but the attack
pattern should remain the same.
[ROTATING BRIDGE]
Cutscene will trigger with Dante playing with the Neo Generator and
eventually powering the bridge to rotate.
Head to the next area.
[MARBLE THROUGHWAY]
Walk to Arkham's body to complete mission
` ~ ~ ~~~""""""
{MISSION 11 { R E V E N G E
~~ ~ ~ ~~~~~~~_~_~~_____________________ """"""""
"Give a guest from the past an adequate homecoming"
[GEARS OF MADNESS]
Jump along the gears, defeating the enigmas along the way. You can
obtain a Devil Star on the upper level, shining. Jump to the round
platform above the last gear and double jump to reach another gear
with a red glowing center. Examine it for a secret mission. Exit
the door after doing the secret mission.
` ~ ~ ~~~"""""" """""''''!!'''{
!{SECRET MISSION 7 { H A N G 1 0 '"
~~ ~ ~ ~~~~~~~_~ ___ _________ _"" _ _
Obtain the Blue Orb Fragment within the time limit. (20 seconds)
You shouldnt have any problems if you have at least 7 Devil Trigger
runes. As soon as the mission starts, just activate it, run as fast
as you can and just ignore the enemies.
[ALTAR OF EVIL PATHWAY]
As soon as you enter, jump off the pipes overhead to reach another
blue orb fragment. Just follow the path and get rid of the ghastly
enemies. Enter door.
[ALTAR OF EVIL]
Look for a statue that has a spear impaled on it. Jump on the spear
and jump again to reach the 2nd floor. Move the block to the opening
on the wall using your melee weapon. Now head to the other side, and
on the 2nd corner, hit the wall that has a crack on it to reveal the
other block. Move it on the second opening. Door will open below.
You will be sealed inside again and you need to defeat the enemies.
Just take the big enemy down first then exit from the area.
[TEMPERANCE WAGON (1) ]
Hit the statue to reveal an opening below. Go down to get a green orb
and a HOLY WATER. Go up, score a "SHOWTIME!" rank on the Combat
Adjudicator using Agni & Rudra to get another fragment.
Hop on the cart.
[TEMPERANCE WAGON] (Cart)
Enemies will appear and some will arrive via cart. Just get rid of
them as they come.
[TEMPERANCE WAGON (2) ]
There is a divinity statue you can use in case you need to power up
or restock items.
[TORTURE CHAMBER]
Walk towards the shining item for a cutscene and a bossfight.
!!BOSS - BEOWULF
This guy is huge and aggressive. Fortunately, the area is wide enough
for you to see him. His eyes are his weakness. You can blind him
for a moment by hitting him directly in the face and score some free
hits. Just dont do that infront of him or he will be able to hit you.
He normally does a basic 3 hit combo. But halfway his health, he
will charge towards you or just stomp the ground, a huge pillar
will drop and he will punch it towards you. Also he will stand and
punch the ground. You must jump to evade this since that attack also
sends out a shockwave. Just make sure that you take the chance to
attack him when he is standing, aim for his eyes for more damage.
Also, glowing feathers will burst out from his back and shoot at you.
Getting behind him is the trick and also hard hits on his face will
give you more attack opportunities. Having the swordsmaster style
in this battle also helps, since you can perform air combos more
efficiently, giving you more advantage in this battle. Just remember
to switch weapons as needed to connect your attacks.
Get HAYRIRE NEO-GENERATOR to end the mission. Cutscene.
` ~ ~ ~~~"""""" ~~ ~ ~ ~~~~~ ~
{MISSION 12 { H U N T E R A N D H U N T E D
~~ ~ ~ ~~~~~~~_~_~~_________________________________ """"""""
"Reclaim the bridge before the soul is lost forever"
[TORTURE CHAMBER]
Your life will drain while having the neo-generator. Fortunately,
you will have infinite devil trigger. Head to the exit and just
defeat the enemies quickly and aggressively. Don't worry, they will
drop green orbs constantly.
[TEMPERANCE WAGON]
Several enemies will attack you in the cart. Defeat the enemies as
they come. When you reach the other end of the cart, head through the
exit or alternatively, hit the statue to open the same hidden
ledge and obtain a green orb.
Head to the door.
[ALTAR OF EVIL]
The doors will be sealed shut, clear the area of enemies.
[ALTAR OF EVIL PATHWAY]
You can ignore or fight the Bloodgoyles here - your call. Head to
the end of the pathway.
[GEARS OF MADNESS]
More bloodgoyles here. You don't need to fight them unless they're
hampering your progress. Just use the small rotating gear to reach
upper ledge.
[MARBLE THROUGHWAY]
You will be sealed off again. This time a Vanguard will join the
fray. Just concentrate taking down the bug guy first then
occasionally take down the smaller enemies if you need green orbs.
[ROTATING BRIDGE]
Run to the middle of the bridge for a cutscene. Enter the door after
that.
[SPIRAL CORRIDOR]
Grab Vital Star L in the doorway. Use the Divinity Statue when needed
There is a teleporter there that will lead you to another Jester
bossfight. This is optional.
He remains the same but there is one additional attack. A ball with
a face will appear, increasing his sphere attacks or another attack.
Just apply the same strategies that you used on this one.
Get out of the place by taking the red portal.
[SPIRAL CORRIDOR]
Go down the staircase, and enter the door in the bottom.
[UNDERGROUND ARENA]
Walk to the middle of the bridge. An boss will confront you.
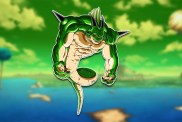
!!BOSS - GERYON
He will charge at you so you need to jump in the sides of the bridge
to evade it. You need to hit him directly, not the carriage. He will
do this several times until he will just stand near the entrance of
the bridge. Knock him down to hit him several times.
The bridge will crumble and soon you will taken into the actual
arena. Here he will have more attacks. He would run around with his
carriage while firing projectiles at you. He will then turn around
swing the carriage towards you. He will also stomp the ground,
sending out flamejets around him. Double jump to evade this. HE will
stomp again, sending the fire towards you. Also he will charge to
ram you, just get out of the way. After those attacks, he will
actually halt, giving you oppurtunity to hit him hard. If your
attack is strong enough to knock him down, just score a few hits
then get away from him. He will time freeze automatically.
Note that when his eyes glow red, he will use his timefreeze again.
Get away from him. After the battle on your first playthrough, you
will obtain the QUICKSILVER style here. Go to the door.
` ~ ~ ~~~"""""" ~~ ~ ~ ~~ ~~~ ~
{MISSION 13 { C H A O S ' W A R M W E L C O M E
~~ ~ ~ ~~~~~~~_~_~~______________________________________ """"""""
"Battle of blood and of brothers"
[EFFERVESCENCE CORRIDOR]
The door will be sealed and you need to defeat the statues. Remember
to stay away from the Bishops when they charge thier fireballs and
from the Pawns when they charge thier swords red.
[SPIRAL STAIRCASE]
Follow the path and examine the third light (red) to enter another
secret mission
` ~ ~ ~~~"""""" """""''''!!'''{
!{SECRET MISSION 8 { T O U G H G U Y S '"
~~ ~ ~ ~~~~~~~_~ ___ _________ _"" _ _
Destory every enemy.
You need to fight really tough enemies here. Take down the spiders
first and just save your Devil Trigger till the last wave of enemies.
The two are actually Vanguards. Just concentrate on taking one at a
time. Just be aggressive and make your hits count.
[SPIRAL STAIRCASE]
Continue downstairs. Run down the hall and enter the door in the end.
[LUXLUMINOUS CORRIDOR]
Head to the right and double jump on the blank wall to find a DEVIL
STAR on the top. Follow the path nad fight (or run) from the enemies
blocking your way. Enter the first wall.
[VESTIBULE]
This is another reflector puzzle. Starting from the first statue,
destroy the second reflector in front of it, and then the one beside
the one you just destroyed. Notice the opening on the right wall,
destroy the reflector blocking the beam. Go inside and destroy the
last reflector blocking the recieving statue.
Panel beside the statue should open, obtain ORIALCON. There is also
an opening above the left wall. Double jump to reach it and examine
the statue with red glowing eyes to enter another secret mission.
` ~ ~ ~~~"""""" """""''''!!'''{
!{SECRET MISSION 9 { T A R G E T P R A C T I C E '"
~~ ~ ~ ~~~~~~~_~ ___ _________ _"" _ _
Do not let a single enemy escape.
Carts full of enemies will pass by. Some will jump to you others
remain on the carts. Remember to lock on when you see a steady cart
but no monster visible. On your first try, the SPIRAL rifle is
best to use here since it can kill Hell Wraths in one shot, in turn
damaging any enemies beside it, in turn making your job easier.
Defeat ten carts of enemies and obtain a Blue Orb Fragment in the
end.
[VESTIBULE]
Leave the room, follow the hallway to reach the next door. You'll
run into some enemies also.
[OBSIDIAN PATH]
Use the Divinity Statue if needed, then hit the Combat Adjudicator
using Nevan. Score "SHOWTIME!" ranking to get another blue orb
fragment. Place the Orialcon on the massive door to open it and
enter the sacrificial chamber.
[SACRIFICIAL CHAMBER]
!!BOSS - VERGIL
Has the same attacks as before but after recieving Beowulf's
gauntlet and greaves, he will have additional set of attacks.
He unleashes Devil Trigger at times, so stay away from him and
dodge his attacks until the trigger wears out.
Its better to catch him off guard after he recovers from his move.
You can stagger him often as soon as he recovers from his "Starfall"
move (he jumps in the air then performs a diving kick).
After defeating Vergil, more cutscenes and mission completes.
` ~ ~ ~~~"""""" ~~ ~ ~ ~~ ~~~ ~
{MISSION 14 { D R I V E
~~ ~ ~ ~~~~~~~_~_~~__________________________ """"""""
"Charge upward to the sky"
[LAIR OF JUDGEMENT RUINS]
Take the path accross the Divinity Statue for red orbs. Also, take
the left path ahead and pickup BEOWULF devil arms. You need to hit
the Combat Adjudicator using Beowulf and score a "CRAZY!" ranking
and clear the path on the door. Obtain another BLUE ORB FRAGMENT.
[UNDERWATER ELEVATOR]
Take the elevator.
[SUBTERRANEAN LAKE]
Go to the opening on the wall accross the elevator.
[TOP OBSIDIAN PATH]
Enter the door.
[VESTIBULE]
Go through the broken wall and take the doorway in the back.
[ALTAR OF EVIL]
Doors will be sealed shut and you need to destroy the Dullahans.
Attack them solidly from behind. Enter the door.
[TEMPERANCE WAGON]
Board the cart and defeat the enemies. Also another Vanguard will
appear after the first wave is defeated. More enemies will ambush
you. After all the enemies are defeated, cart will reach the end.
[HELL'S HIGHWAY]
Take the first gate then go through the gate on the right. Enemies
will attack you. Defeat them to open a gate on the other side. Go
back to the room where you came from and enter the other gate. A new
enemy will appear, called Damned Knights. Just use your hard hitting
blows to take them down.
After all enemies are defeated, just go back to the blue room then
enter the door on its right. Get Vital Star S and fight some enemies
to open doors. Go back to the room where you just came from, then
enter the red room.
Defeat the enemies that will come up then enter the plain room. Go
through the next few gates and fight some more enemies. The door
leading to the Blue Orb Fragment should open and also the exit to the
next area.
[SUBTERRANEAN GARDEN]
A green orb is in the place where you obtained to Blue Orb Fragment
earlier above the Divinity Statue. Enter the small door.
[SUBGROUND WATER VEIN]
Defeat the enemies along the way and enter the blue portal.
[LOVE PLANET]
Take the door leadinf to Bullseye Bar. Destroy all destrucdible
objects to get some red orbs, then take the door leading outside.
[13TH AVENUE: AFTERMATH]
Collect the orbs again on the ruined building to the left and get a
holy water from the top of the last building to the right. Jump on
the back of the truck on the building to find another Holy Water and
some orbs. Walk to the tower to complete mission.
` ~ ~ ~~~"""""" ~~ ~ ~ ~~ ~~~ ~
{MISSION 15 { T H E G A T E C R A S H E R
~~ ~ ~ ~~~~~~~_~_~~_______________________________ """"""""
"Control the tower, control your destiny"
[UPPER SUBTERRANEAN GARDEN]
Take the door with a tri colored pattern. Door will be sealed and
a new enemy type will appear. You need to attack thier wings to
expose thier vulnerable faces in thier bodies. If they ever plunge
thier weapons in the ground, move away since it will explode.
[PROVISIONS STOREROOM]
A few spiders will attack. Defeat or ignore them. Take the door.
[DEVILSPROUT LIFT]
Run upstairs to find an elevator panel requiring 3 diffrent items
to power it up. Enter the door across the stairs.
[FORBIDDEN LAND: FRONT]
Jump on the walls beside the entrance to get to the red orbs above
the entrance and an orb formation also. Go downstairs and jump to
Leviathan's eye fro some more orbs.
Light up the firewheel to activate an event (mandatory)
Backtrack and enter the Provisions Storeroom again.
[PROVISIONS STOREROOM]
The gate blocking the firewheel should be lifted by now. Just light
it up once and the tower will "rotate". The actual color on the
tricolored door will rotate as well. Take that door.
[GEARS OF MADNESS]
The gears will restart by now. Just like the rounded pathway, stay
away from the bladed edges of the gears. And also, some Bloodgoyles
are waiting inside so be careful. Ignore the firewheel for the
meantime and head to the room on the other end.
[ALTAR OF EVIL PATHWAY]
There will be a whole length of massive traps alongside with some
Dullahans will block your way. This can be tough. Just wait for them
and lure them to the space before the first set of traps, so that
you can battle them safely. Make your way to the traps and obtain
ORIHALCON FRAGMENT on the other end. Backtrack to the exit and leave.
[GEARS OF MADNESS]
Hit the firewheel the change the room. Jump to the small gear moving
up and down. Go back to the tri-colored door.
[ROUNDED PATHWAY]
Again, stay away from the rotating blades, defeat or evade the
enemies. Again, ignore the firewheel for the meantime.
[PROVISIONS STOREROOM]
FIght the spiders and obtain another ORIHALCON FRAGMENT. Exit the
area.
[ROUNDED PATHWAY]
Light up the firewheel to change rooms and head to the end door.
[TOP SUBTERRIA LOCK]
Collect the red orbs in the path. Open the blue door on the other
end.
[ROUNDED PATHWAY]
Alright, the rotating blades are now horizontal. Time your jump
carefully. Fight or ignore the Soul Eaters in this room and make
your way to the end of the path to get the final ORIHALCON FRAGMENT.
Exit the room.
[TOP SUBTERRIA LOCK]
Light up the firewheel again to rotate the tower. Enter the
tricolored door again.
[MARBLED THROUGHWAY]
Walk through the next few doors and go downstairs to enter the
bridge of the Underground Arena.
[UNDERGROUND ARENA]
Enemies will ambush you. Defeat them and fall down to the area below
the bridge to obtain a BLUE ORB FRAGMENT. Take the floating platform
to return to the top of the bridge. Run to the Top Subterria lock.
[TOP SUBTERRIA LOCK]
Light the firewheel again to change rooms. Enter the tricolored door
once again.
[PROVISIONS STOREROOM]
The doors will be sealed shut and spiders will attack you. Fight them
and get back to the elevator.
[DEVILSPROUT LIFT]
Place all Orihalcon Fragments to the control switch and enter the
elevator.
[SUN AND MOON CHAMBER]
Walk out the elevator to finish mission.
` ~ ~ ~~~"""""" ~~ ~ ~ ~~ ~~~ ~
{MISSION 16 { W I N O R L O S E
~~ ~ ~ ~~~~~~~_~_~~_______________________________ """"""""
"Stand up for your beliefs! "
[SUN AND MOON CHAMBER]
The door requires a sun and moon engraved items to open. It doesnt
matter which door you take first.
[ENTRANCEWAY] (Blue Door)
Enemies will appear as you enter. Just take them out and head to
the end of the path.
[LIVING STATUE ROOM]
Door will be sealed and you will need to face Bloodgoyles and Enigmas
Just defeat them in order to continue.
[WAKING SUN CHAMBER]
Light up the firewheel. A skullsphere will drop down from the ceiling
and you need to crush the sphere before the lights on the firewheel
dies out. Just use the ordinary combos connected with hard hitting
strikes to destroy it. Obtain GOLDEN SUN.
Doors will be sealed off and another set of damned chess pieces will
appear. Thier attacks are predictable and easy to evade, just hit
them hard. After the battle, examined the white glowing glyph on the
right wall for a secret mission.
` ~ ~ ~~~"""""" """""''''!!'''{
!{SECRET MISSION 10 { G U I D I N G L I G H T '"
~~ ~ ~ ~~~~~~~_~ ___ _________ _"" _ _
Solve the Crystal Puzzle.
You need to only light one of the two recieving statues and there
were actually at least five or six diffrent solutions here. Im sorry
I wont be able to provide you solutions for this one since I consider
this puzzle a fairly easy one. Obtain a Blue Orb Fragment.
[ENTRANCEWAY] (Red Door)
As usual, enemies will appear as you enter. Defeat them. If you
want a Devil Star, proceed to the end of the path to reach the door
upstairs. You need to battle a set of enemies though.
When ready just go inside the cracked hole in the wall.
[CHAMBER OF SINS]
Light both firewheels to have the two skullspheres to drop. You need
have both of them to collide and break. After that, railings will
open and you'll gain ONYX MOONSHARD.
The entrance will be sealed and two Fallens will attack you. Defeat
them and seal will be broken.
[SUN AND MOON CHAMBER]
Examine the panels on the closed door, place the GOLDEN SUN and
ONYX MOONSHARD. Door will open.
[ICE GUARDIAN'S CHAMBER]
Alright, Bloodgoyles + Enigmas. Good. You need to make use of your
trusted guns to survive. Jump up the debris to get to the next area.
[SURGE OF FORTUNAS]
Bloodgoyles and Lusts will ambush you. You can get rid of them or
run from them.
[ENDLESS INFERNUM]
Walk downstairs and take the large red door in the end.
[GIANTWALKER CHAMBER]
Arachnes and Bgoyles will be waiting below. Again, you can fight them
or run. Take the door in the end.
[INCANDESCENT SPACE]
There is a VItal Star S in the end of the pathway. Use the Divinity
Statue since there is a bossfight next.
[DIVINE LIBRARY]
Either attempt to take the door or head to the library- it doesnt
matter; scene will occur.
!! BOSS - LADY
Lady is one heck of a gunner. She moves a lot and is fast. You need
to actively lock unto her to know her position. Try to keep her in
sight as much possible.
Attacks:
1. Bazooka -- she will fire a hard bazooka shell in your face. She
will always try to get behind or adistance from you
to activate this attack
2. Grenades -- She will jump in the platforms above the shelves and
will use time delay grenades. She is open for a few
hits while throwing the grenades.
3. Grappling hook - NOt really an attack but her way to get into
another position. She will pistol away as she
ascends.
4. Homing Rockets - she kneels down and loads her RL. Once fired,
several homing projectiles will chase you. You
can cancel it by hitting here before the launcher
fires.
YOu need to use fast, hard-hitting attacks here. She will run around
and the shelves are actually good to protect you from her long ranged
attacks. She staggers a bit so when that happens, score a few free
hits on her.
You'll obtain KALINA ANN rocket launcher (Dante only)
[HIGH-FLY ZONE]
Bounce using the glowing spots to reach the topmost door available.
Get the orbs along the way. Open door to end mission.
` ~ ~ ~~~"""""" ~~ ~ ~ ~~ ~~~ ~
{MISSION 17 { I N N E R - D E M ON S
~~ ~ ~ ~~~~~~~_~_~~_______________________________ """"""""
"Confront your shadow"
[DARK CORRIDOR]
Jump to the wall to get a Vital Star S on the wall. Also, get all
the orbs overhead. Enter the cracked wall past the door. This area
is only optional and the reward you'll get is a GOLD / YELLOW ORB
[TRIAL OF THE WARRIOR]
This is basically the same as the original trial. Light up both
fire wheels to disable the enemies' devil triggers and hurt them.
Remember the enemies here are frustratingly difficult and annoying
at times.
[GOD CUBE CHAMBER]
There is a orb pillar in the back of the room. Score a "STYLISH"
ranking on the Combat Adjudicator using Beowulf (dante) to get
another BLUE ORB FRAGMENT. Just hop your way using the blocks.
Try moving the camera using the right analog stick to get better
view.
[FIRESTORM CHAMBER]
A Hell Vanguard escorted by some enigmas will attack you. You need
to defeat them to unseal the door.
[AZURE GARDEN]
Take the path to the elevator. Find a BLUE ORB FRAGMENT on the floor
and some red orbs near the ceiling. Backtrack to the God Cube
Chamber.
[GOD CUBE CHAMBER]
Make your way to the third level by double jumping on the cubes.
[TRI-SEALED CHAMBER]
Either take the portal to battle Jester optionally, or take the
staircase.
[TRIAL OF WISDOM]
Get behind the Dullahans and chip away thier crystals on the back.
[TRIAL OF SKILL]
Basically the same as before, dodge the spikes. Reach the cracked
wall and use the glowing circle to jump to the next area.
[PITCH-BLACK VOID]
Collect the orbs and examine the glowing statue for a secret mission
` ~ ~ ~~~"""""" """""''''!!'''{
!{SECRET MISSION 11 { O N P I N S A N D N E E D L E S '"
~~ ~ ~ ~~~~~~~_~ ___ ______________________- _"" _ _
Avoid the spikes and obtain the Blue Orb
Try to stay in the middle portion and use Devil Trigger to move
faster. You should be able to make it through without a scratch.
Ontain BLUE ORB FRAGMENT. Take the blue door.
[SKULL SPIRE]
Doors will be sealed again and you will be pitted against a new wave
of enemies. Just defeat them and continue.
[MOONLIGHT MILE]
Use the Divinity Statue. Bossfight ahead.
[DARK-PACT CHAMBER]
Run to the top of the tower and enter the darkness.
!! BOSS - - DOPPELGANGER
All around the place are light bulbs that you need to hit 3-4 times
to open. You just need to evade his attacks, lure him to your
position near the bulb. As he rushes towards you, begin hitting the
the bulb to light it up, leaving him vulnerable for a few seconds.
You will need to repeat the patterns since he will try to shut down
the bulbs time to time. Also, he will not attack you if you stay on
the light.
Using Beowulf in this battle can deal serious damage to him when he
is stunned by the light.
You'll receive DOPPELGANGER style after the battle. (Dante) Enter the
portal.
[DARK-PACT CHAMBER]
Run upstairs to finish mission.
` ~ ~ ~~~"""""" ~~ ~ ~ ~~ ~~~ ~
{MISSION 18 { I N V A D I N G H E L L
~~ ~ ~ ~~~~~~~_~_~~_______________________________ ""
"Break the seal and battle into the depths"
[UNSACRED HELLGATE]
Just go straight ahead and take the portal.
[DAMNED CHESS BOARD]
You need to take out the king when you have the chance. Just take care
of the pawns first then when the other official pieces makes thier
move, just evade and use your projectile weapons to take them out
safely.
Take note the the pieces do "phase in" and "phase out". When they turn
gray, they will be invulnerable. Also the Damned Rooks revive
destroyed pieces. Not to mention they will protect the king by
"castling" with him. Just be careful on the Queen itself since it is
the most mobile and dangerous.
After destroying the King, other pieces shall fall.
[ROAD TO DESPAIR]
Follow the path. Two Fallens will appear. Get rid of them. Before
taking the portal to the next area, go to the right side of the foot
monument to find an orb crystal. Run around to the left side of the
foot again to find some red orbs and examine the glyph on the side of
the stone foot for a secret mission.
Take the portal after the mission.
` ~ ~ ~~~"""""" """""''''!!'''{
!{SECRET MISSION 12 { F I N A L A S C E N S I O N '"
~~ ~ ~ ~~~~~~~_~ ___ ______________________- _"" _ _
Obtain the Blue Orb Fragment.
You should have Sky Star LV2 with Air Hike. Jump on top of the cube
to the left of the door. There is a rotating cube above you so double
jump to reach it. Wait for the cube you're standing on floats away
then starts to float back towards the door. You may need to rotate
your camera to find the cube that moves up and down. You need to
double jump then Sky Star (air dash) to get to that cube. Wait until
the cube moves all the up. Then, double jump to the cube that is about
to float overhead. You need timing to avoid being pushed and fall to
the bottom. Rotate your camera if needed to find two rotating cubes
moving up and down. You need to double jump then air dash to the left
most cube when it reaches the top. Upon landing on that rotating cube,
you need to immediately turn around, double jum then air dash to reach
the Blue Orb Fragment.
[LOST SOULS NIRVANA]
There is a divinity statue you can use. Each of the glowing tablets
teleports you to the previous bosses you have fought already.
Black: Doppelganger
White: Beowulf
Purple: Nevan
Green: Agni & Rudra
Blue: Geryon
Light Blue: Cerberus
Yellow: Gigapede
Orange: Hell Prides, Lusts, Gluttonies, Sloths, and 2 Vanguards
Red: Heart of Leviathan
Everytime you defeat a boss, thier corresponding crystal lights up.
To open the portal, you need to connect the crystals by lighting them.
1. Entire circle connects
2. Half of the circle connects
3. 3 Crystals on the middle connects
Walk throught the portal to end mission.
` ~ ~ ~~~"""""" ~~ ~ ~ ~~ ~~~ ~
{MISSION 19 { F O R C E S C O L L I D E
~~ ~ ~ ~~~~~~~_~_~~_______________________________ ""
"Topple the great beast with fate's bullet"
[ROOM OF FALLEN ONES]
Defeat the enemies and a portal will appear.
[NIRVANA OF ILLUSIONS]
The room is surrounded by mirrors and the only way you can damage the
enemies is by hitting the mirror with a greenish hue, obviously the
one that has reflections. Once the portal appears, jump to the
top of the chandelier to the right facing it to obtain a Vital Star L.
[INFINITY NIVRVANA]
You need to defeat the enemies before the sand on the hourglass runs
out, otherwise the area will be resetted and you will be brought back
to your starting point.
After defeating them, a bridge leading to the hourglass will appear.
Obtain the SAMSARA. Go to the portal that will appear.
[LOST SOULS NIRVANA]
Go back to the portal you just took a while back.
[NIRAVANA OF ILLUSIONS]
Place the SAMSARA on the golden statue of the lady. Enter the portal
to continue.
[END OF THE LINE]
Follow the path, use divinity statue. Boss battle up ahead.
[FORBIDDEN NIRVANA]
!! BOSS - ARKHAM
You can run up to him and socre a few slashes. He will attack using
his tentacles, just jump to evade and attack in the air.
He will also submerge himself, leaving a group of slimy slug-like
enemies. Use wide-ranged attacks to defeat the slugs or they'll mob
you and deal continuous damage. Kalina Ann is good in crowd control.
When attacking Arkham, you may need use Beowulf's attacks since his
combos includes jumping in the air and smashing downwards, giving you
more chances on evading his attacks. Also, you can use your Devil
Trigger here since you will not be able to use that in the second part
of the battle.
Halfway on his health, you will be joined by Vergil (Dante) or Red
Vergil (Vergil). If you have a second controller and buddy, you can
just press the start button to gain 2nd player control to your shadow/
brother. The 2nd player is invulnerable so, you just have him do
the slashing and you take care of the blasting (using your guns)
` ~ ~ ~~~"""""" ~~ ~ ~ ~~ ~~~ ~
{MISSION 20 {
~~ ~ ~ ~~~~~~~_~_~~_______________________________ ""
!! BOSS -- VERGIL / RED VERGIL
This guy is fast, has devil trigger and hits hard. Be sure to have
a lot of Vital Star L that you can afford at the moment. He is really
agressive and tends to attack you most often. Just evade his combos
so that you can interrupt him or perform a counter-attack while he
recovers.
When he Devil Triggers, stay away from him while firing projectiles
away. He recovers HP while in this mode so keep hitting him with
your guns to chip away the life he recovers.
Do not attempt to continue attacking him once he parries your attack.
In most instances, he will dash in front of you then combo the hell
out of you.
Also, in the latter part of the game, he will use Judgement Cut
rapidly and will vanish while running around the area leaving a trail
of air slashes that deal good amount of dmg.
You can use you own Stinger move to get to him quickly or to counter
him when he's open. Rebellion and Beowulf are the weapon of choice
here. For guns, Ebony and Ivory or either Spiral or Kalina Ann. But
you wont be able to use the secondary weapons often because of thier
slow firing rate.
------------++++++++++++++++++++++++++++++++++++-------------------
~ ~ ~ ~ ~ ~ ~ ~ ~ ~ ~ ~ ~
BLUE ORB FRAGMENT LOCATIONS (in order)
~ ~ ~ ~ ~ ~ ~ ~ ~ ~ ~ ~ ~
MISSION 3
--13th Avenue
--13th Avenue, Combat Adjudicator
--Secret Mission 1
MISSION 4
--Incandescent Space
MISSION 5
--Endless Infernum, Combat Adjudicator
--Secret Mission 2
MISSION 6
--Dark Corridor, Combat Adjudicator
MISSION 7
--Dark Corridor
--Secret Mission 3
--Pitch-Black Void
--Lift Room, Combat Adjudicator
MISSION 8
--Leviathan's Stomach
--Secret Mission 4
--Leviathan's Intestines, Combat Adjudicator
MISSION 9
--Subterranean Garden
--Subterranean Lake, Combat Adjudicator
--Secret Mission 5
MISSION 10
--Secret Mission 6
MISSION 11
--Secret Mission 7
--Altar of Evil Pathway
--Temperance Wagon, Combat Adjudicator
MISSION 13
--Secret Mission 8
--Secret Mission 9
--Obsidian Path, Combat Adjudicator
MISSION 14
--Lair of Judgement Ruins, Combat Adjudicator
--Hell's Highway
MISSION 15
--Underground Arena
MISSION 16
--Secret Mission 10
MISSION 17
--God Cube Chamber, Combat Adjudicator
--Azure Garden
--Secret Mission 11
MISSION 18
--Secret Mission 12
--Lost souls Nirvana (Defeat all the bosses)
~ ~ ~ ~ ~ ~ ~ ~ ~ ~ ~ ~ ~
RED ORB CRYSTAL LOCATIONS (in order)
~ ~ ~ ~ ~ ~ ~ ~ ~ ~ ~ ~ ~
MISSION 3
13th Avenue
--Break the wall on the second building on the left.
MISSION 4
Silence Statuary
--In the back of the room
MISSION 7
Moonlight Mile
--Next to the door
MISSION 8
Leviathan's Stomach
--Left of the bridge, after going through the cave.
MISSION 10
Forbidden Land, front
--double jump on either side to reach the ledge above the entrance.
MISSION 14
Underwater Elevator
--Find the hidden doorway on the left side behind the elevator shaft.
MISSION 17
God-cube Chamber
--In the back of the main floor.
MISSION 18
Road to Despair
--Go around the left of the stone foot monument.
------------++++++++++++++++++++++++++++++++++++-------------------
~ ~ ~ ~ ~ ~ ~ ~ ~ ~ ~
POST-GAME UNLOCKABLES
~ ~ ~ ~ ~ ~ ~ ~ ~ ~ ~
GALLERY
=======
-Complete game once (Contents added to the gallery as each mode is completed)
-Clear game art is added as you gain S and SS rank for diffrent difficulties
DEMO DIGEST
===========
-In game cutscenes can be viewed here.
GAME OPTIONS (to be toggled in the options menu)
============
-Turbo mode
-Lock on Cursor
BLOODY PALACE
=============
-Clear game with Dante
-Have a completed DMC3 save file on memory card
!!NOTE: Having a completed game save file of DM3 will only unlock the Bloody
Palace and Vergil. Nothing else will be transferred over.
PLAY AS VERGIL
==============
-Clear game with Dante
-Have a completed DMC3 save file on memory card
!!NOTE: When starting a new game for Vergil, save it as another file. Do not
overwrite you game with Dante since you will lose your file with Dante and
replace it with Vergil.
DIFFICULTIES
============
EASY - die 3 times
HARD - clear Normal mode
VERY HARD - clear Hard mode
DANTE MUST DIE - clear Hard mode
HEAVEN OR HELL - clear DMD mode
OUTFITS -- DANTE
================
COATLESS DANTE - clear Easy or Normal
--This is Dante's default and basic costume.
DMC1 DANTE - clear Normal mode
--This is what he's wearing in the ending when he's shop is opened. Obviously,
this is the outfit he is wearing on the original Devil May Cry. Also note that
in this mode, Dante's Rebellion sword will look like the Force Edge but will
remain as it is.
DMC1 COATLESS - clear Hard mode
--This is the outfit of the original game. The Dante's amulet is visible in
this outfit and also Rebellion will look like Force Edge.
SPARDA - clear Hard mode
--Sparda's outfit, complete with his demon shadow and monocle. Again Rebellion
will look like Force Edge and Ebony and Ivory will look like Luce and Ombra.
Again only the appearance will be change. Nothing else.
SUPER DANTE - clear Very Hard mode
--Same as his default sleeveless outfit. It does give Dante unlimited Devil
Trigger. In this form however, his HP is not recovered unlike the normal
trigger. Also, using Time Lag (Quicksilver Style), Flux (devil trigger
explosion and After Image (Doppelganger) consumes trigger gauge.
SUPER SPARDA - clear DMD mode
--Sparda outfit in infinite Devil Trigger mode. Using Flux, Time Lag and
After Image doesnt consume trigger runes. Also, HP recovers fast, giving
you an impression that you're playing in God mode. Very cool.
OUTFITS - VERGIL
================
COATLESS VERGIL - clear Easy or Normal mode
NELO ANGELO - clear Hard mode
--Vergil will be displayed as Corrupt Vergil / Nelo Angelo, his Devil Trigger
from the original game. Note that when he is using this costume, his moveset '
also changes.
SUPER VIRGIL - clear Very Hard mode
--It is the default outfit but utilizes unlimited Devil Trigger. Using Flux
and Spiral Swords still consume trigger runes, though. Also, just like
Super Dante's outfit, HP is not recovered in this mode.
SUPER NELO ANGELO - clear DMD mode
--Just like Super Sparda outfit, Vergil gets unlimited Devil Trigger while
having rapid HP recovery. Using Flux and Spiral Swords doesnt consume runes in
this mode.
OUTFIT -- LADY / MARY
=====================
RYDER SUIT - Depends on what Vergil / Dante is wearing.
Since you cannot play as Lady (which could've been better if possible), you
will only see her wearing this outfit during your bossfight with her or
during the credits screen when you're fighting with her.
To see her in this outfit, Dante and Vergil should be wearing:
DANTE VERGIL
-DMC1 Coatless -Coatless
-Sparda -Nelo Angelo
-Super Sparda -Super Nelo Angelo
------------++++++++++++++++++++++++++++++++++++-------------------
C R E D I T S
_______________
___________________
Thanks,
....primarily to all the gaming sites that hosted these faqs.
I really appreciate it.
....also to all the Filipino gamers that are actively participating and
contributing, helping their fellow gamers alike.
....to my family, especially to my brother and sister on helping on this
faq's completion.
....to my friends, family and office mates.
Mabuhay!

Star Citizen is an upcoming space trading and combat simulator video game for Microsoft Windows. Star Citizen will consist of two main components: first person space combat and trading in a massively multiplayer persistent universe and customizable private servers (known as Star Citizen), and a branching single-player game (known as Squadron 42). The game will also feature VR support.